
sb89
Active Member
- First Name
- Spenser
- Joined
- Aug 5, 2025
- Threads
- 3
- Messages
- 43
- Reaction score
- 38
- Location
- Massachusetts
- Vehicles
- 2022 Taycan Cross Turismo, 2025 Grand Wagoneer Obsidian S3, Ex-996, Ex-Tesla
- Thread starter
- #1
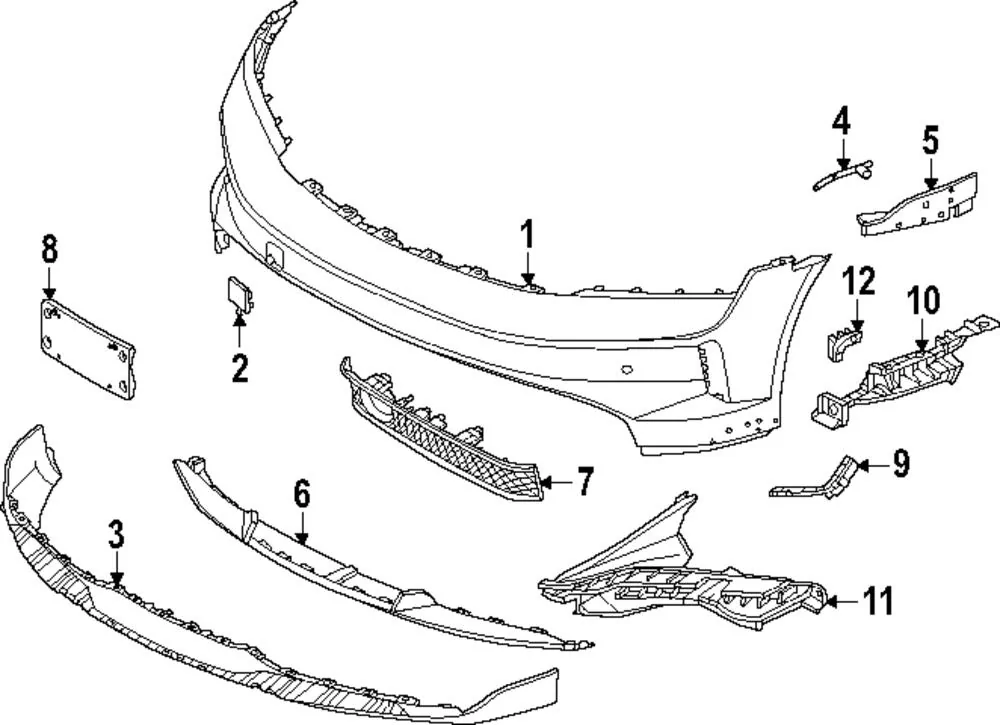
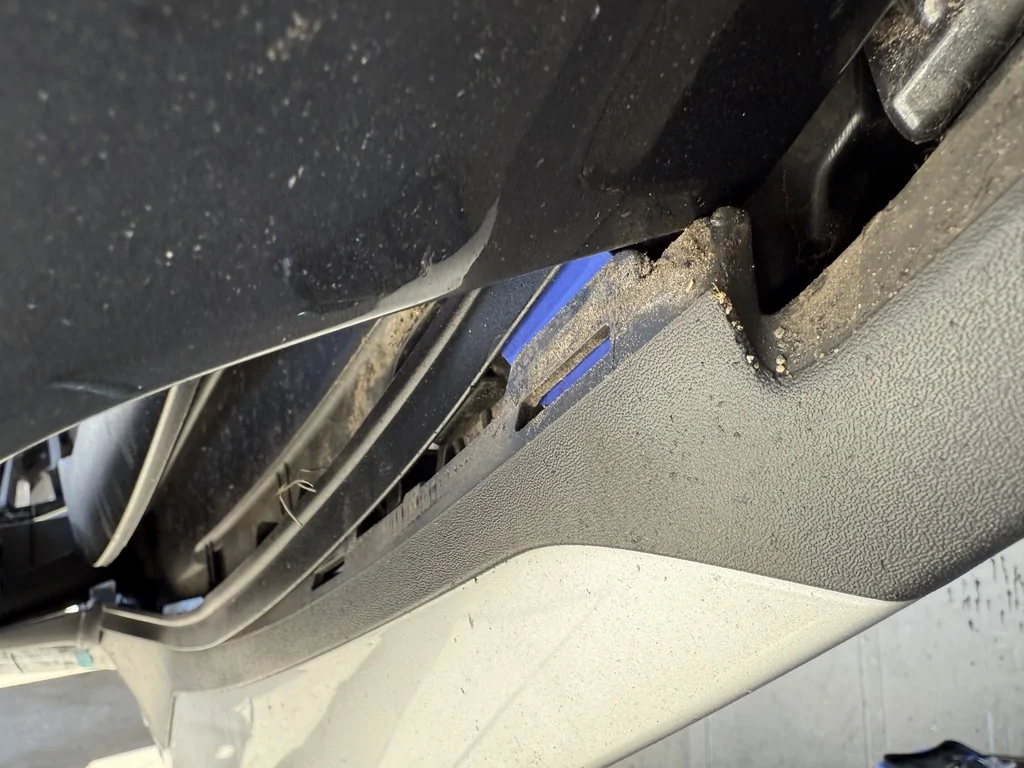
Posting a full DIY here because I could not find any good documentation... My first question was, do I actually have to remove the front bumper... conclusion? Yes you do. I watched a few youtube videos on how to remove the bumper, but honestly they sucked. I didn't make a video, but I did my best to track what screws were "Gotcha's" and there was really only one that almost screwed me. First, here's the damage my OCD wanted to fix... it isn't much but I am having the entire car wrapped this week and this was the opportunity to make the fix, the dealer wanted 6 hours and $650+ in parts, I later found out why the part total didn't match my expectation per the Porsche Diagram (item 3 in the image)

My Damage, passenger side lower left, it was really visible even from afar.

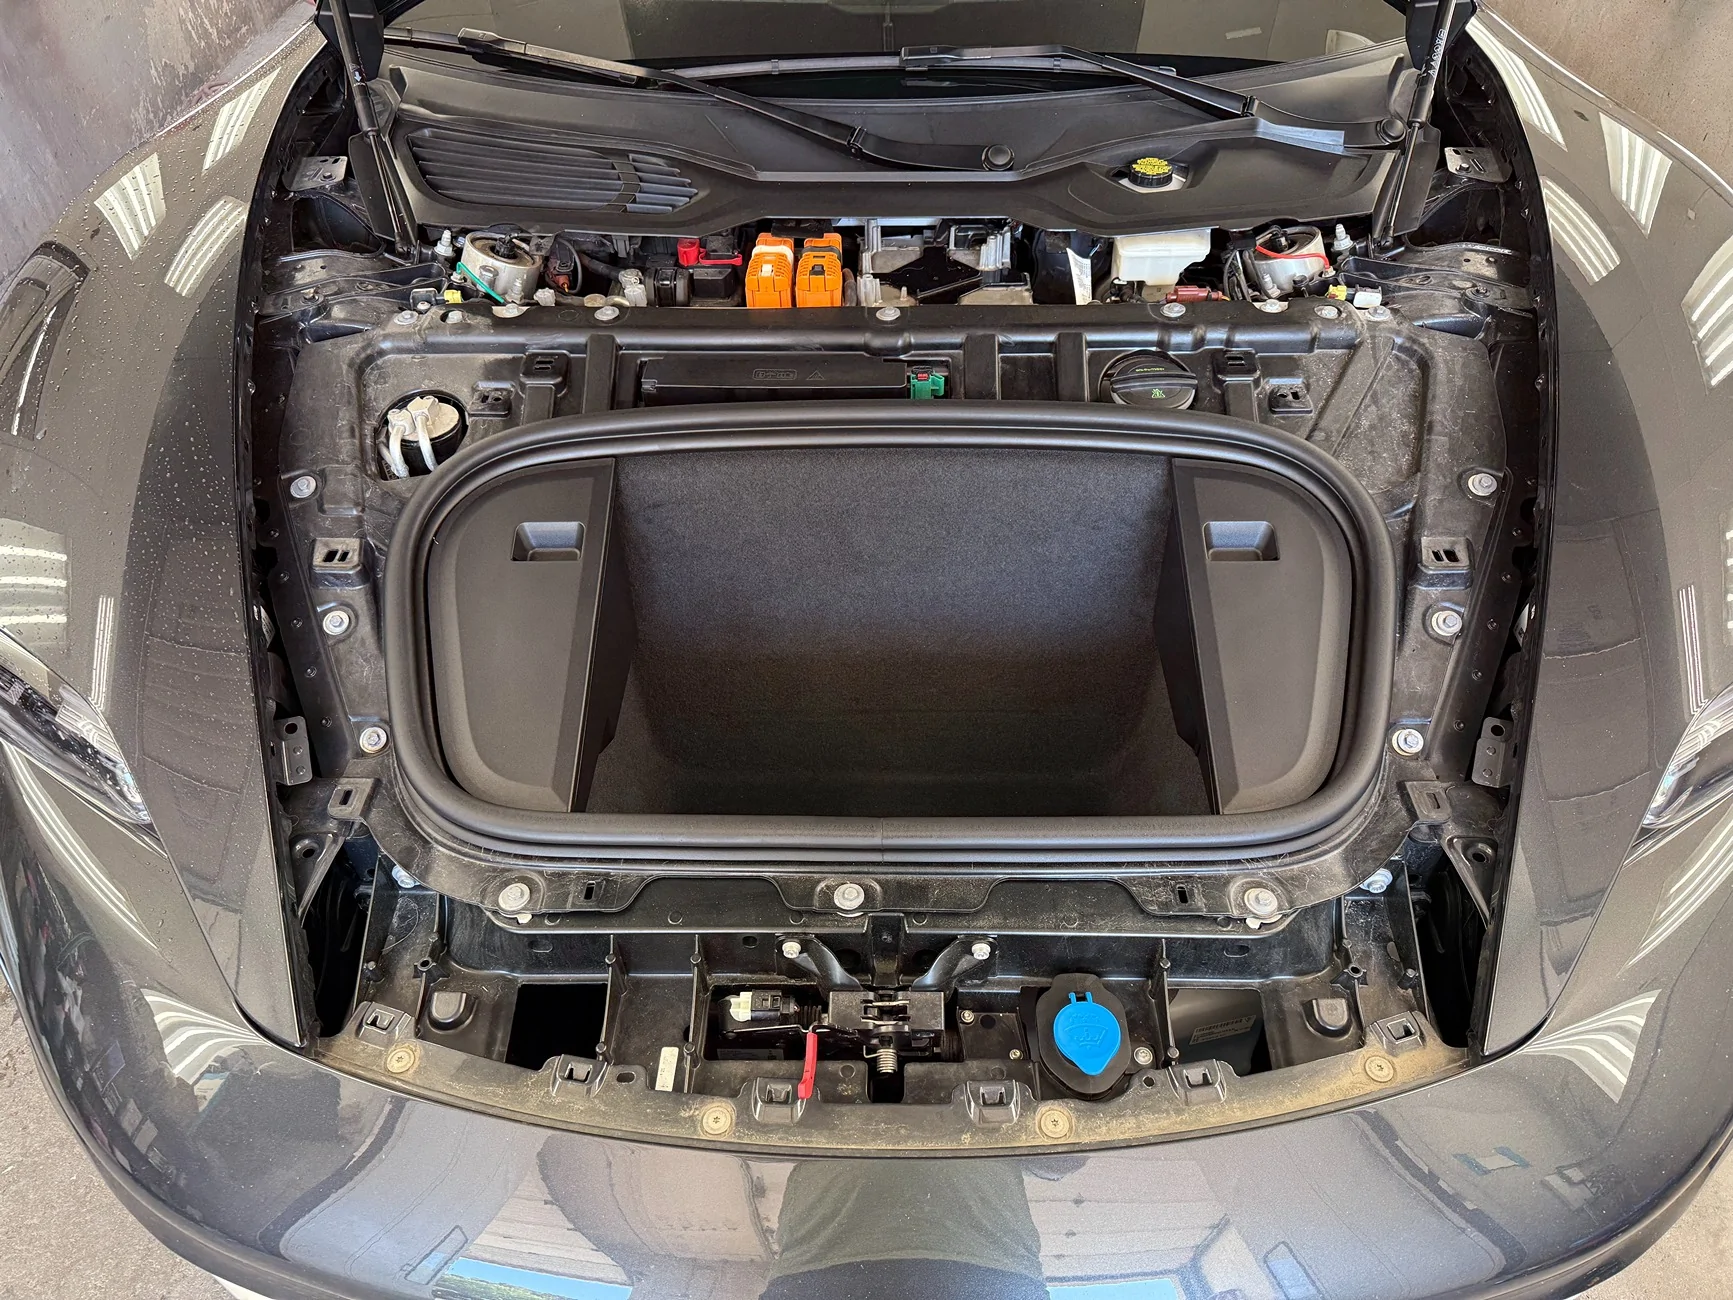
To start remove all the plastic under the hood:
Only 4 torx screws to be removed here, mark their placement if you don't want to eyeball alignment when you put it back together.
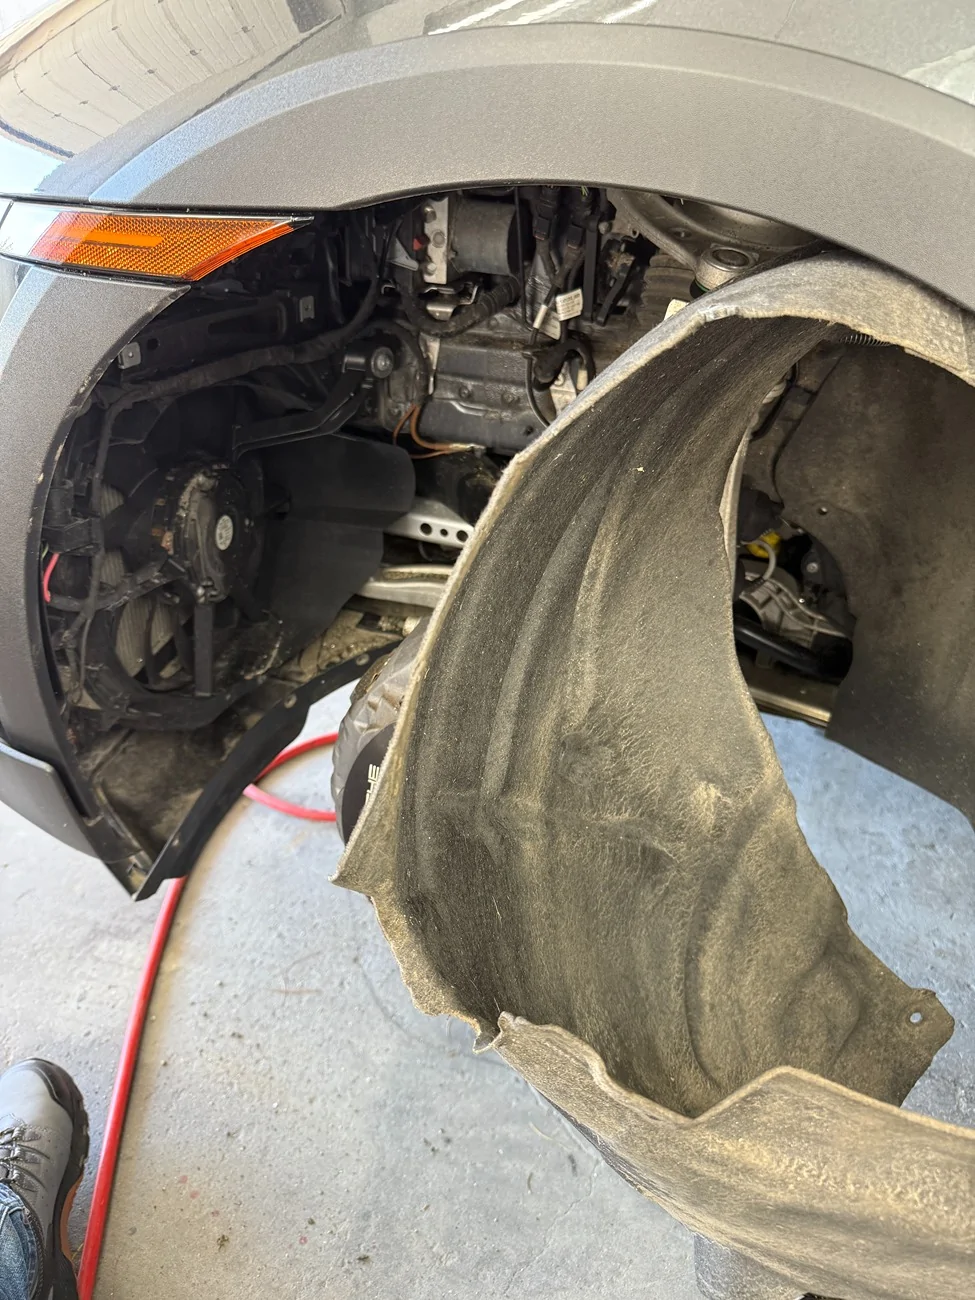
Next jack it up because the wheels and fender liner are coming off, pay attention to the Cross Turismo specific trim piece bolt on the top insider, don't over tighten when putting things back together you will break it (trust me).

You can remove the entire liner, I just removed all but the back screws and pushed it behind the rotor, easier to align going back in.
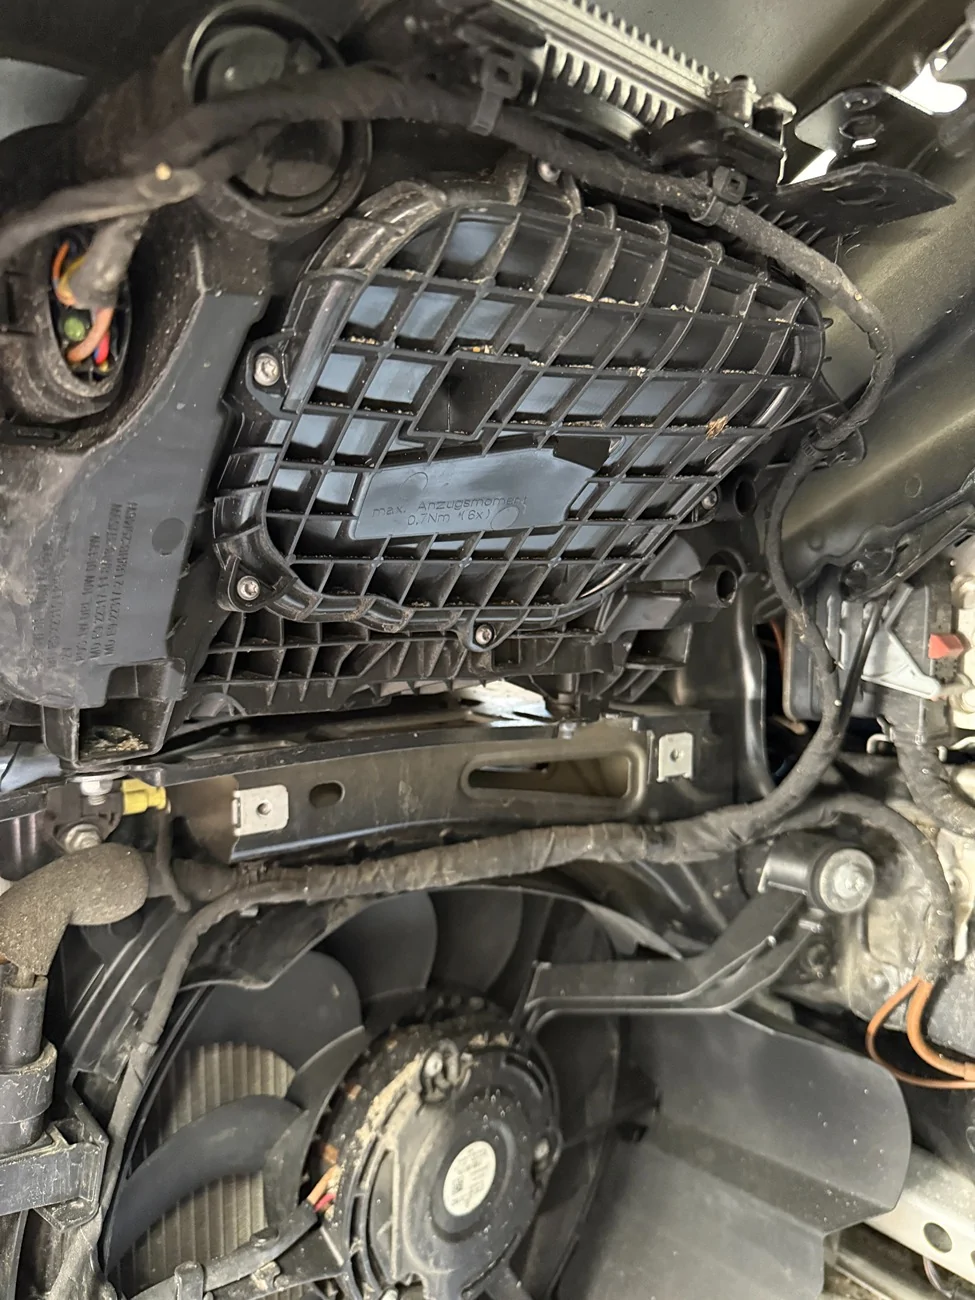
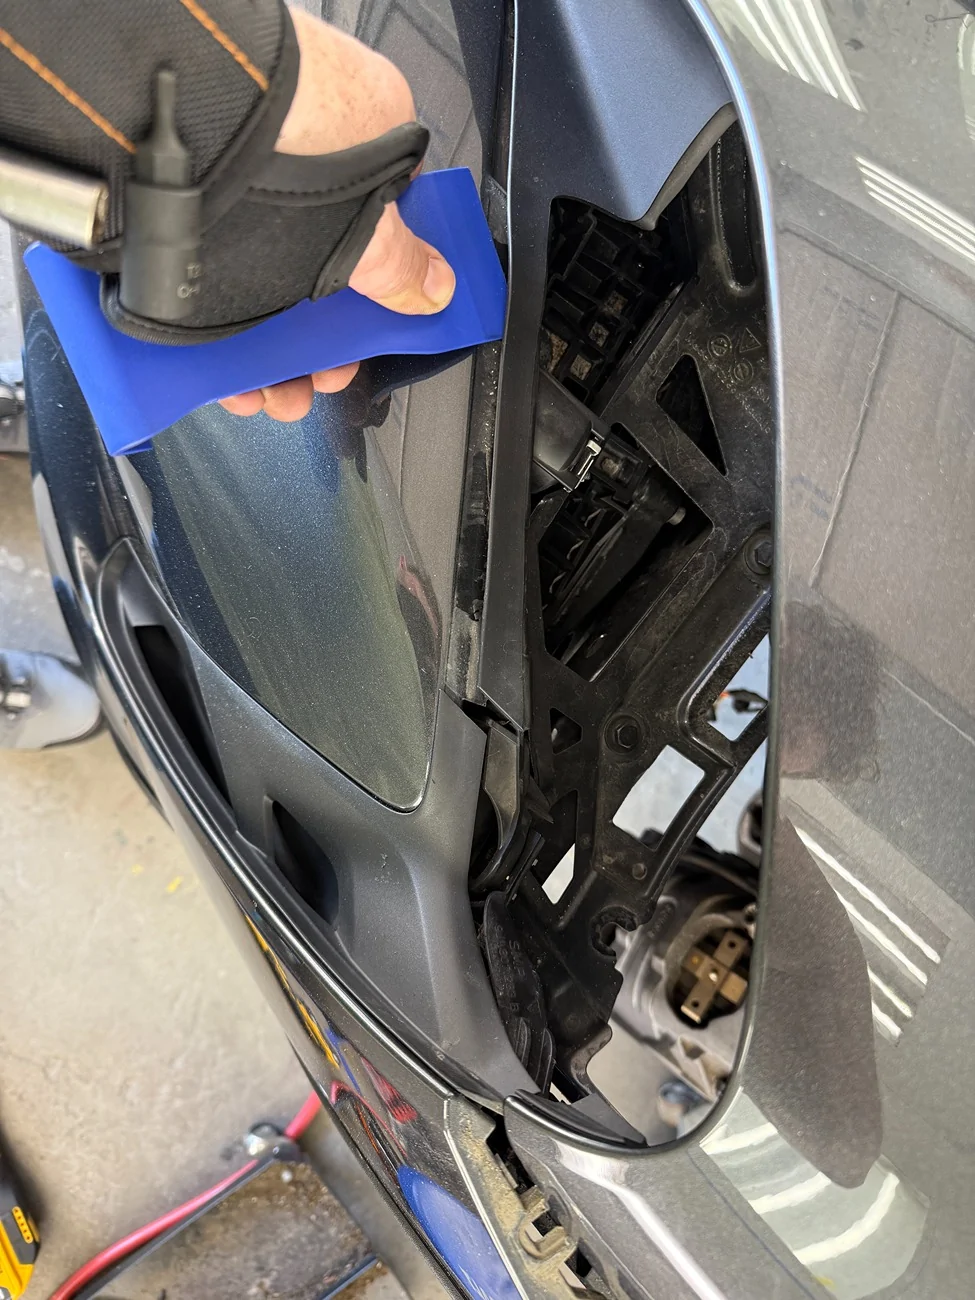
Next I undo all the cables and clips for the front camera, lidar, and park sensors. Disconnect the headlight and side markers. If you haven't already upgraded to clear OEM side markers, may as well do that now. Undo the wire clips dressing the headlight cable as well. You will need a 10MM to take the headlight out, only two nuts, confused the crap out of me because it doesn't seem very secure, AND there's a third tab at the top that aligns with a retaining nut and you would swear a bolt should go there, maybe for the other headlight style.
After losening the 10mm nuts (don't remove them fully) the headlight just slides out, there are good Youtube videos for this.
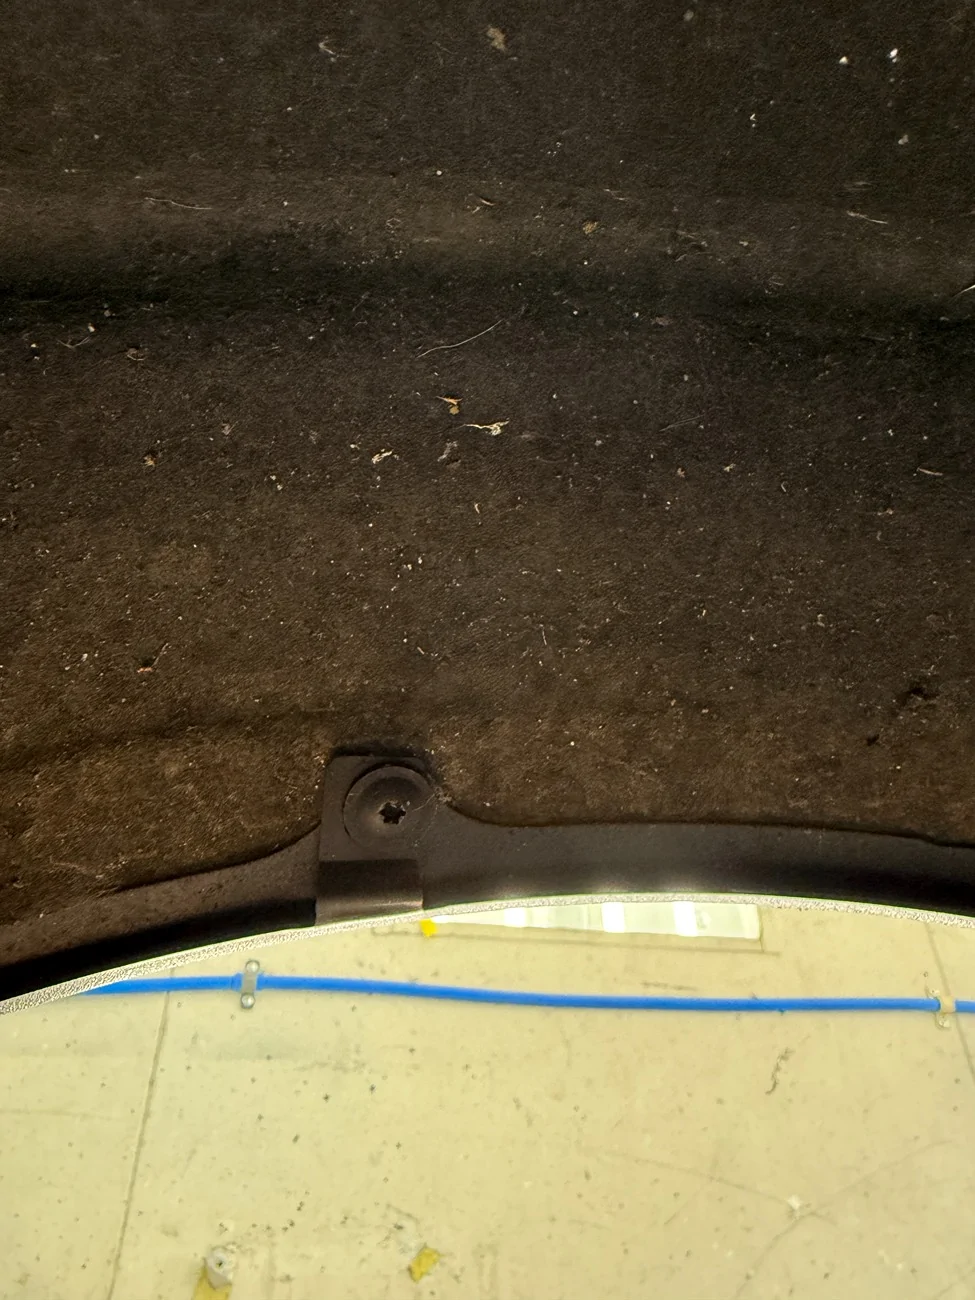
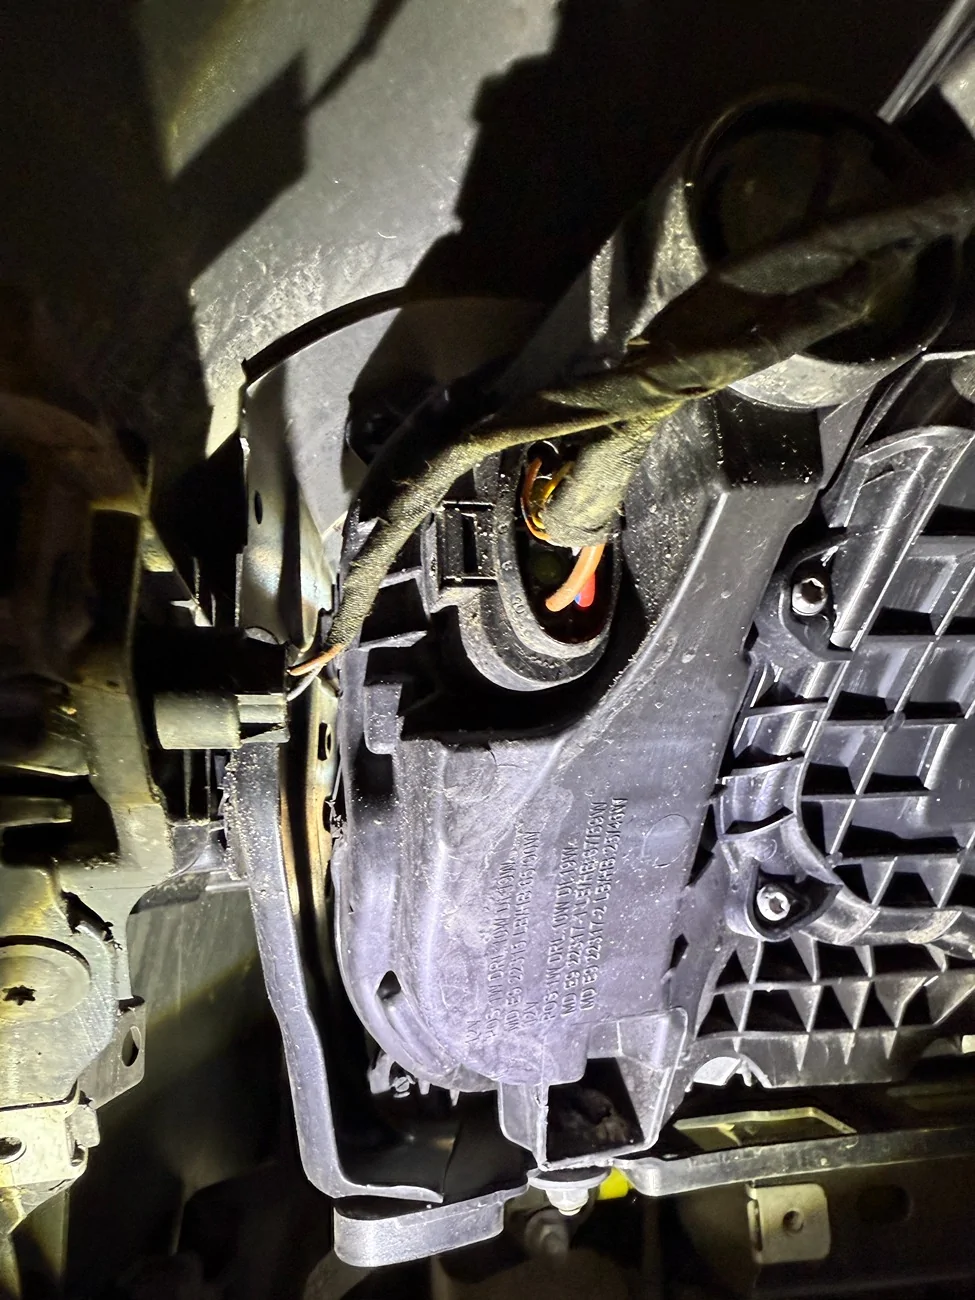
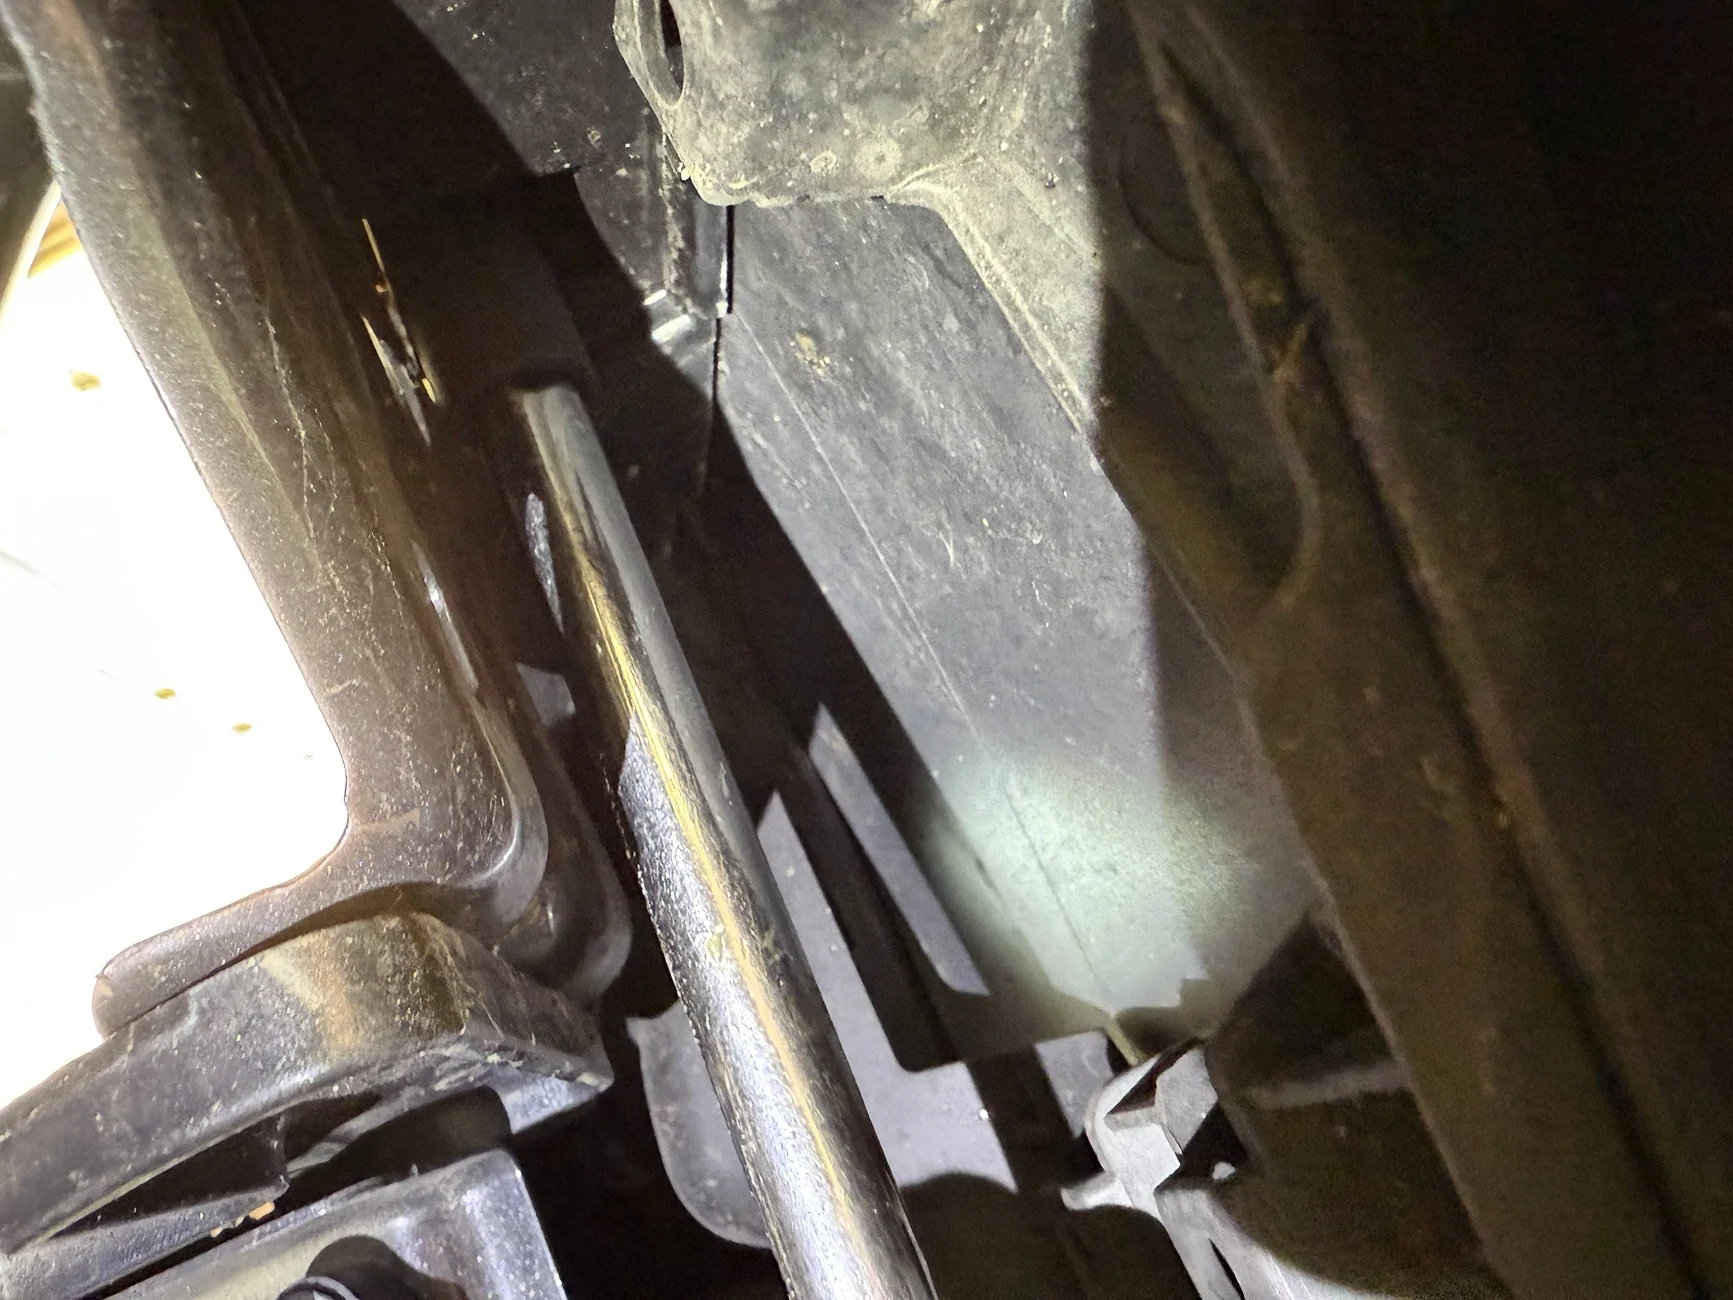
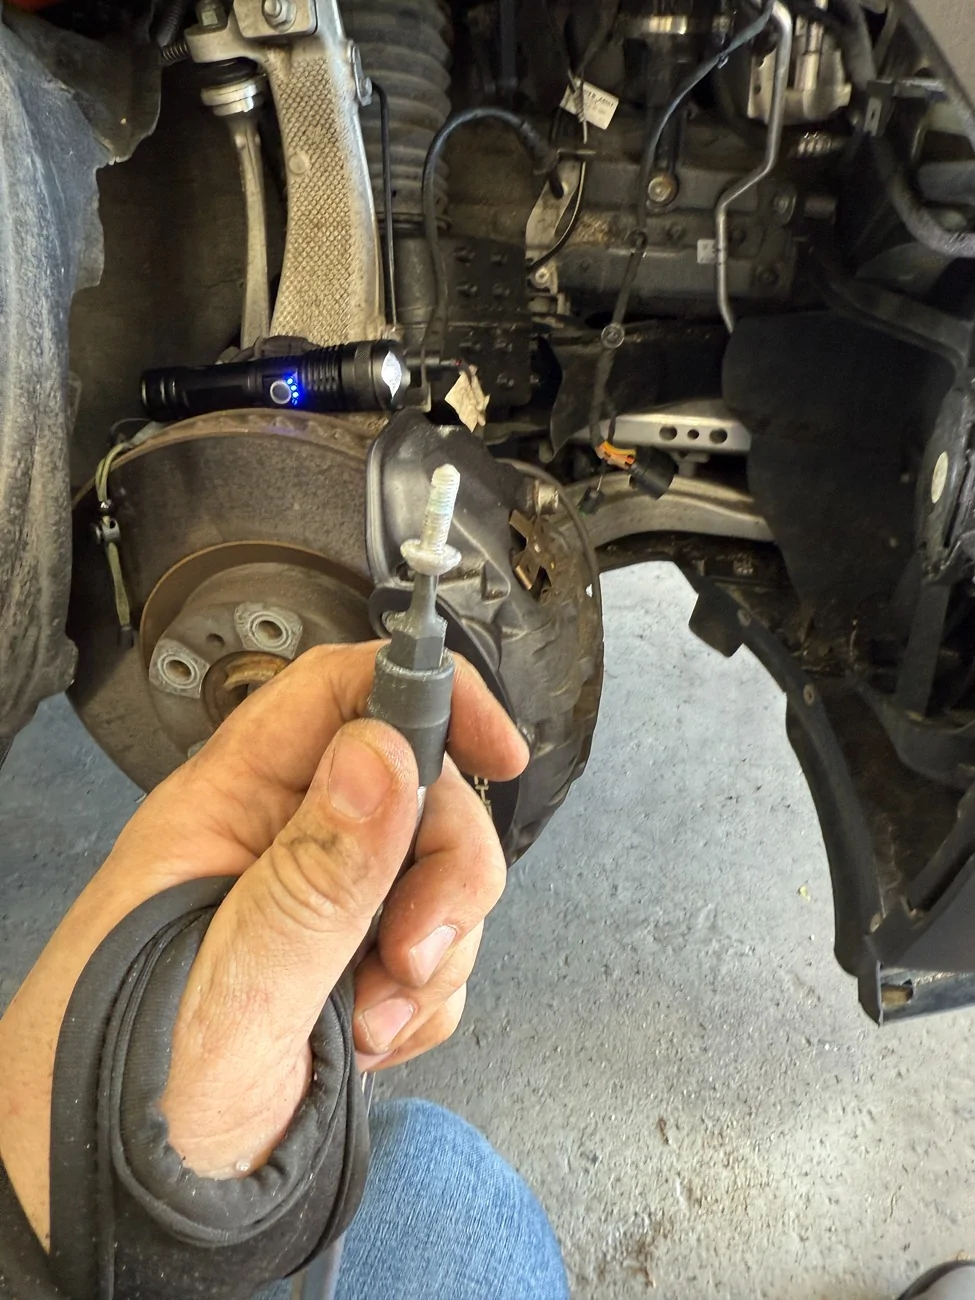
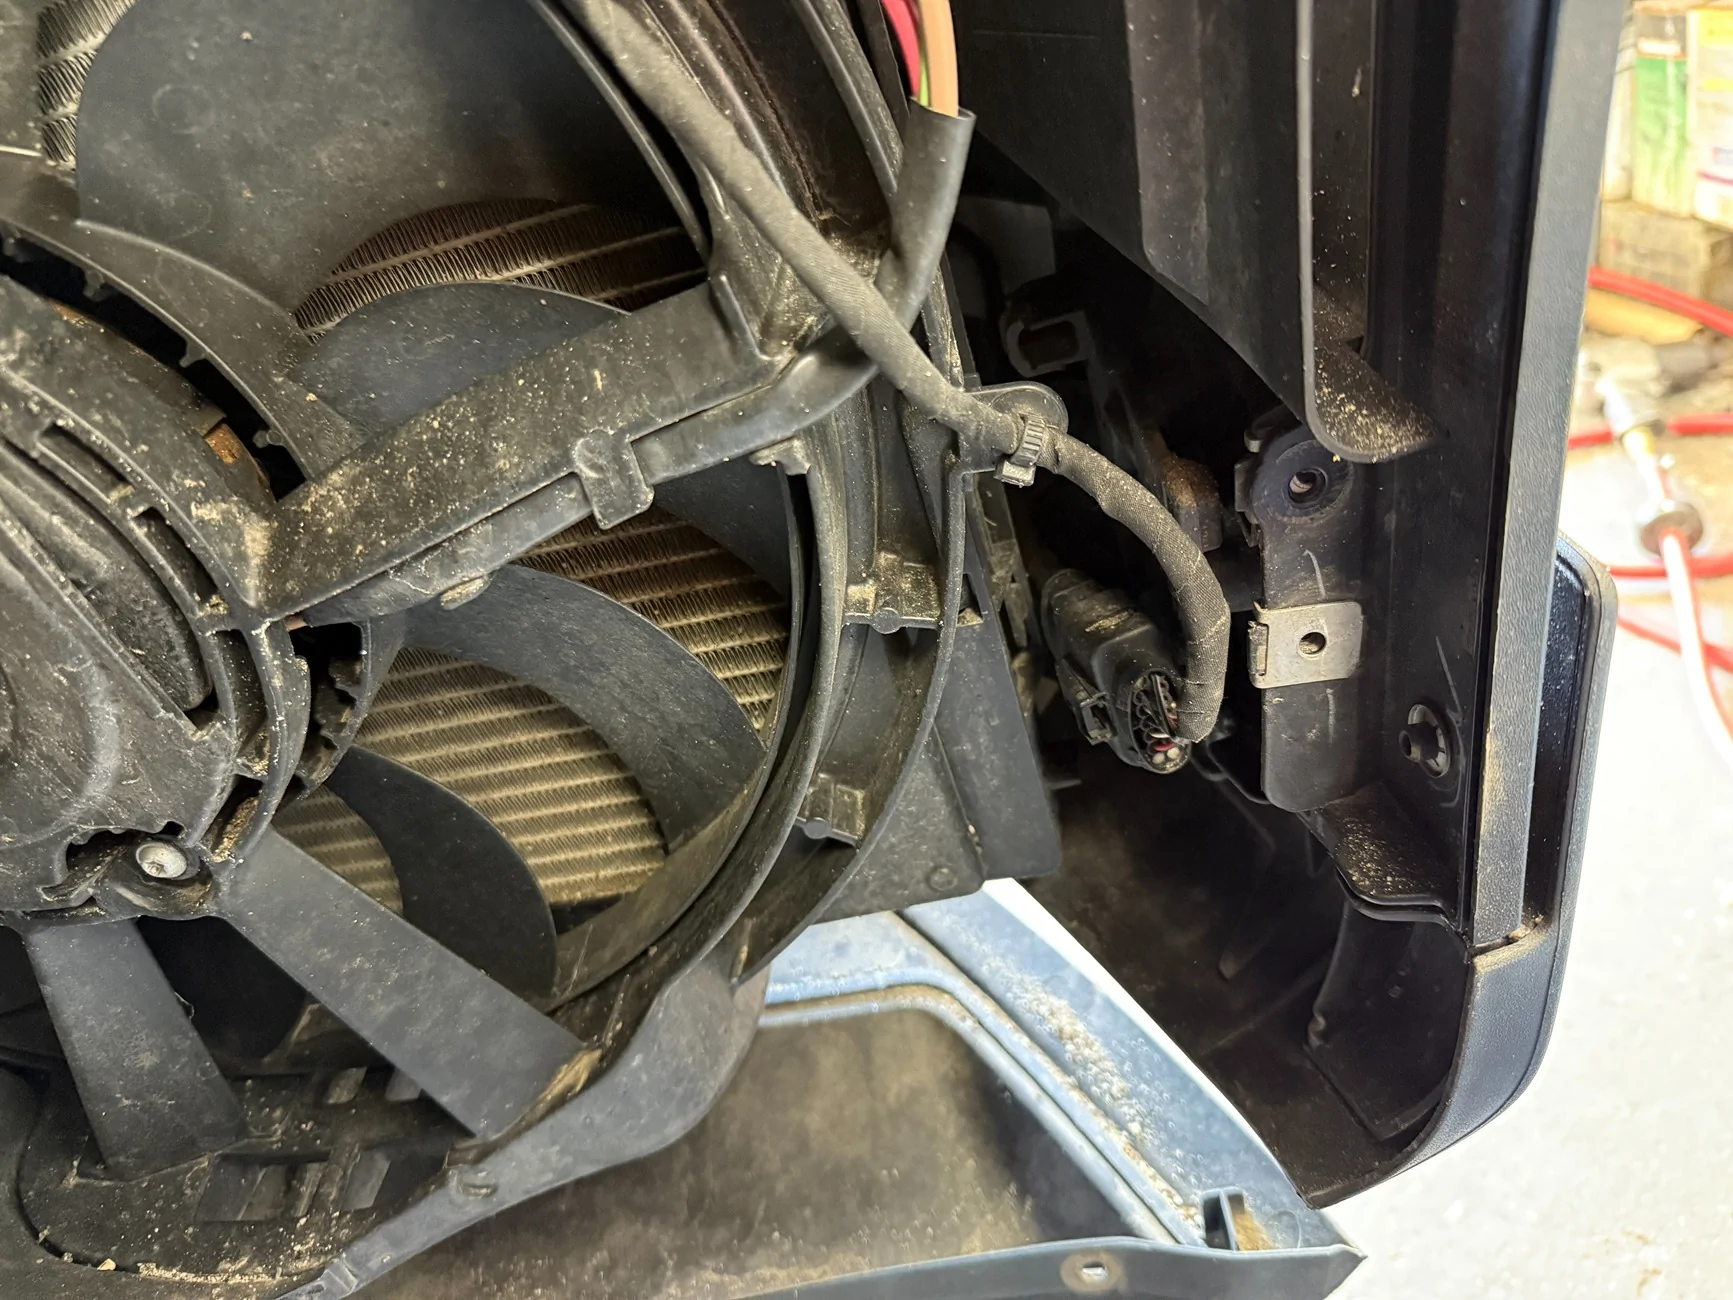
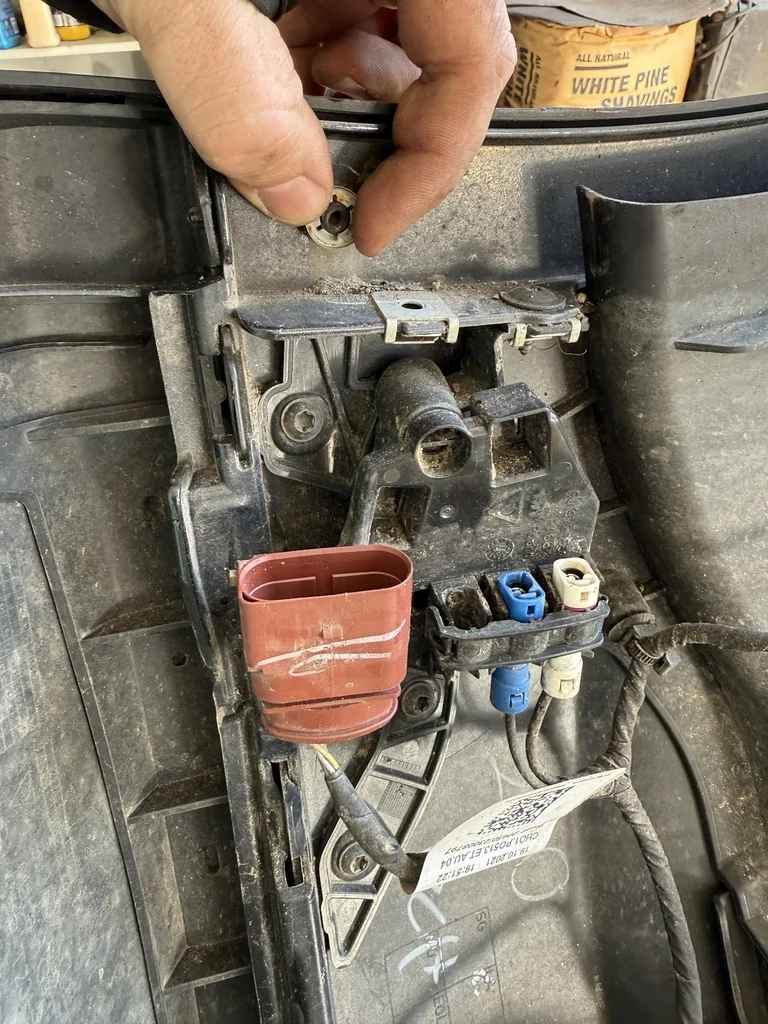
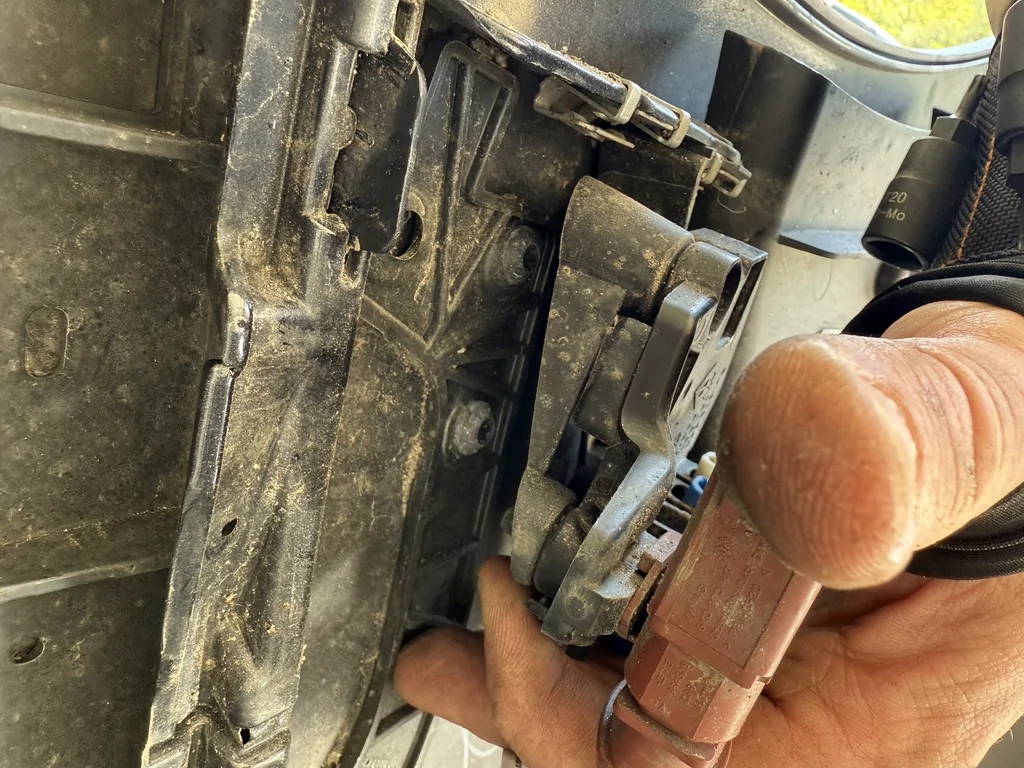
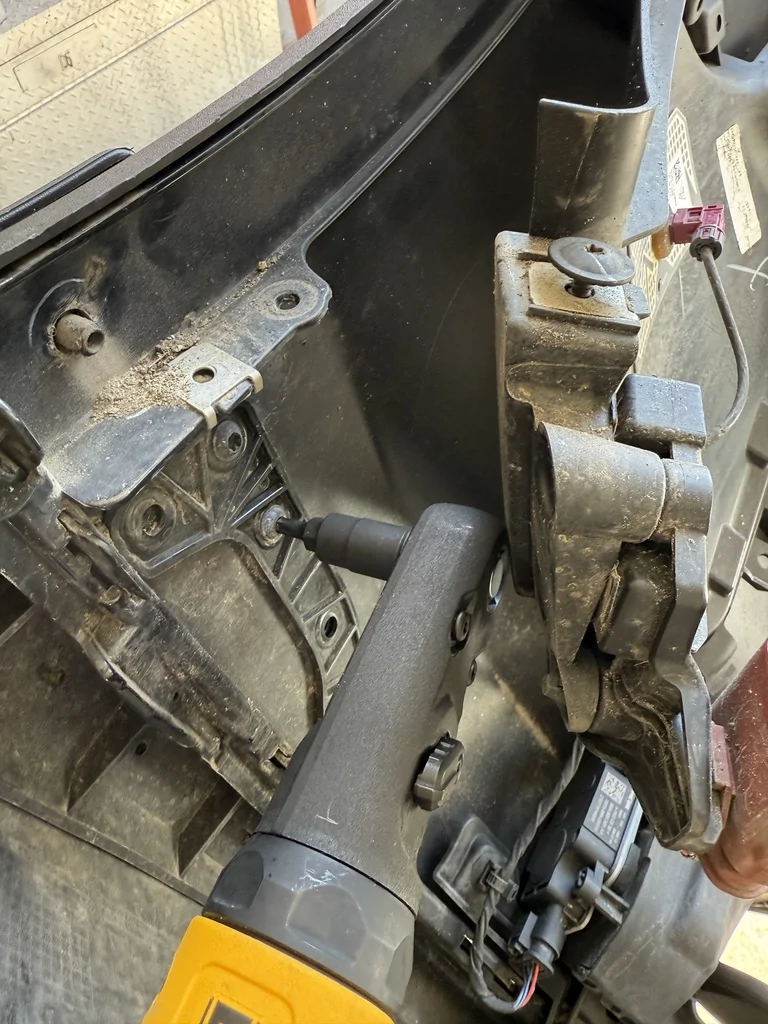
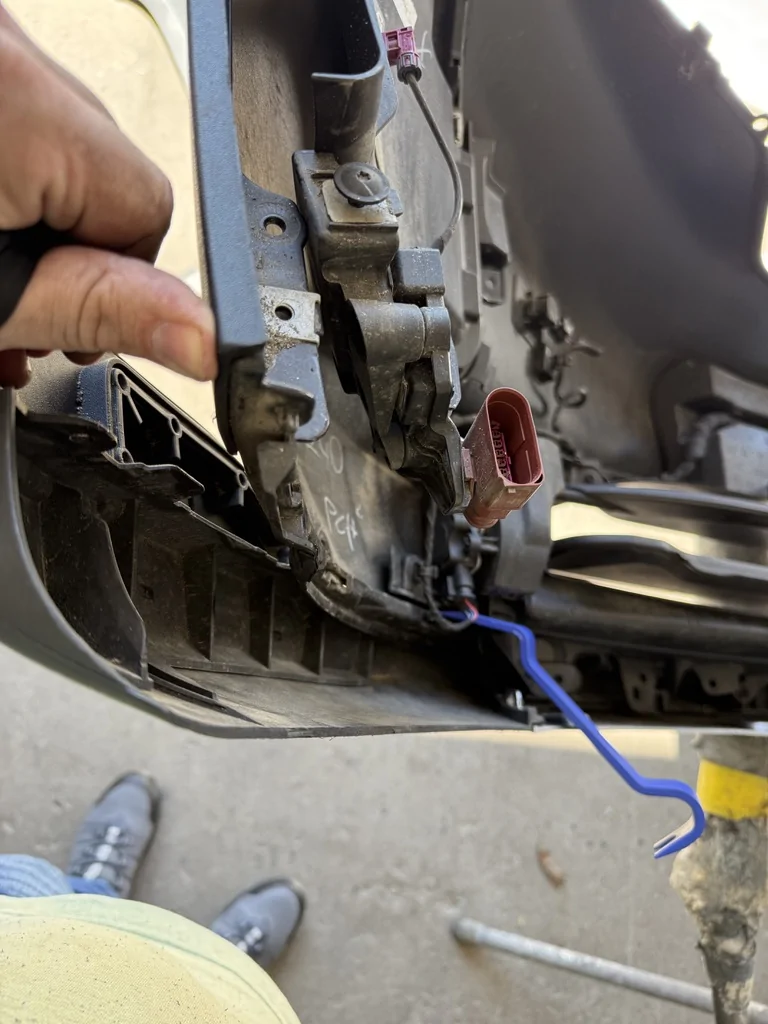
Now we get to the hardest to find and must be removed bolt that is the key to removing the bumper. It's up under the car between the headlight and side marker. These are the best I could do to get photos.
Repeat the process on the passenger side...
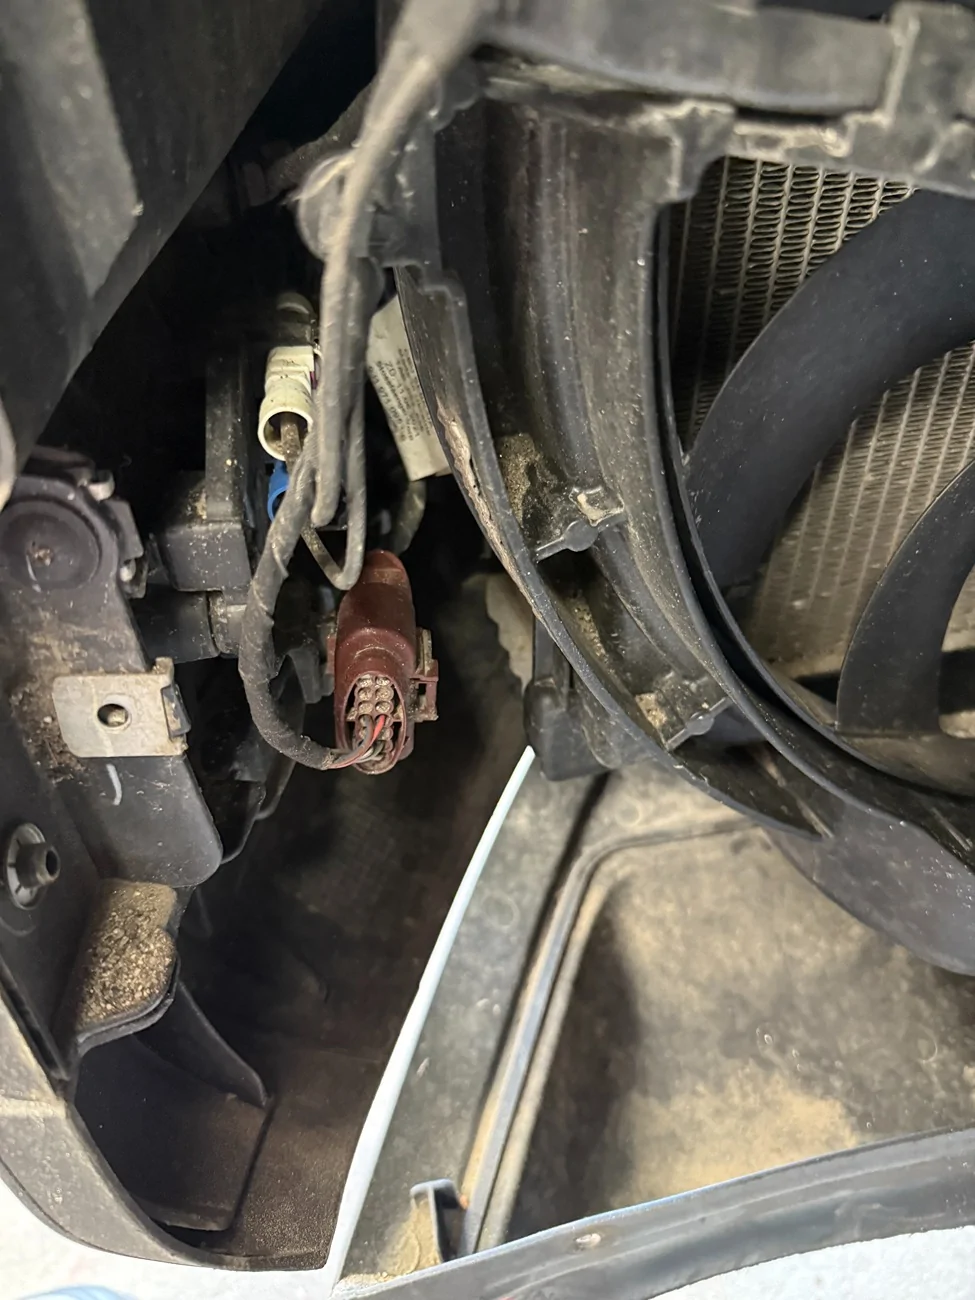
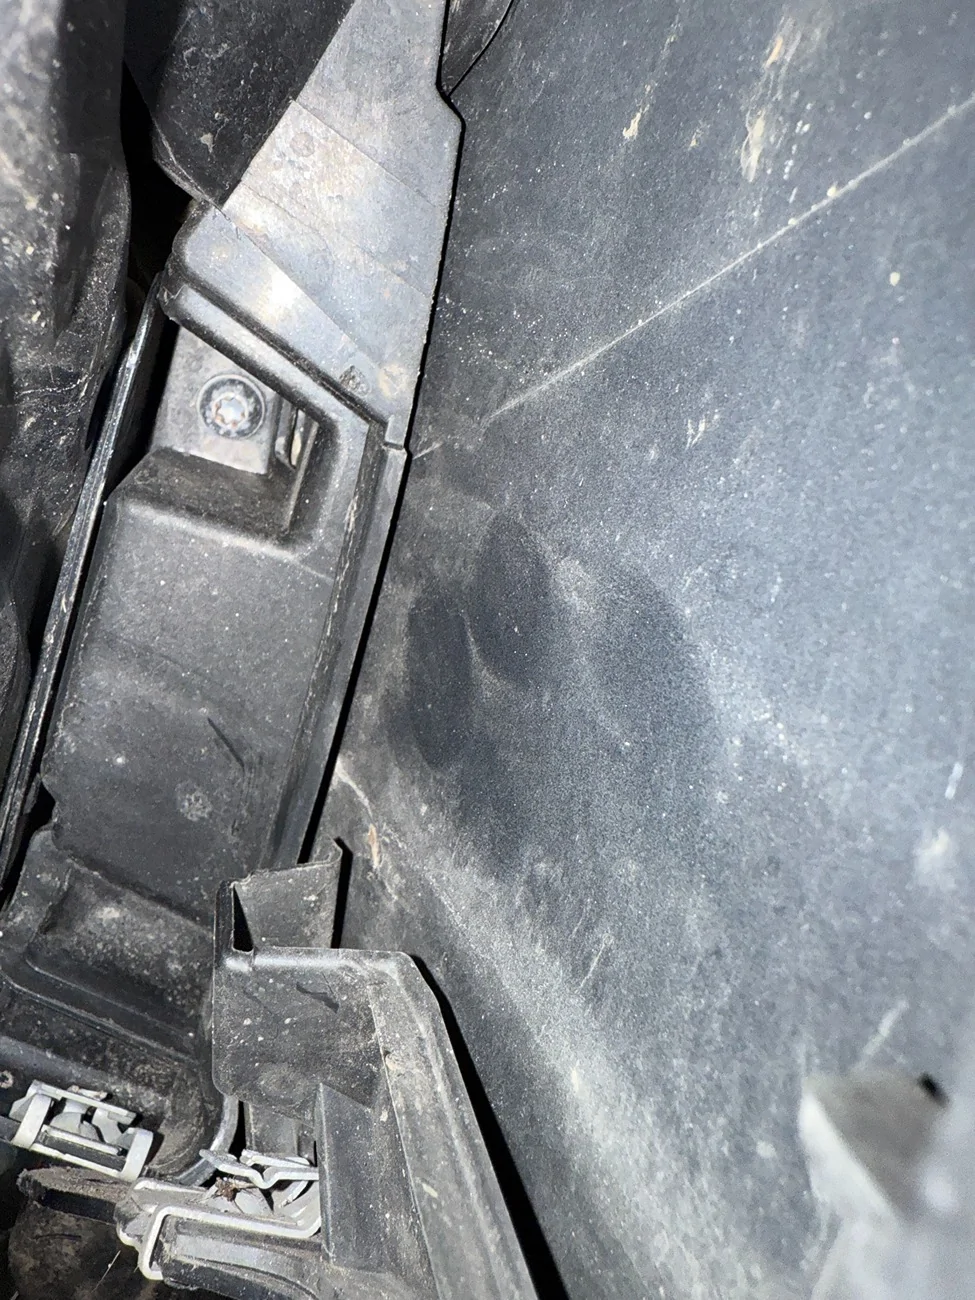
Photo of the connector for the front hand sensor there --
Now there's 4 tabs, 2 under each headlight hole holding the entire bumper on you will want a second person otherwise your bumper will come crashing to the ground, you release these tabs from the front and push down on the back while pulling forward from the corner where the sidemarker lights were.
Now you are ready for the main act, replacing the spoiler...
Edit: Continued...
Now for the main act, and the justification that you cannot remove the CT OFDP spoiler without removing the bumper. Plus the big mistake I made that you shouldn't make with this knowledge.

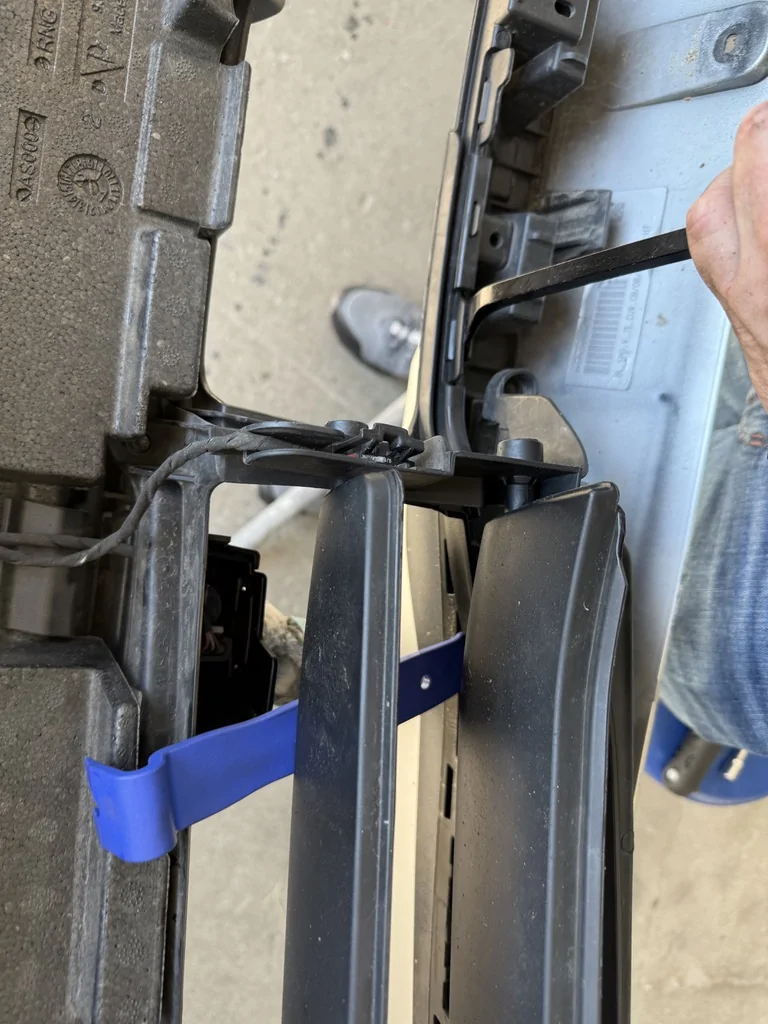
Start by removing the Jesus retaining clip from the plastic wheel arch guards. I used a pick from my panel removal took kit and slowly wiggled it off... if you break this aligning your wheel arch plastic should you ever need to change it will be very hard.
Next I removed all the bolts I could see under the fiber/bumper sensor connector bracket. and started carefully prying the clips off. All of these clips require opening the bottom then top and prying at the same time. Go slow, you don't want to break these, after you figure out the first few it goes fast.
Oh but wait, some jerkhead engineer put more screws under the connector bracket, so remove it to get to those...

Back to left to right working clips out for the bumper cover.
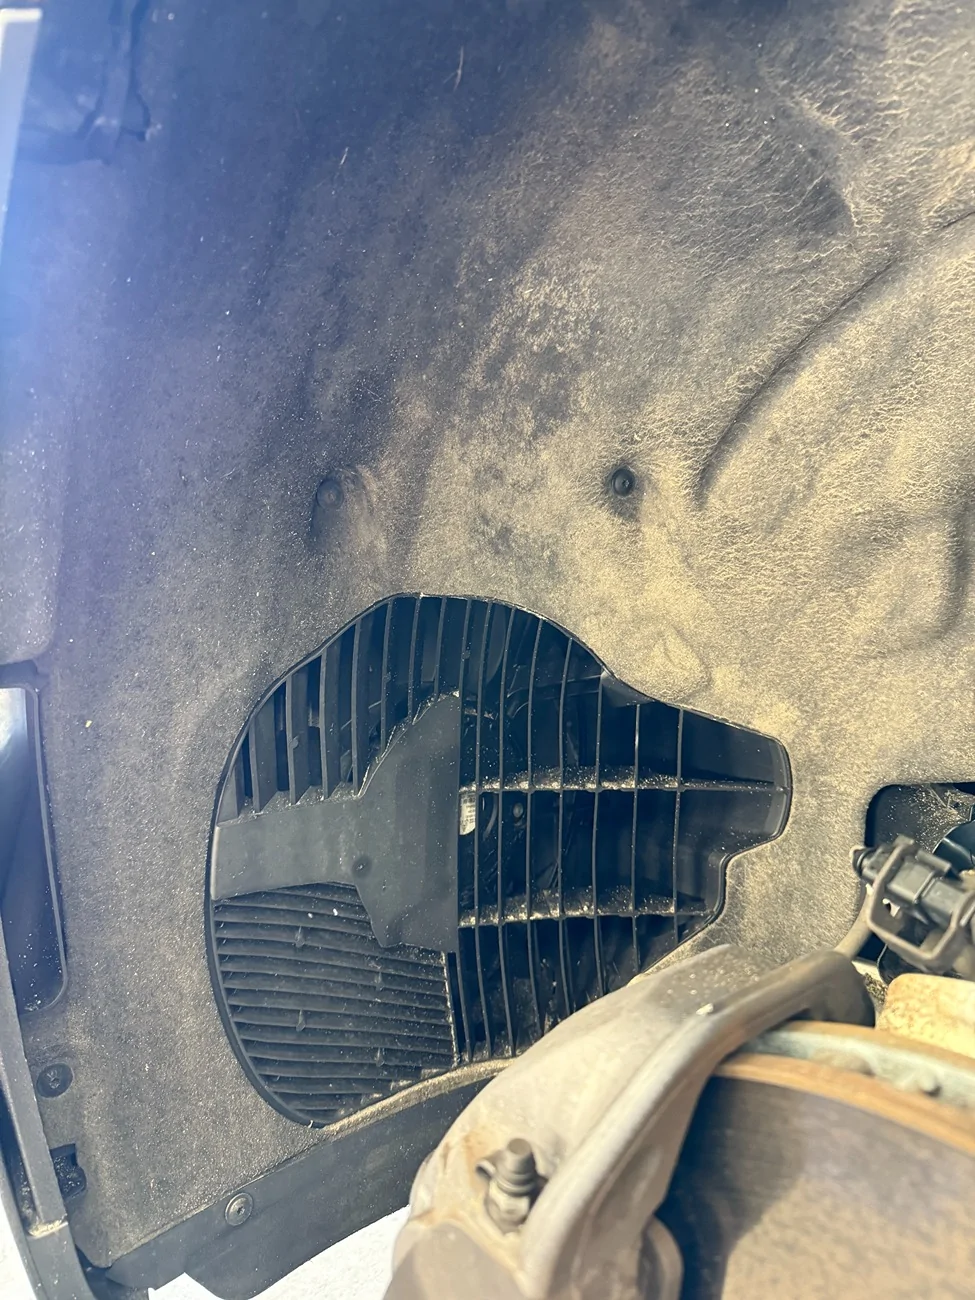
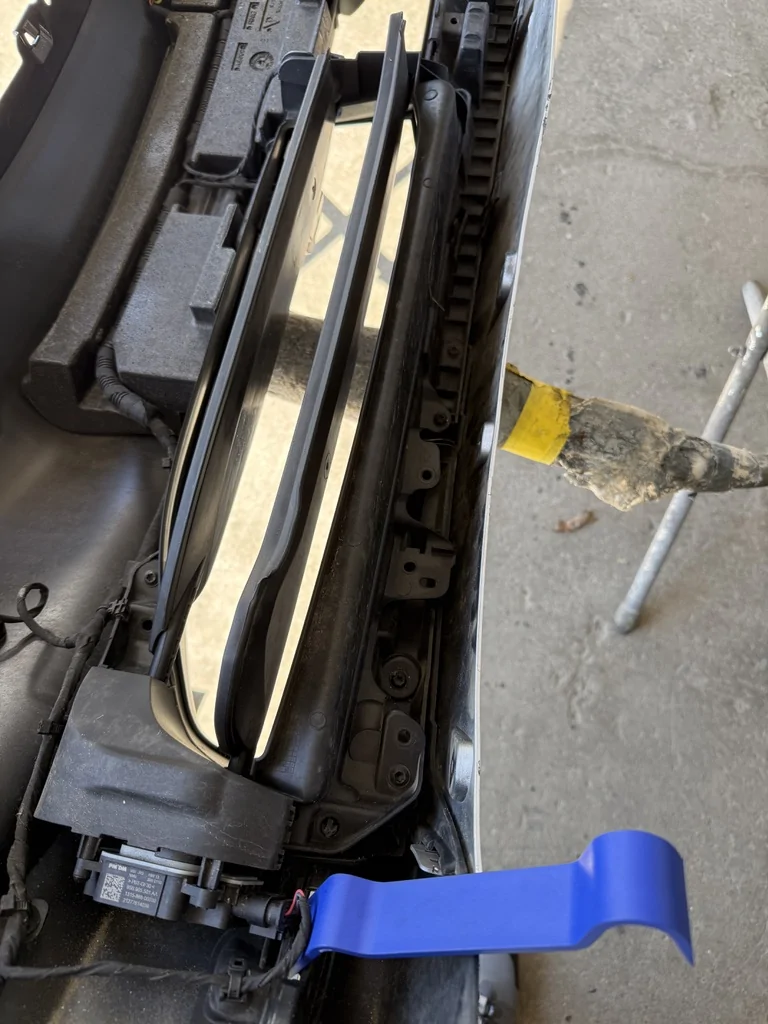
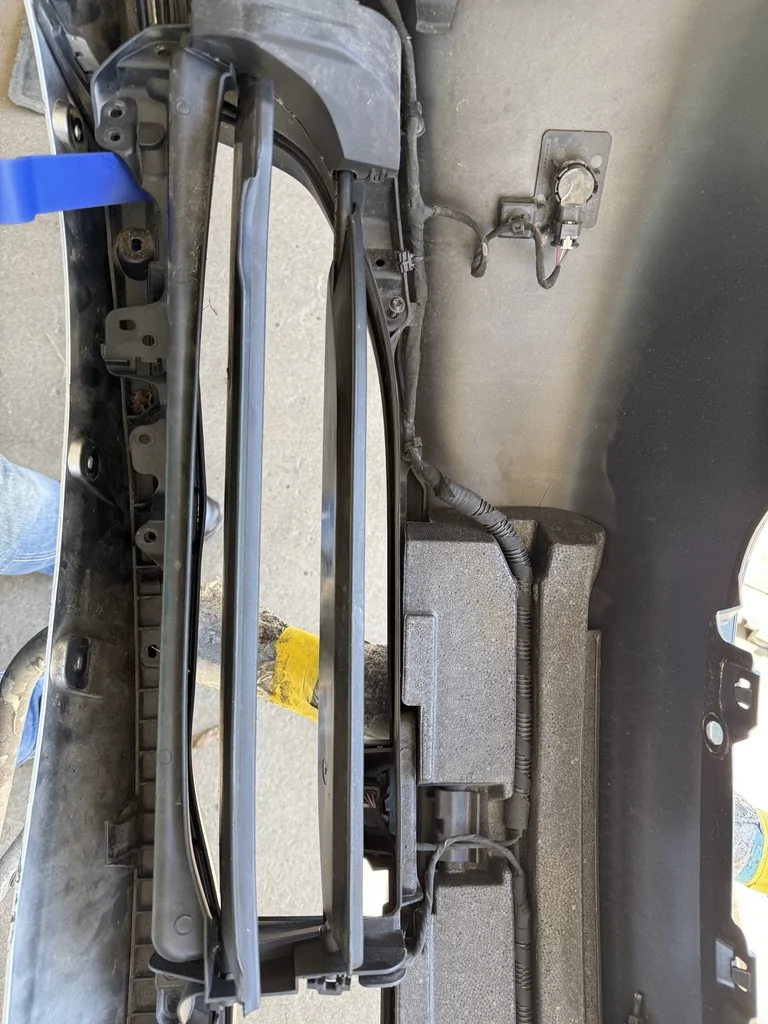
When you get to the automatic shutters, you will need to remove a few bolts and bend it up gently to keep accessing clips...
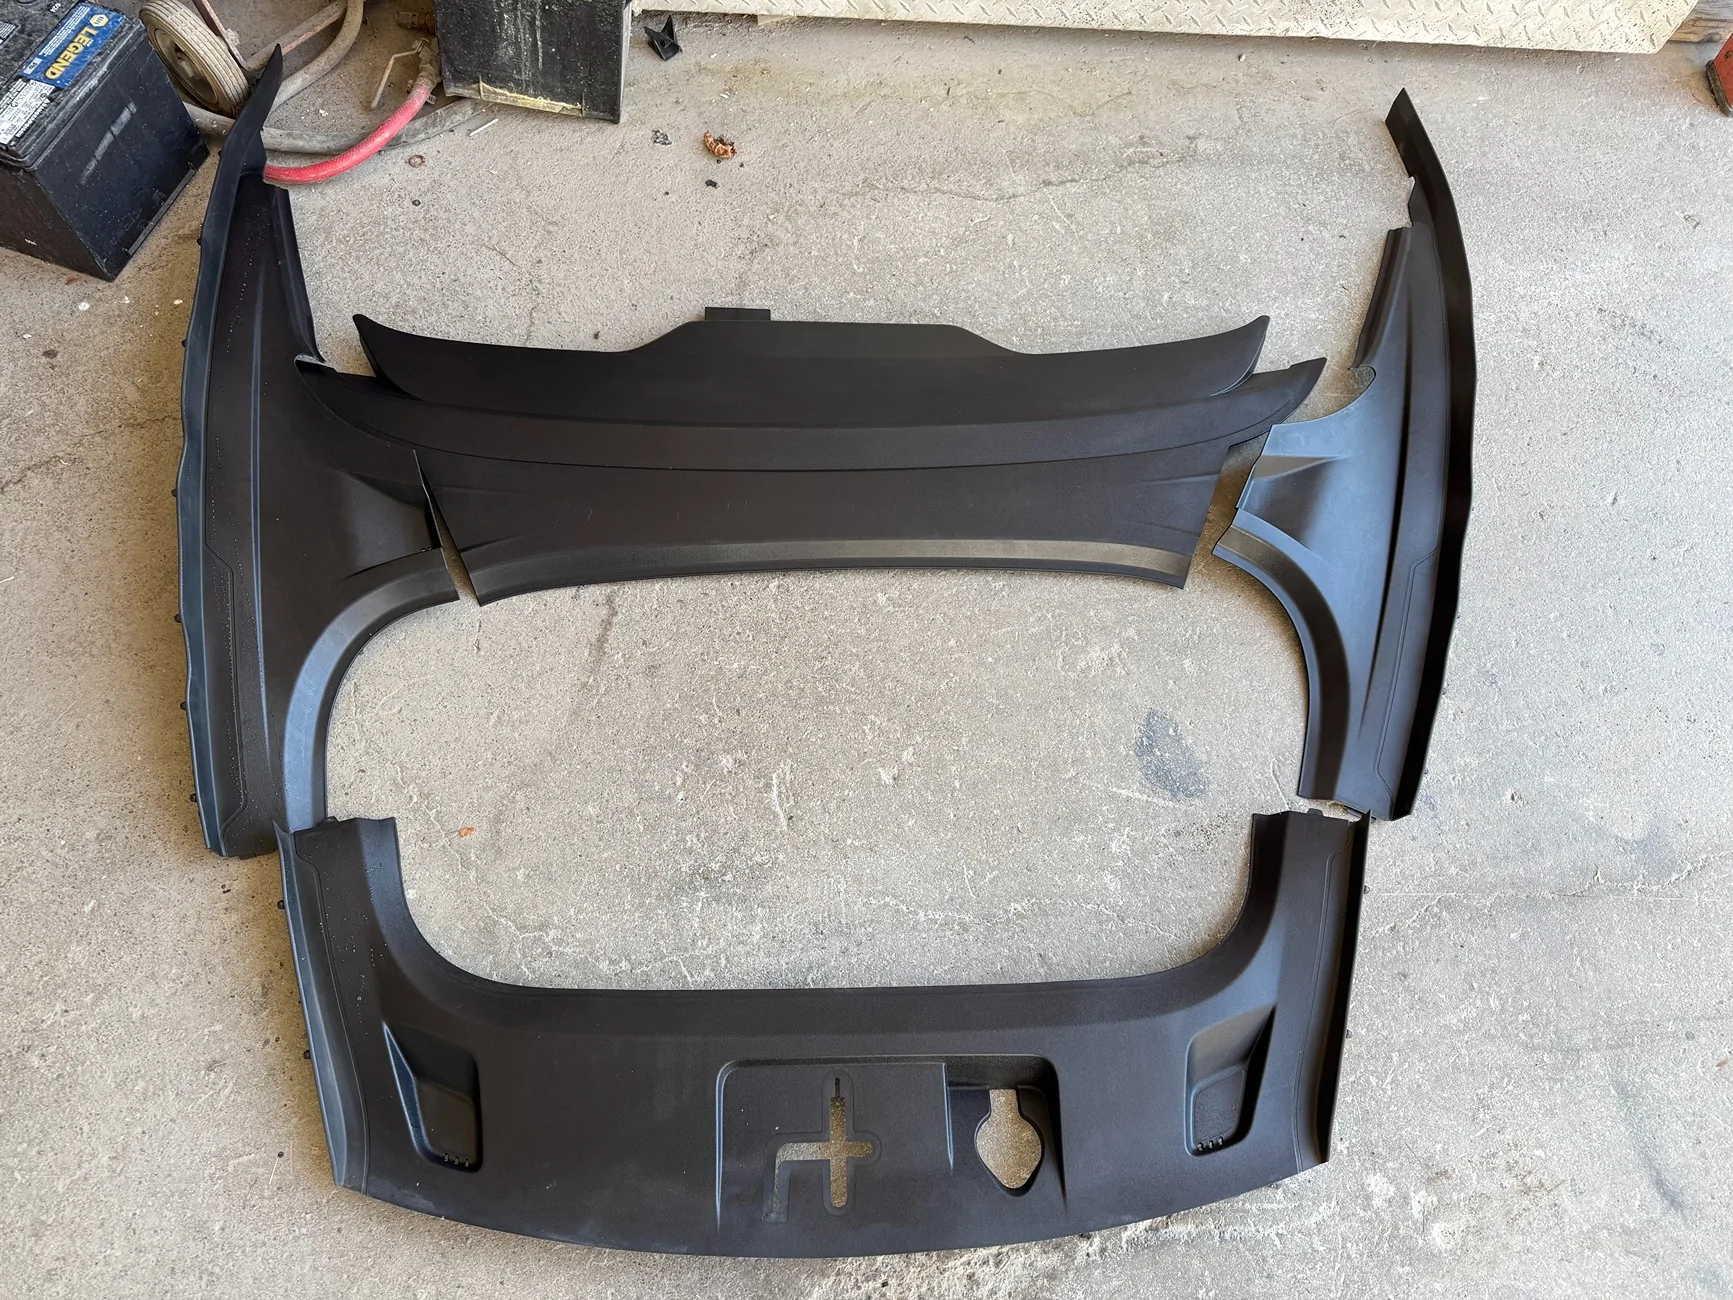
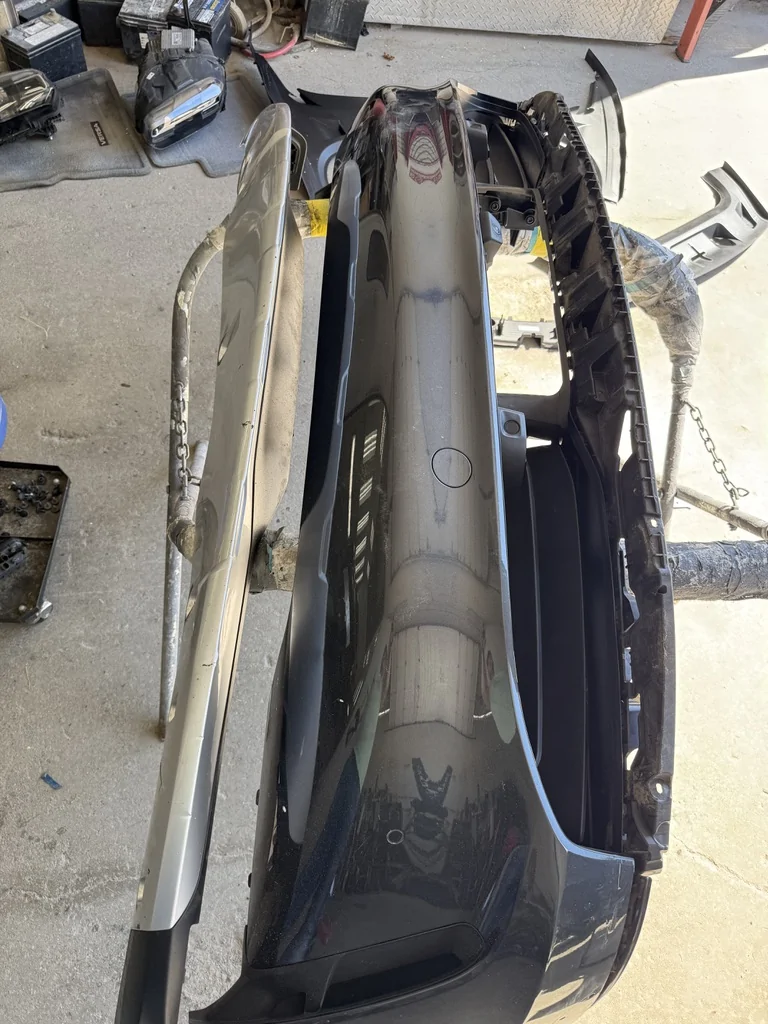
I probably missed some clip photos, but you get the jist... You will now finally have things separated. Phew.
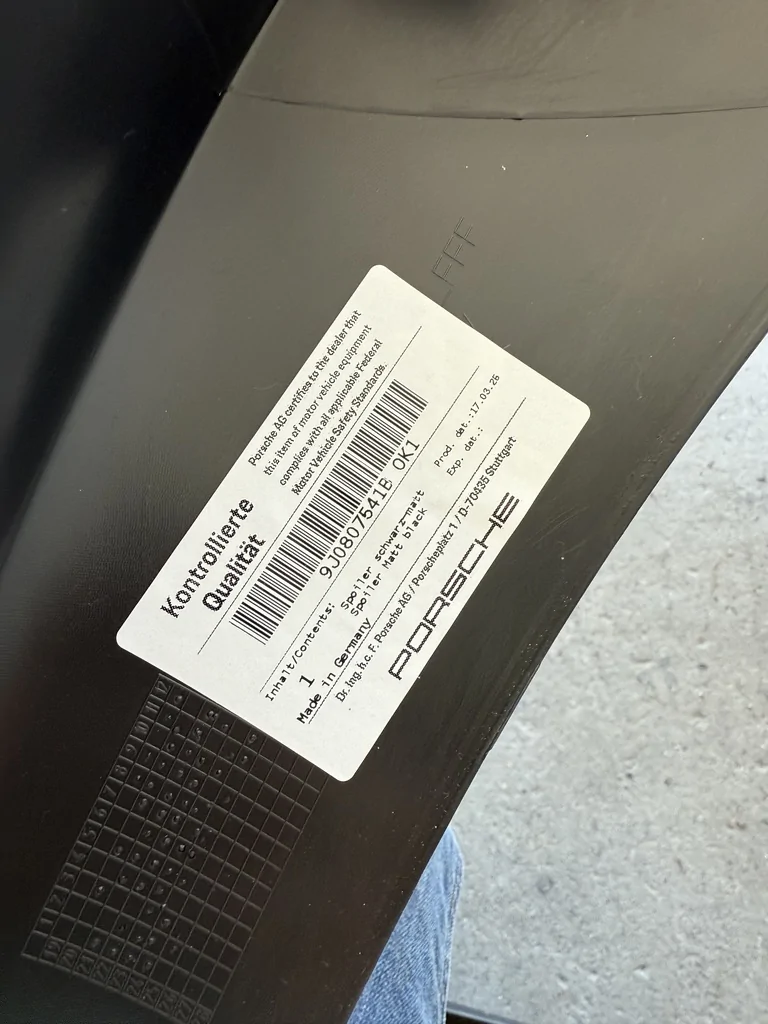
Now let's jump back to the diagram, this is the replacement part I bought from Porsche based on their recommendation per my VIN number. Item Number 3 in the diagram.
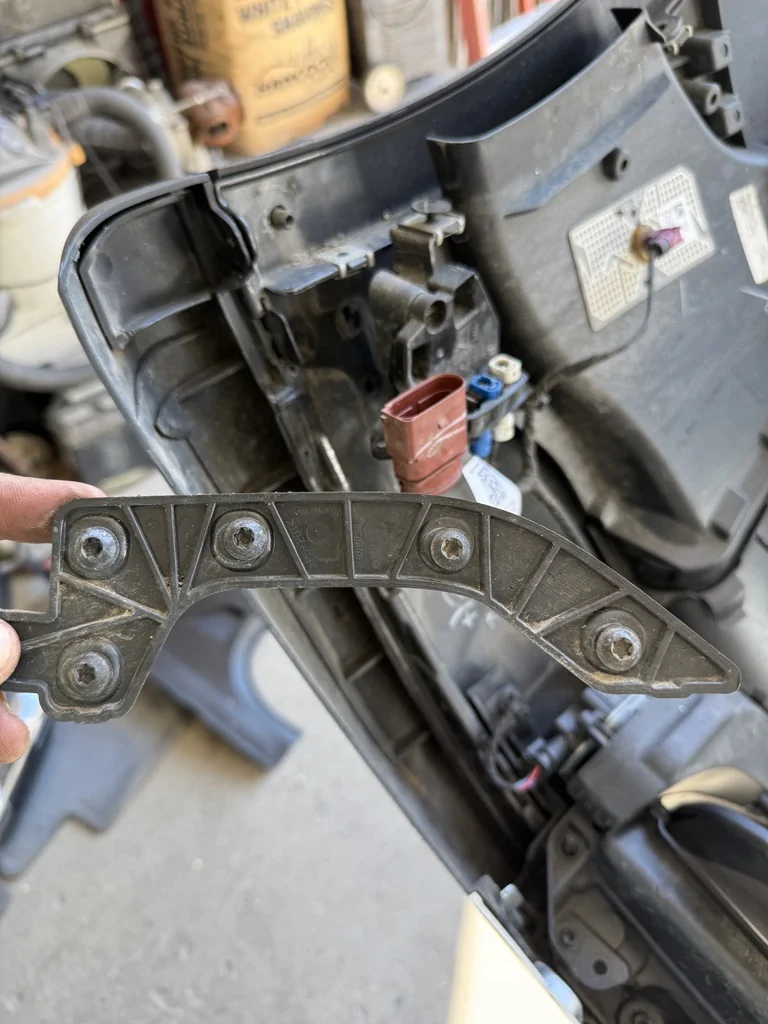
BUT Item #5 has both a Left and Right, and you want to order that as well... DO NOT MAKE THE MISTAKE I DID OF NOT HAVING THE ATTACHMENT BRACKETS FOR L/R ITEM #5 YOU HAVE BEEN WARNED....
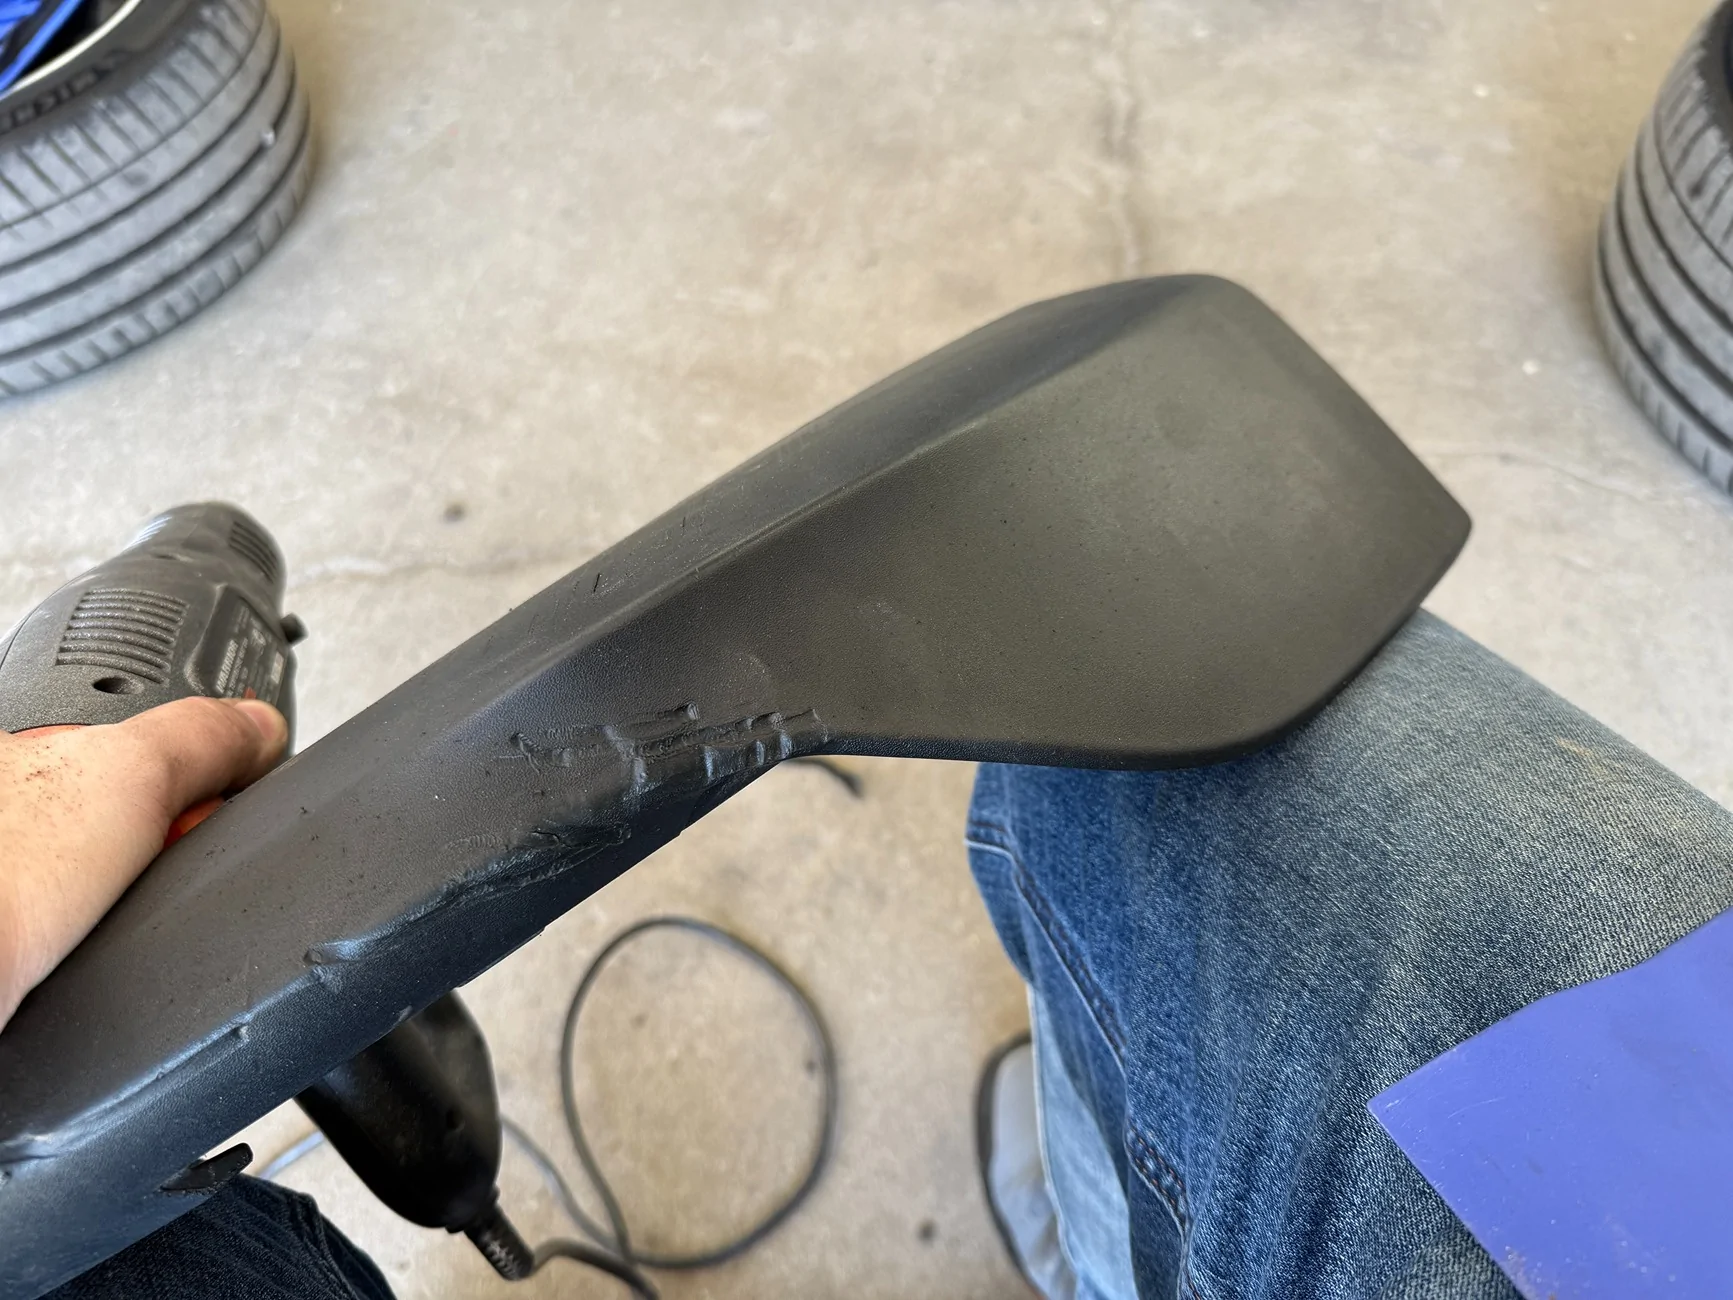
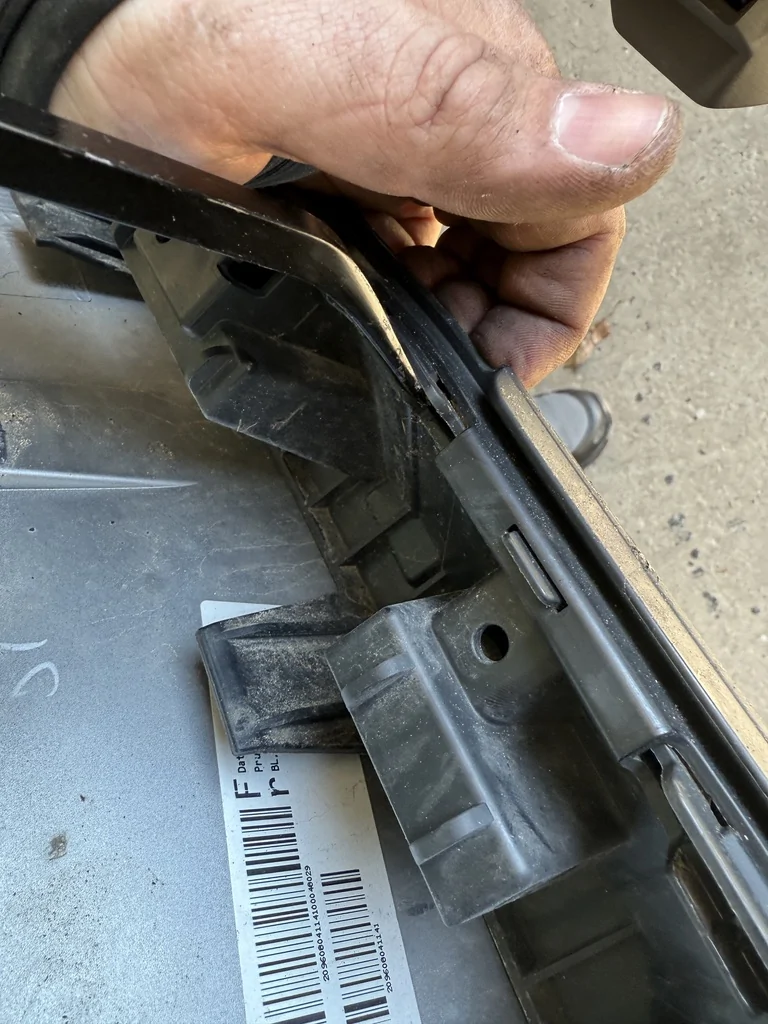
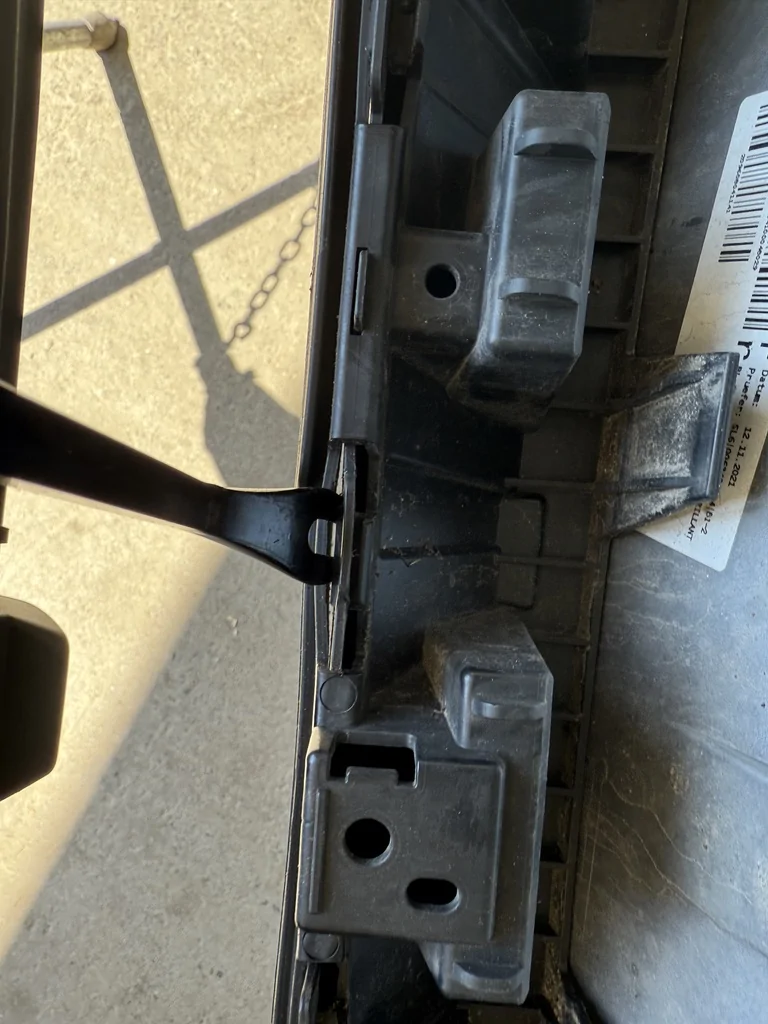
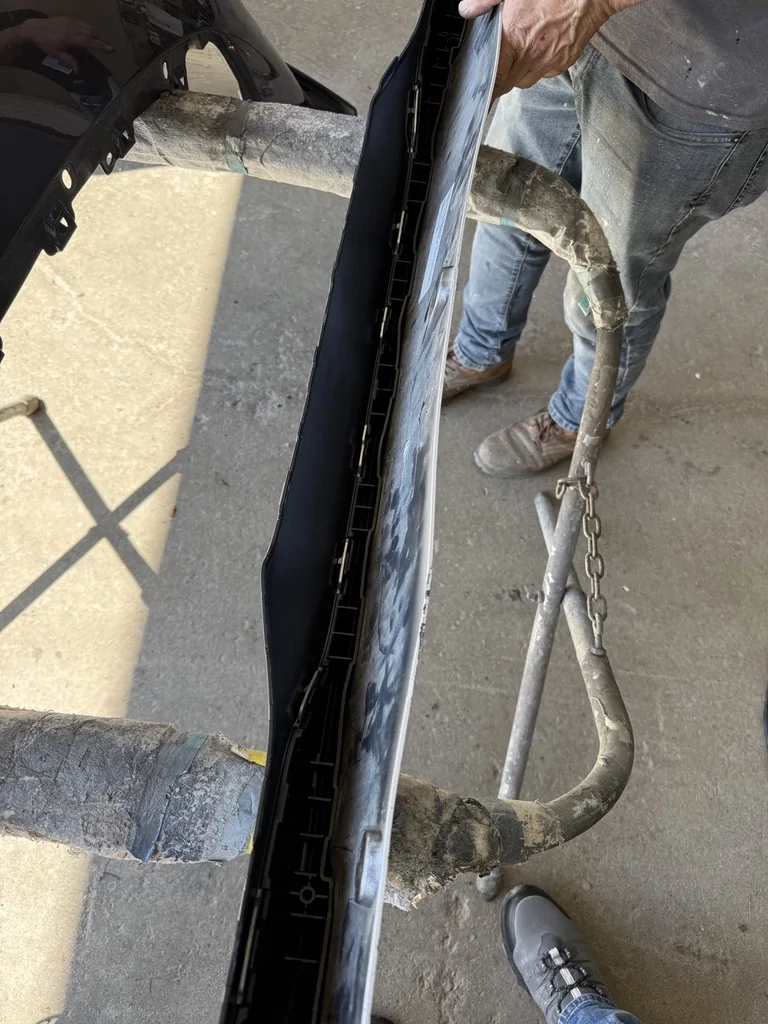
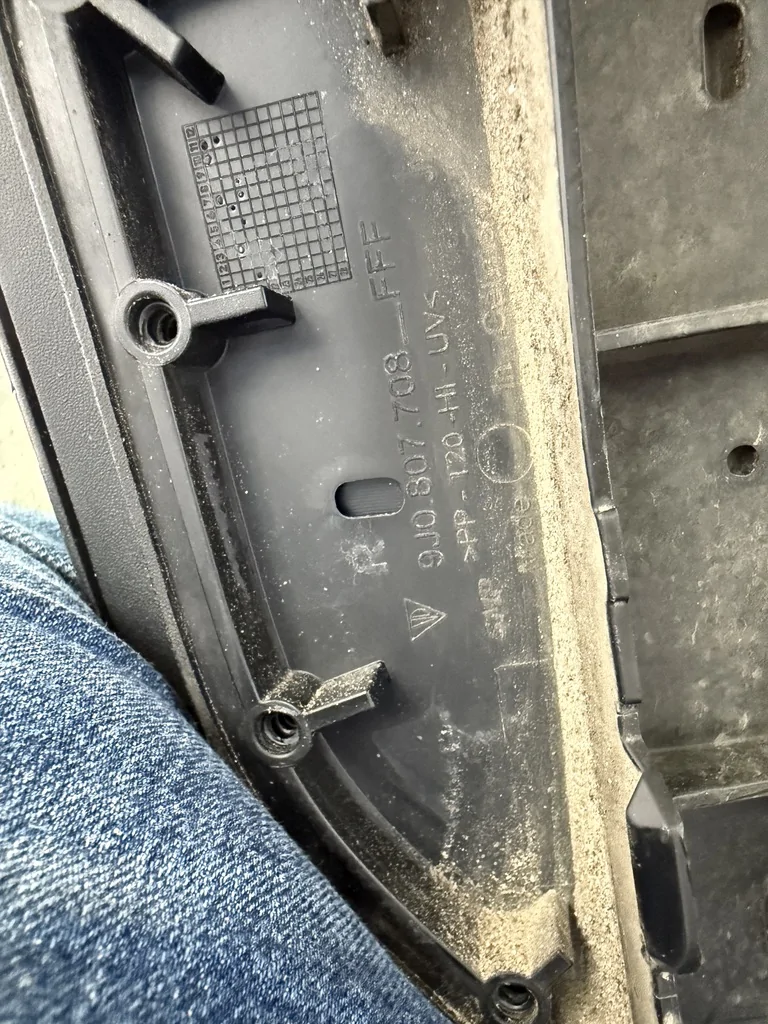
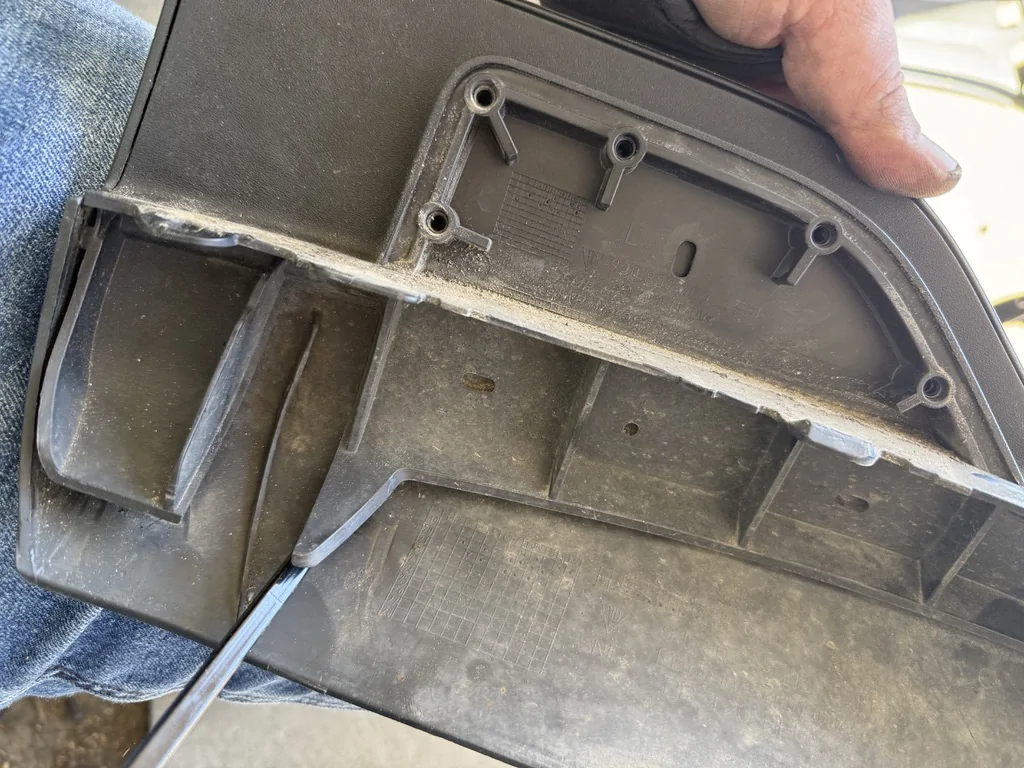
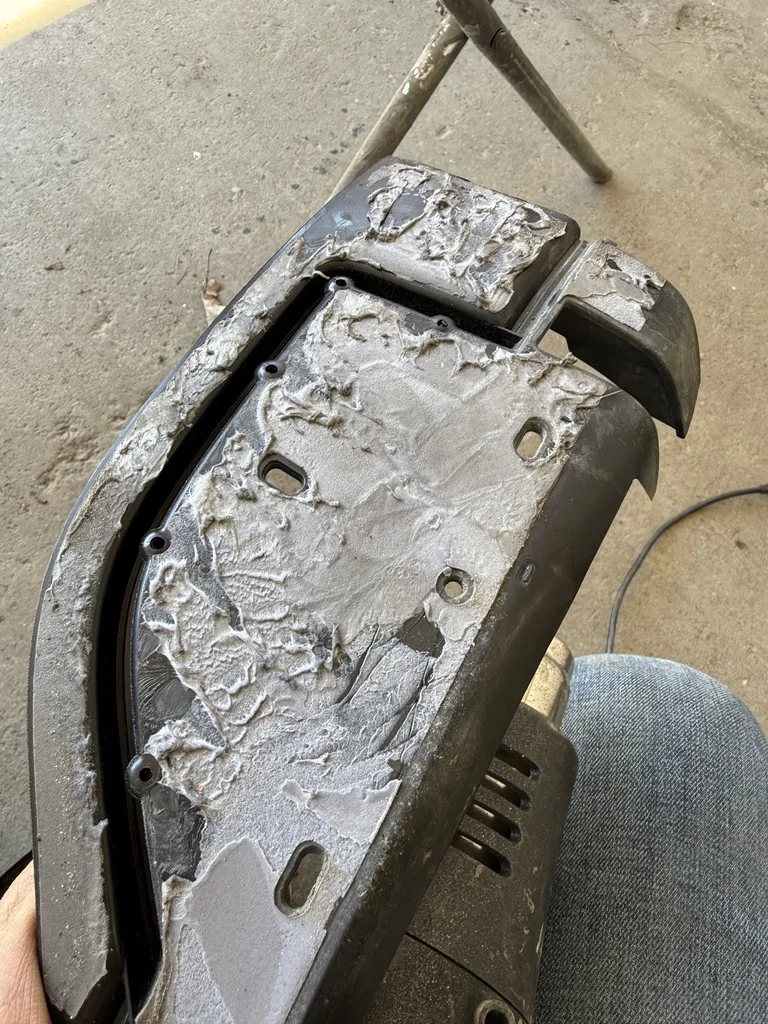
BUT... if you didn't listen... and you are missing #5 L/R here's how to reuse the ones on the car... the following images may cause you physical discomfort...
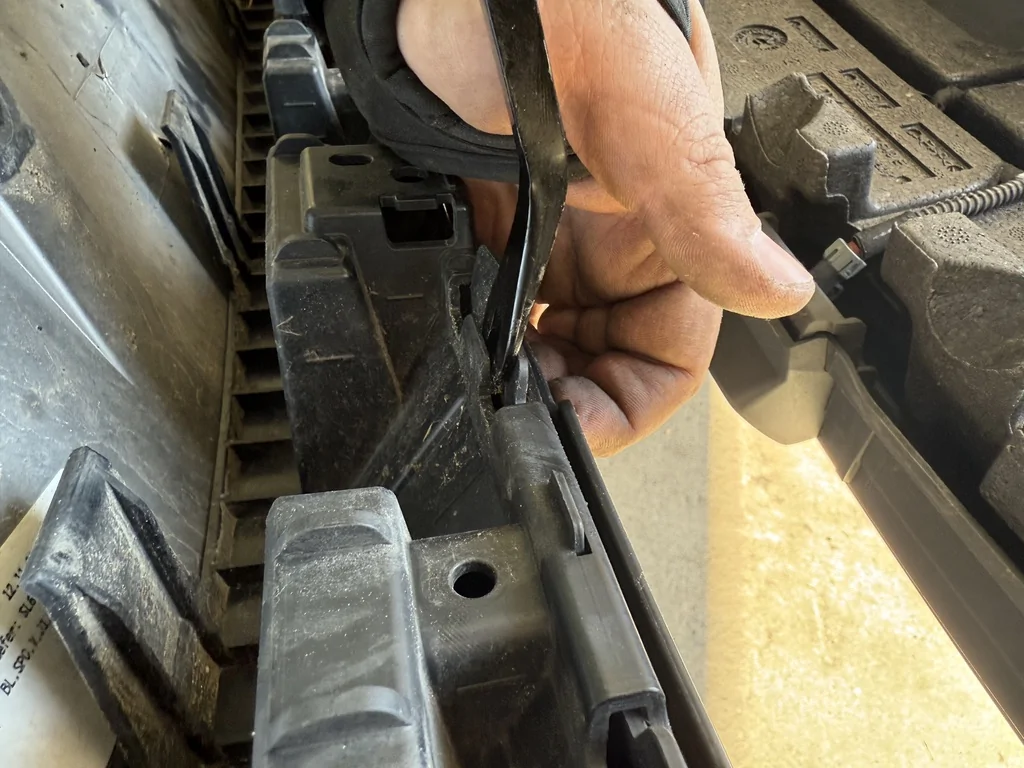
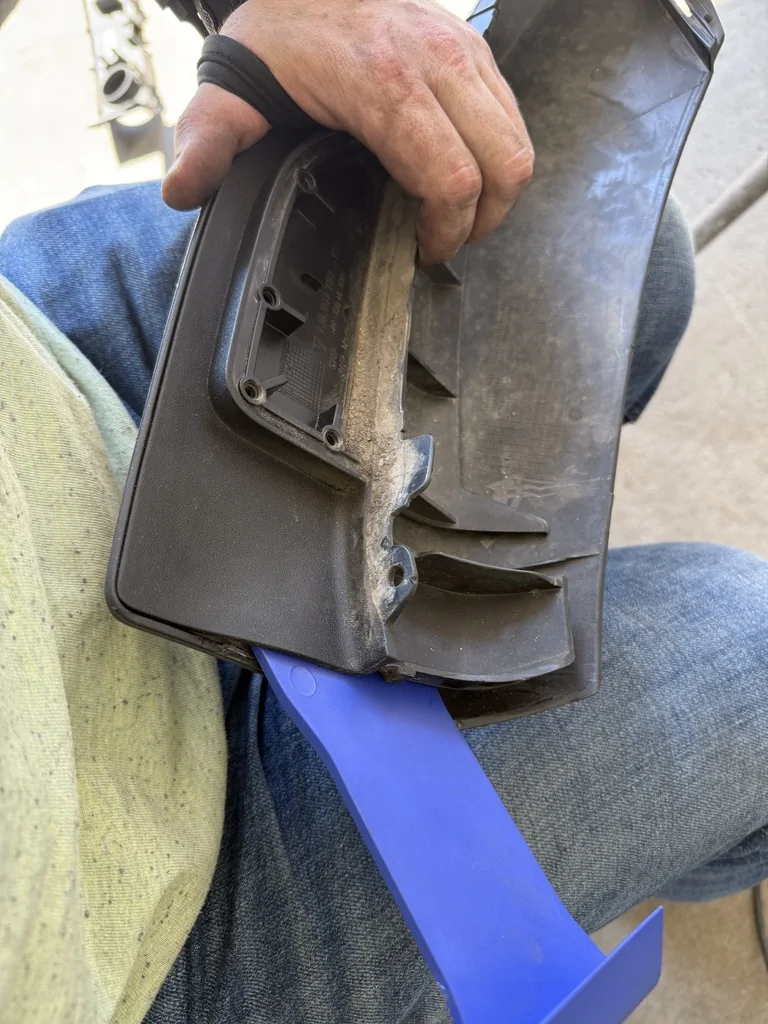
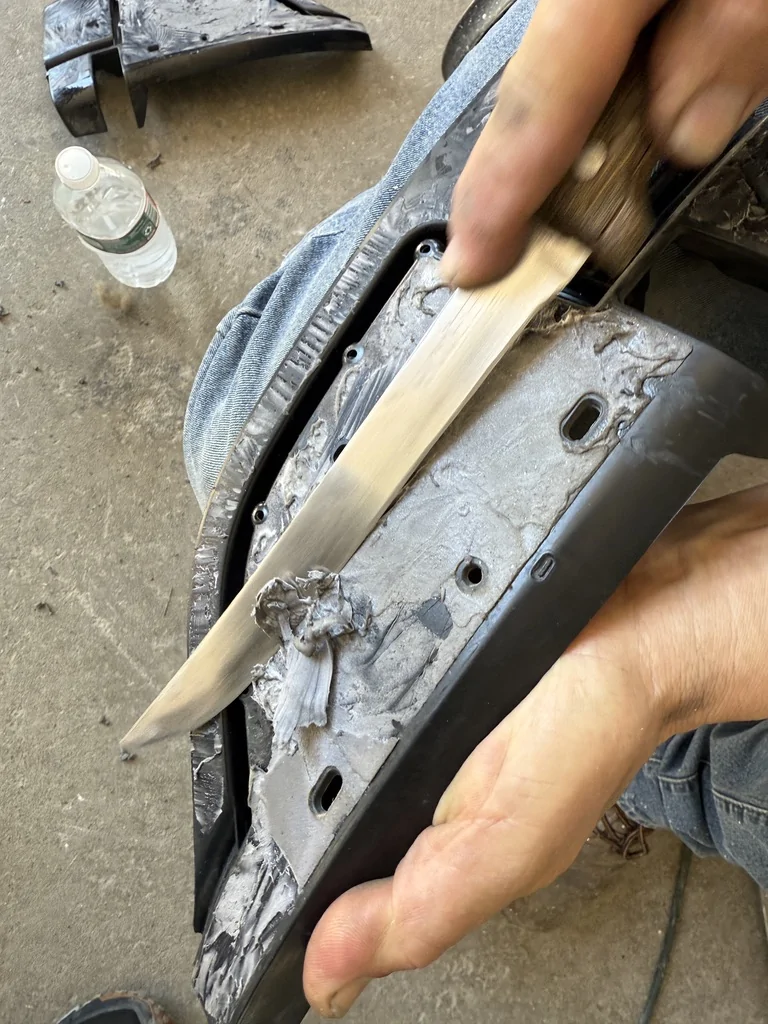
Heat gun helps a lot, this is some nasty VHB stuff... Now you are left with this mess...
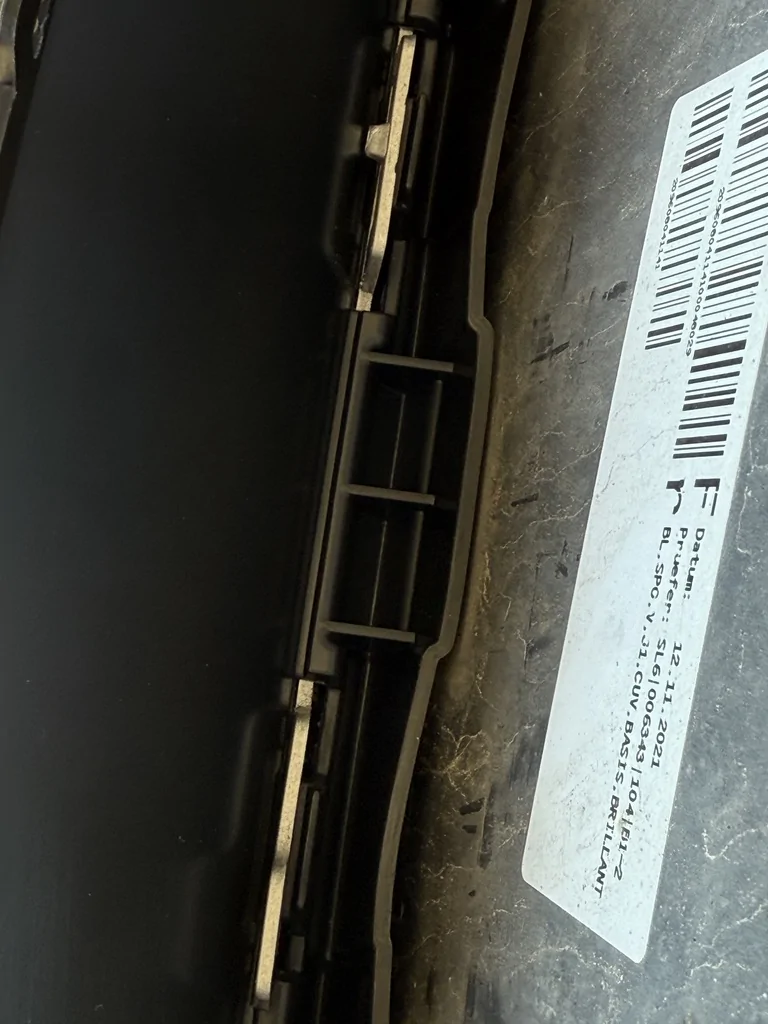
It all has to come off, don't call OSHA or BSA on me.
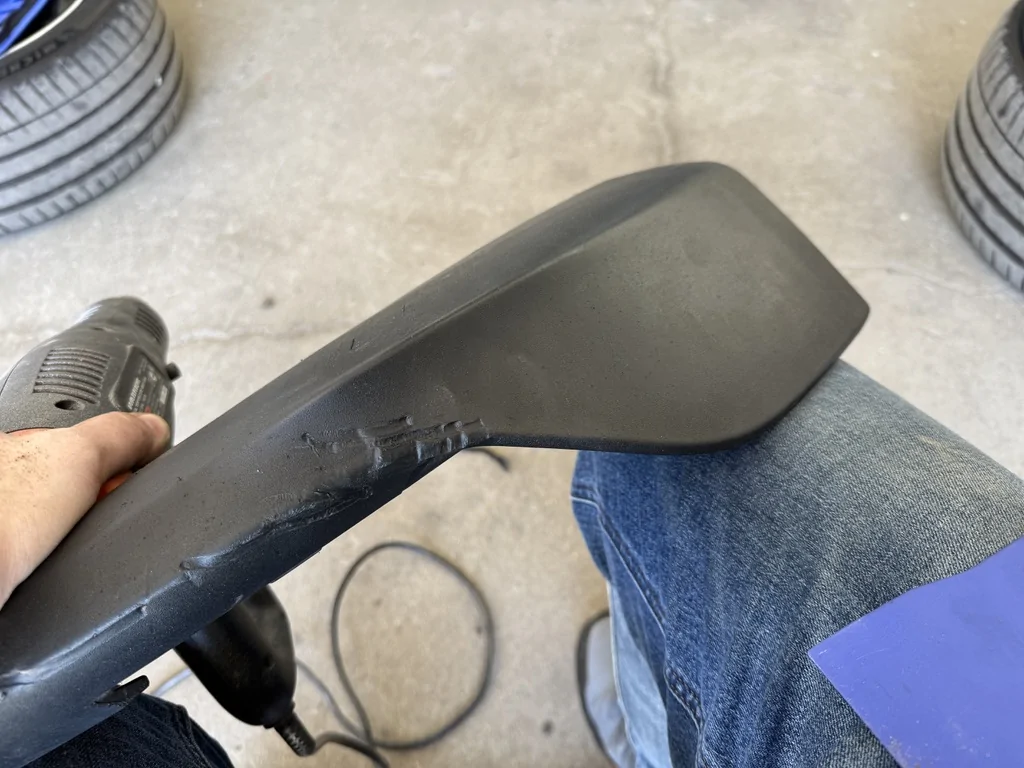
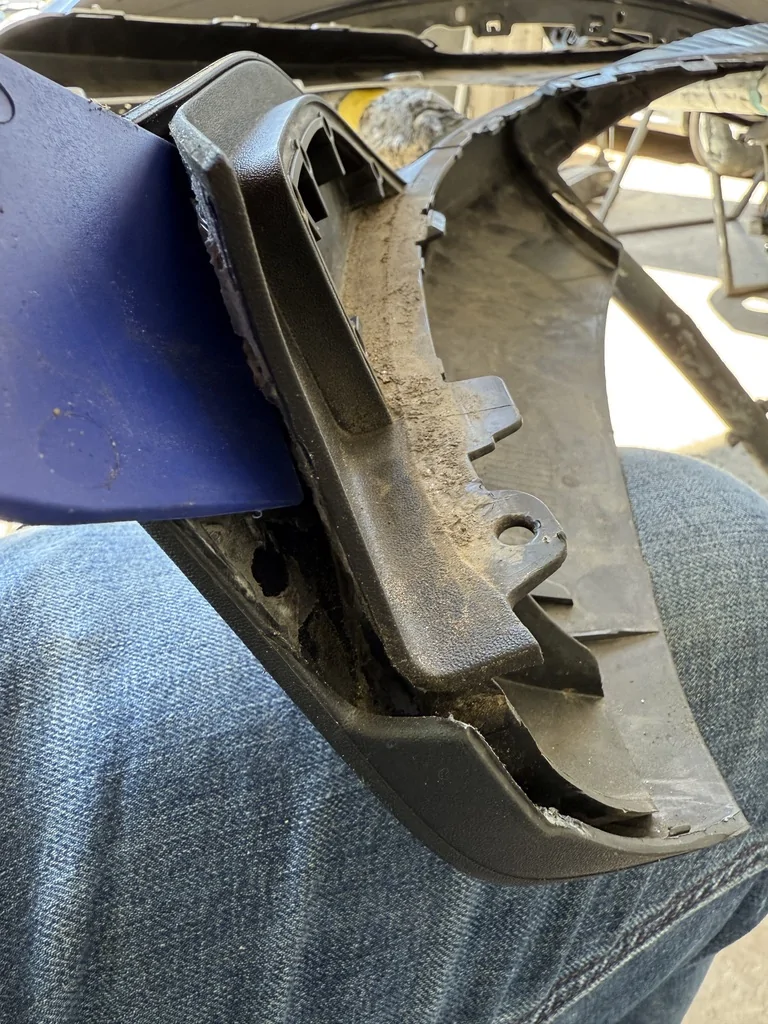
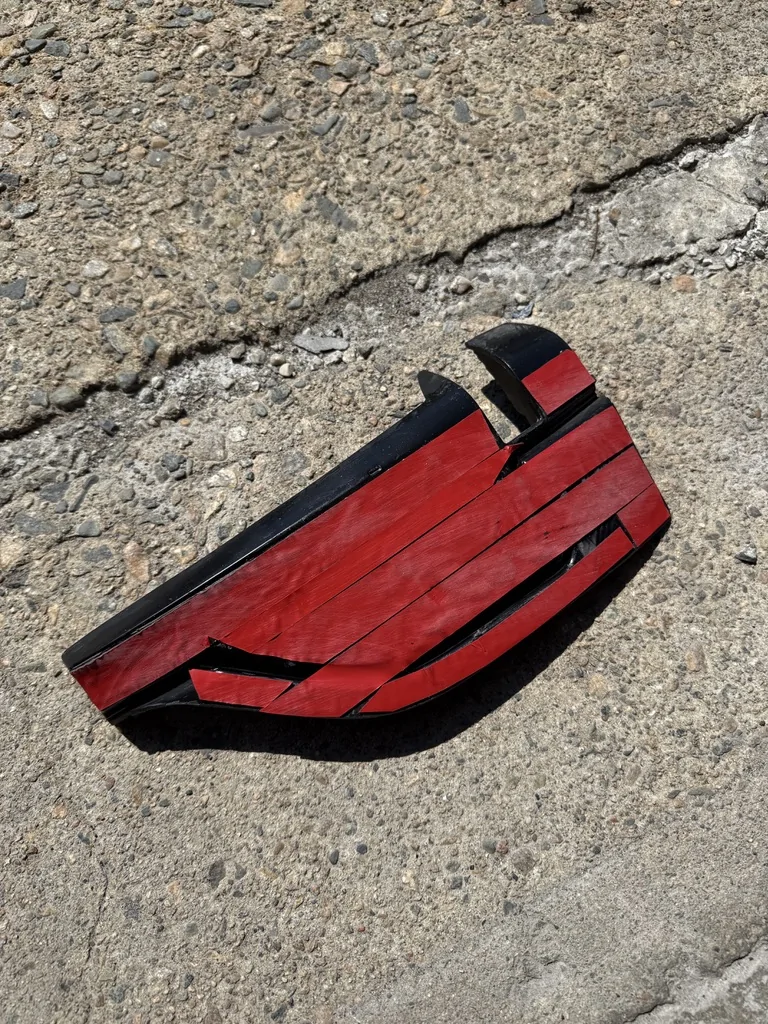
Now we soaked it in thinner and the sun to get it all off, then we put adhesion promotor and automotive grade OEM spec VHB.
From here, things got a bit "clenchy" as you only have ONE shot to put this back on and have it sit OEM flush, this is also where I stopped taking photos. If you align it correctly, you will never be able to tell, there is really no good place to start, but I practiced a few times with the red film still on the tape and I recommend you do the same.
From here on, you are doing all the steps above in reverse. Bonus points if you have no extra screws at the end. I didn't")
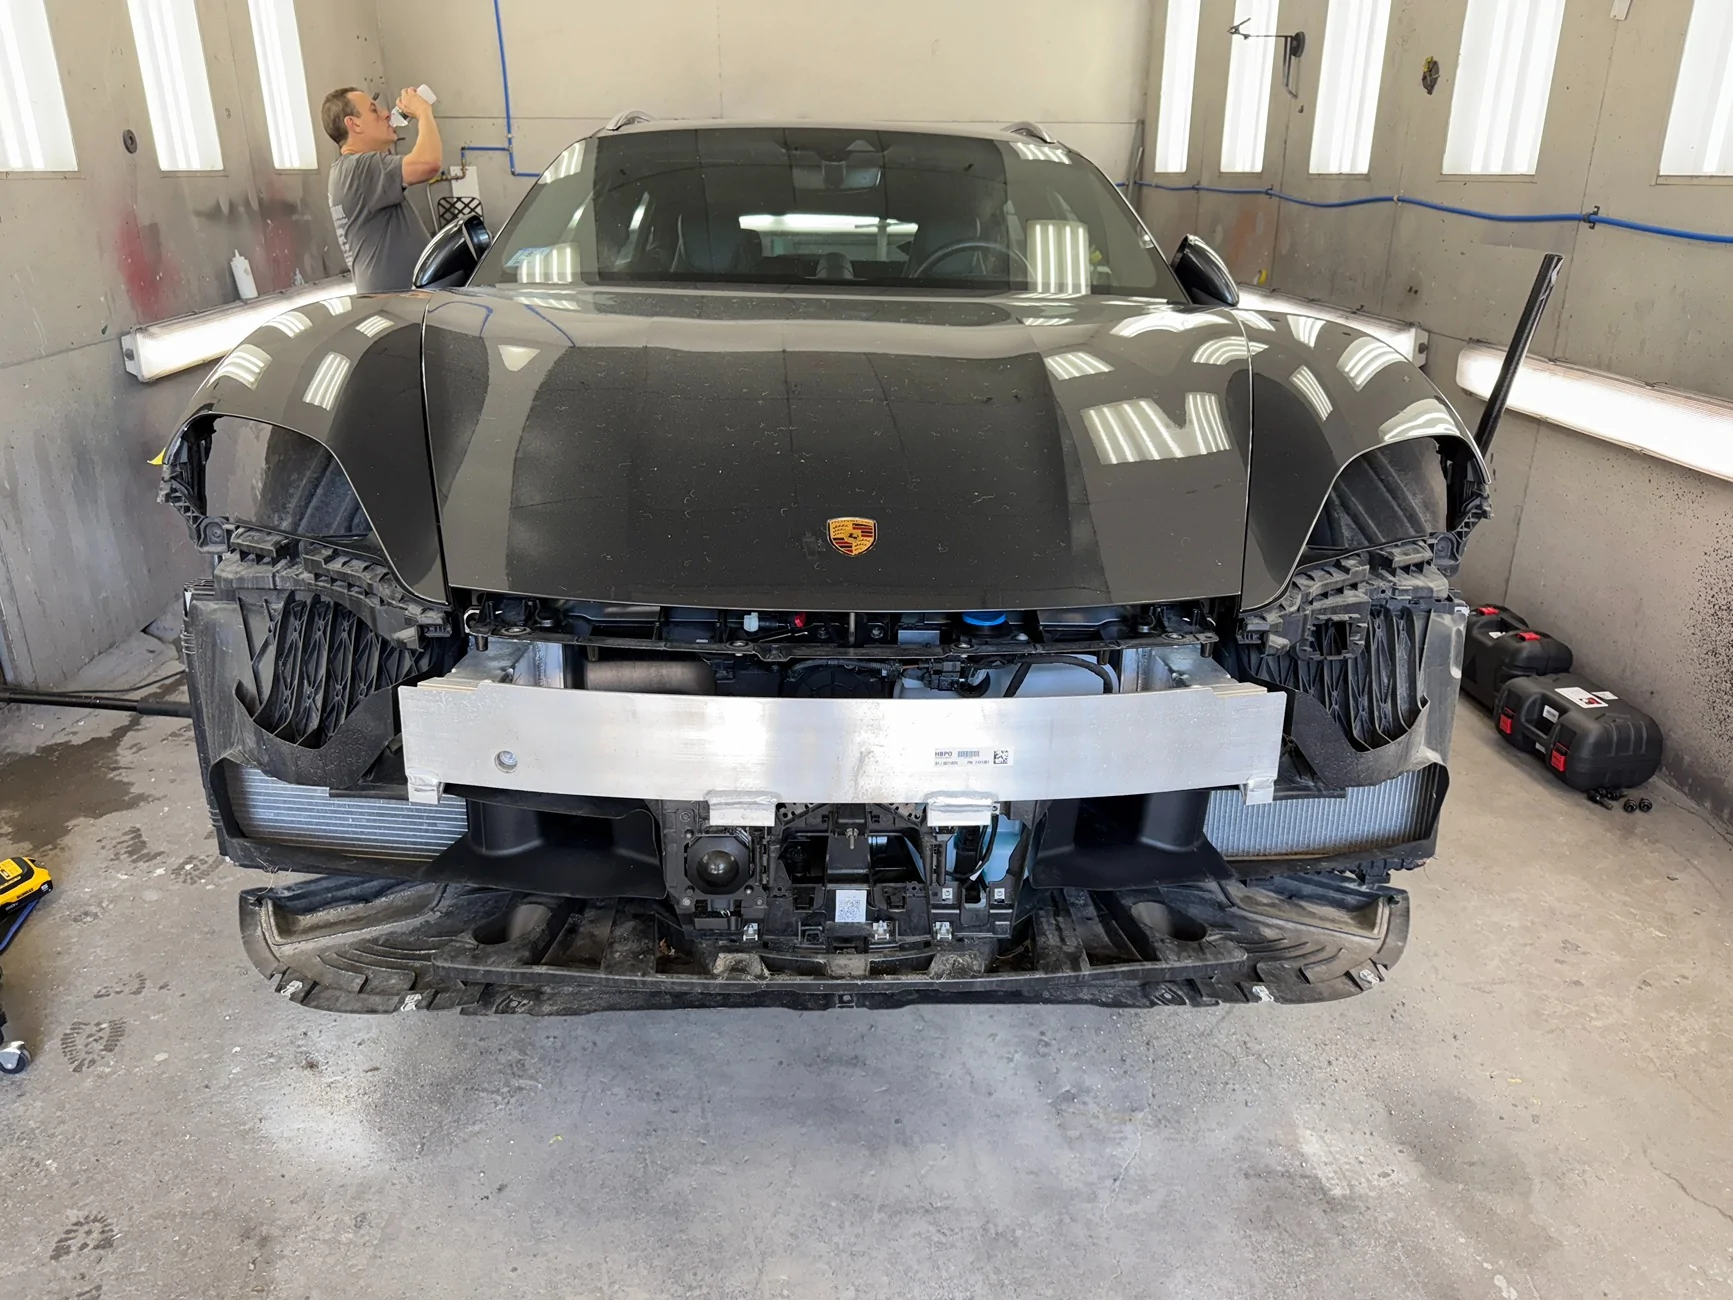
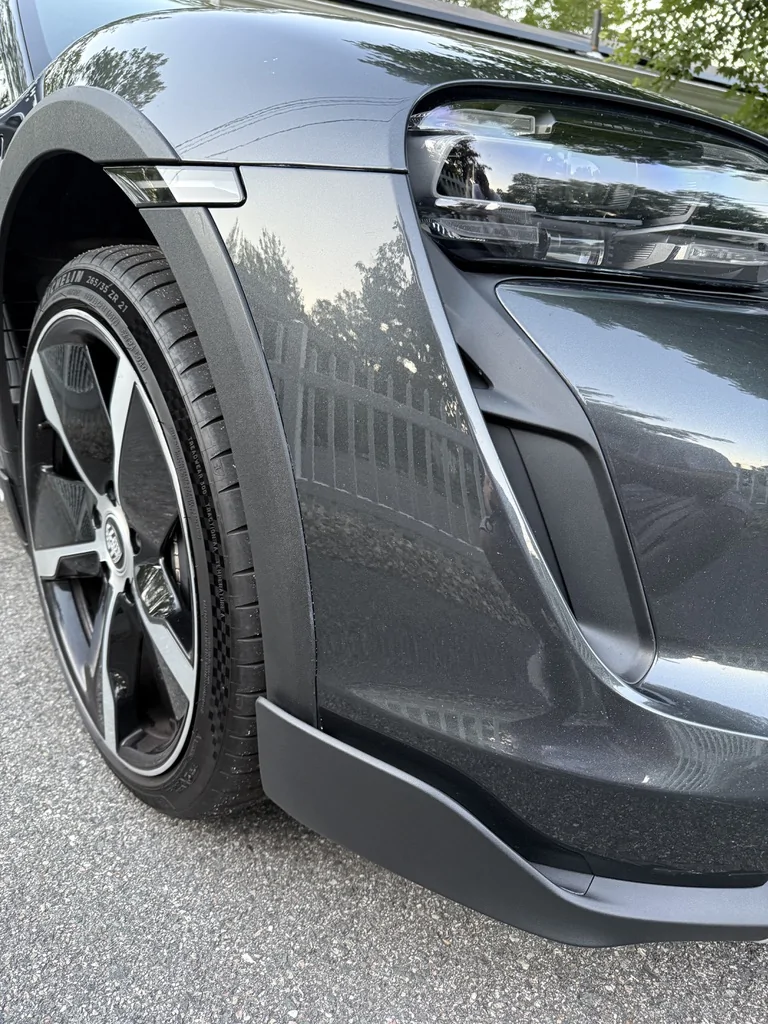
Here's the finished result, I did not fix the silver shroud, I am unsure what color I want it to be after the wrap this week. Will update if I end up repairing that, but I will likely just go mask/paint vs replacing it. I also didn't fix some bumper damage, just wet sanded and polished getting it flat for the wrap also.
Thanks for following along, here to answer any questions you might have.
My Damage, passenger side lower left, it was really visible even from afar.
To start remove all the plastic under the hood:
Only 4 torx screws to be removed here, mark their placement if you don't want to eyeball alignment when you put it back together.
Next jack it up because the wheels and fender liner are coming off, pay attention to the Cross Turismo specific trim piece bolt on the top insider, don't over tighten when putting things back together you will break it (trust me).
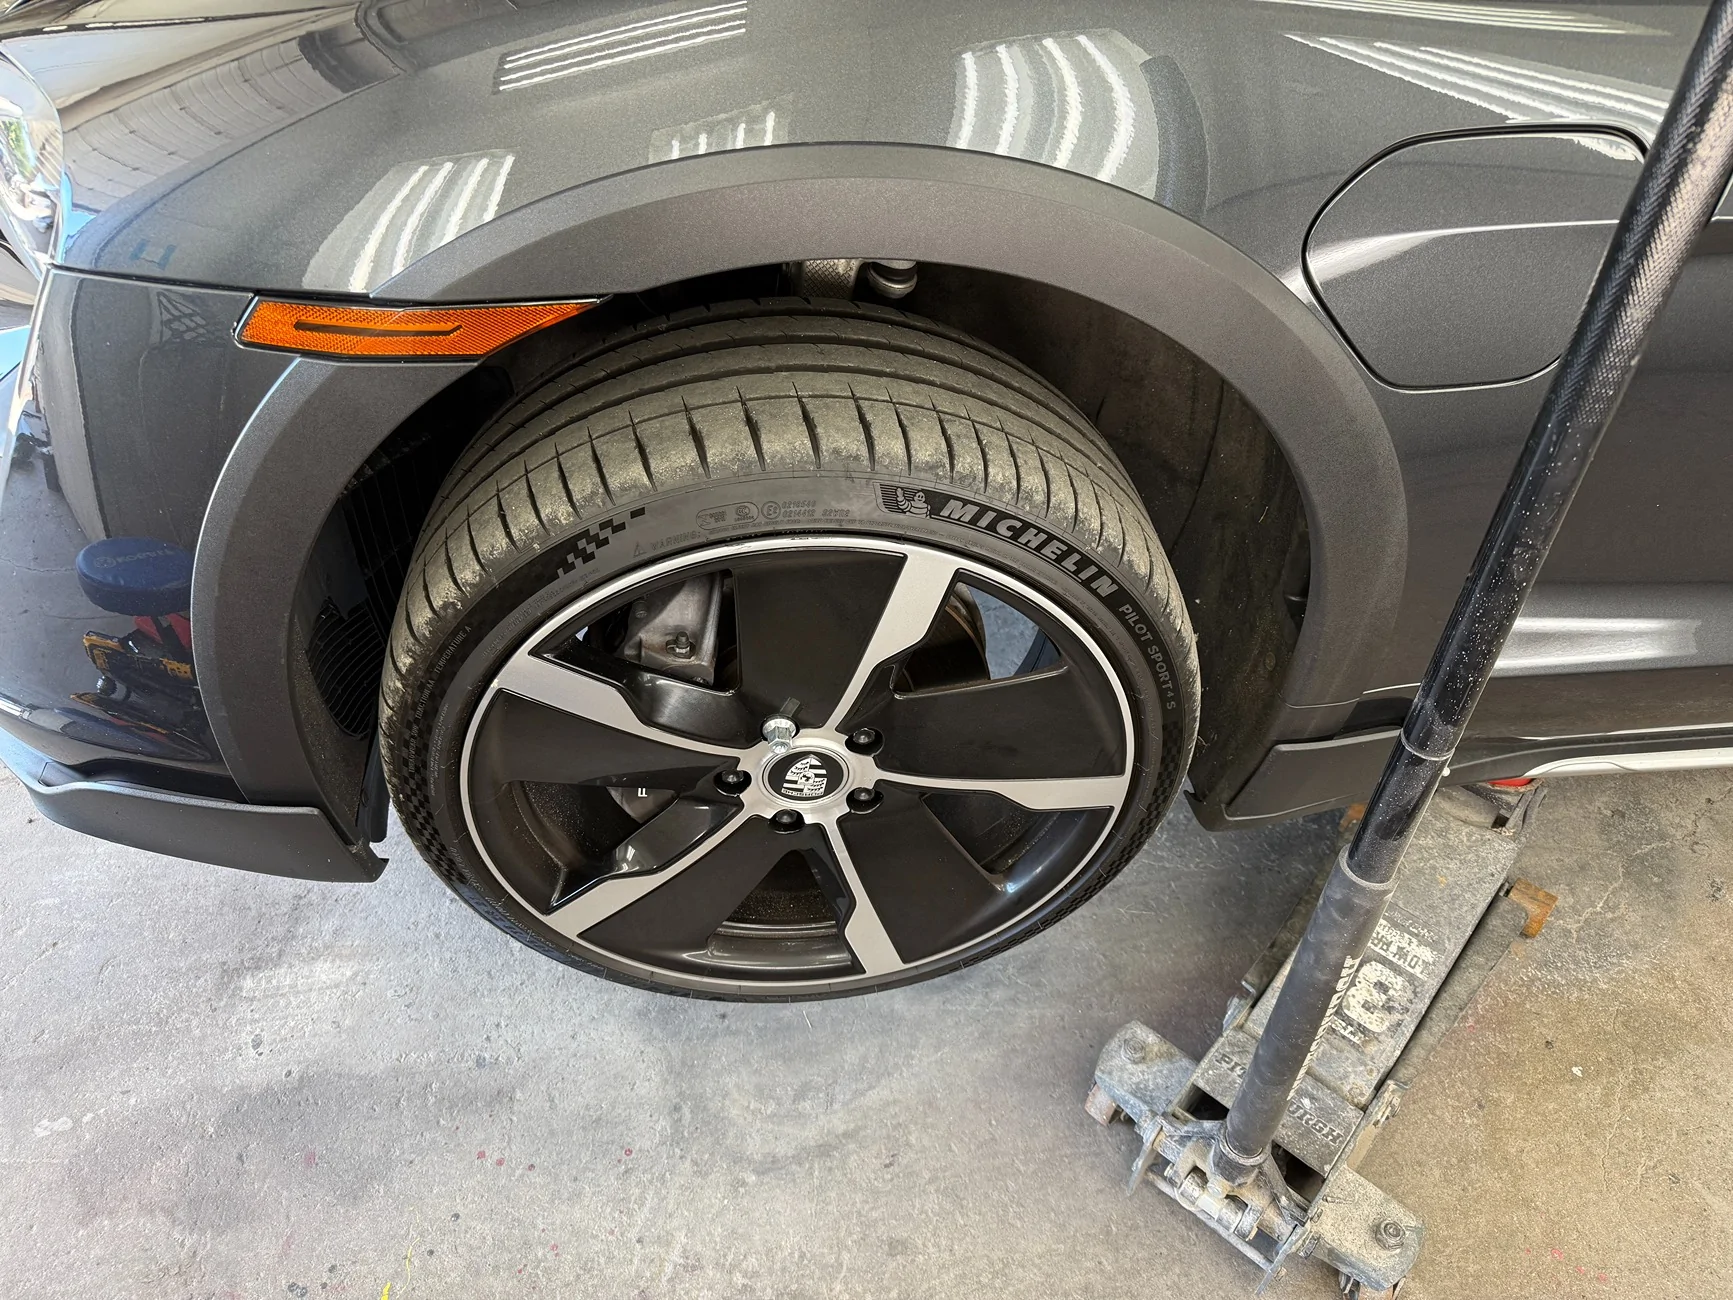
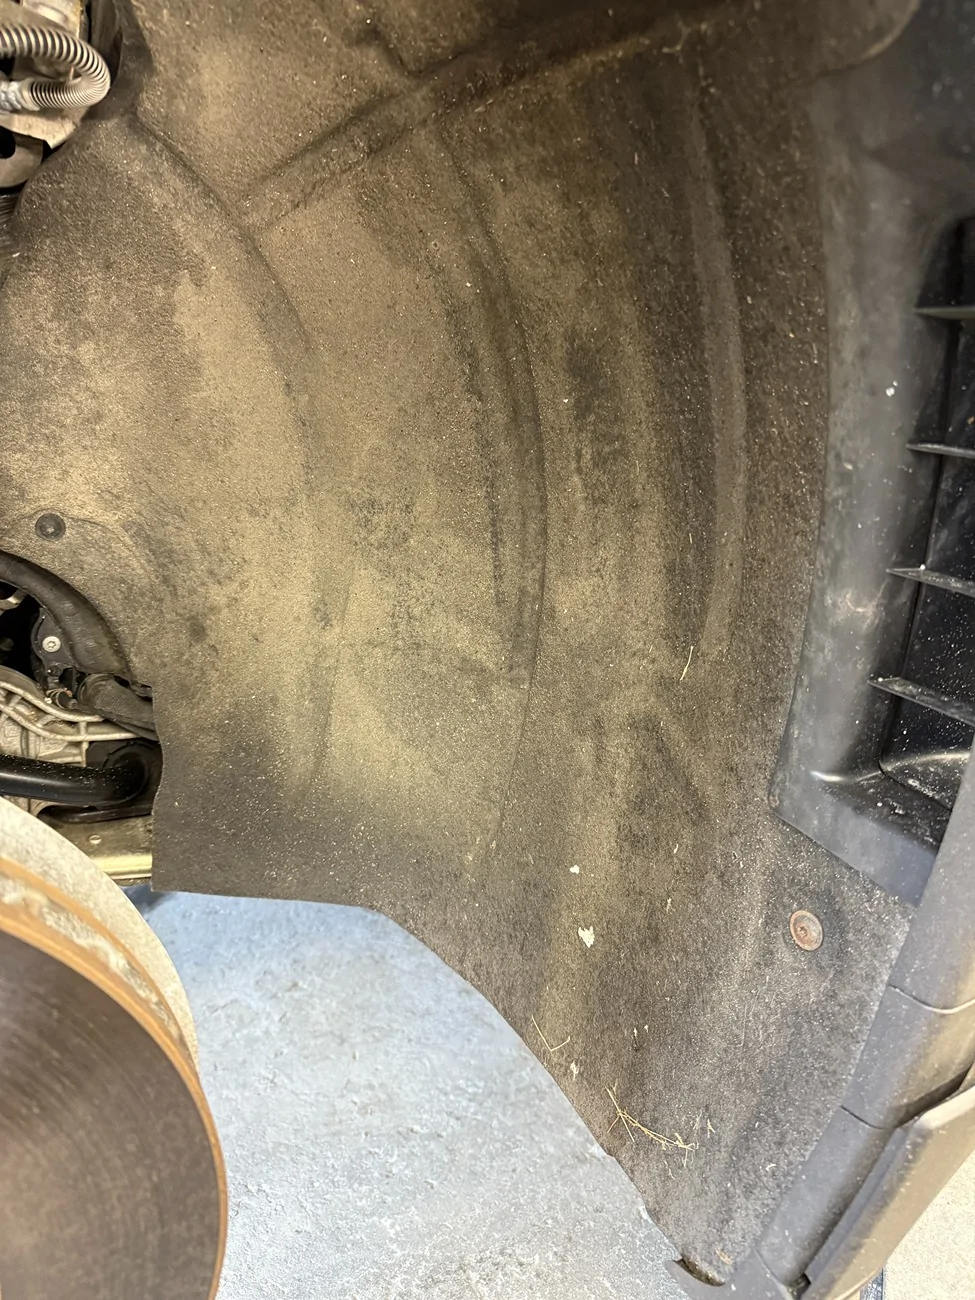
You can remove the entire liner, I just removed all but the back screws and pushed it behind the rotor, easier to align going back in.
Next I undo all the cables and clips for the front camera, lidar, and park sensors. Disconnect the headlight and side markers. If you haven't already upgraded to clear OEM side markers, may as well do that now. Undo the wire clips dressing the headlight cable as well. You will need a 10MM to take the headlight out, only two nuts, confused the crap out of me because it doesn't seem very secure, AND there's a third tab at the top that aligns with a retaining nut and you would swear a bolt should go there, maybe for the other headlight style.

After losening the 10mm nuts (don't remove them fully) the headlight just slides out, there are good Youtube videos for this.
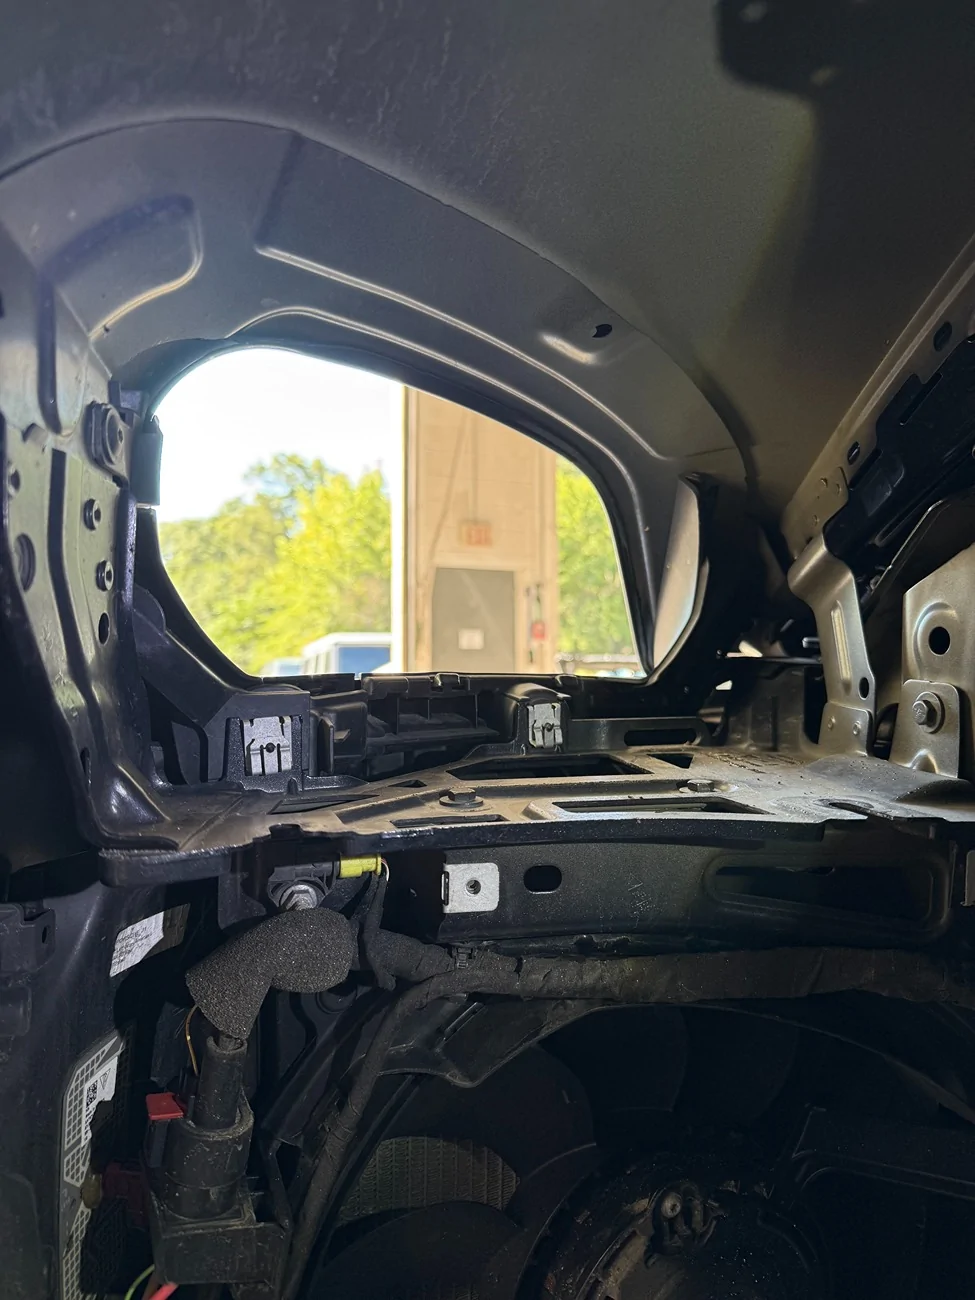
Now we get to the hardest to find and must be removed bolt that is the key to removing the bumper. It's up under the car between the headlight and side marker. These are the best I could do to get photos.
Repeat the process on the passenger side...
Photo of the connector for the front hand sensor there --
Now there's 4 tabs, 2 under each headlight hole holding the entire bumper on you will want a second person otherwise your bumper will come crashing to the ground, you release these tabs from the front and push down on the back while pulling forward from the corner where the sidemarker lights were.
Now you are ready for the main act, replacing the spoiler...
Edit: Continued...
Now for the main act, and the justification that you cannot remove the CT OFDP spoiler without removing the bumper. Plus the big mistake I made that you shouldn't make with this knowledge.
Start by removing the Jesus retaining clip from the plastic wheel arch guards. I used a pick from my panel removal took kit and slowly wiggled it off... if you break this aligning your wheel arch plastic should you ever need to change it will be very hard.
Next I removed all the bolts I could see under the fiber/bumper sensor connector bracket. and started carefully prying the clips off. All of these clips require opening the bottom then top and prying at the same time. Go slow, you don't want to break these, after you figure out the first few it goes fast.
Oh but wait, some jerkhead engineer put more screws under the connector bracket, so remove it to get to those...
Back to left to right working clips out for the bumper cover.
When you get to the automatic shutters, you will need to remove a few bolts and bend it up gently to keep accessing clips...
I probably missed some clip photos, but you get the jist... You will now finally have things separated. Phew.
Now let's jump back to the diagram, this is the replacement part I bought from Porsche based on their recommendation per my VIN number. Item Number 3 in the diagram.
BUT Item #5 has both a Left and Right, and you want to order that as well... DO NOT MAKE THE MISTAKE I DID OF NOT HAVING THE ATTACHMENT BRACKETS FOR L/R ITEM #5 YOU HAVE BEEN WARNED....

BUT... if you didn't listen... and you are missing #5 L/R here's how to reuse the ones on the car... the following images may cause you physical discomfort...
Heat gun helps a lot, this is some nasty VHB stuff... Now you are left with this mess...
It all has to come off, don't call OSHA or BSA on me.
Now we soaked it in thinner and the sun to get it all off, then we put adhesion promotor and automotive grade OEM spec VHB.

From here, things got a bit "clenchy" as you only have ONE shot to put this back on and have it sit OEM flush, this is also where I stopped taking photos. If you align it correctly, you will never be able to tell, there is really no good place to start, but I practiced a few times with the red film still on the tape and I recommend you do the same.
From here on, you are doing all the steps above in reverse. Bonus points if you have no extra screws at the end. I didn't
Here's the finished result, I did not fix the silver shroud, I am unsure what color I want it to be after the wrap this week. Will update if I end up repairing that, but I will likely just go mask/paint vs replacing it. I also didn't fix some bumper damage, just wet sanded and polished getting it flat for the wrap also.
Thanks for following along, here to answer any questions you might have.

Sponsored
Last edited:
