Sponsored

Retrofitting original sport chrono clock

OP
OP

alex_bell

Well-Known Member
First Name
Alex
Joined
May 8, 2025
Threads
3
Messages
55
Reaction score
53
Location
Vancouver
Vehicles
Taycan 4s
Country flag
HI! I just joined the Taycan community today!! I actually was looking to do this purely out of aesthetics where I wouldn't even wire it for now until a later date I will have the time and courage to wire it. Is just replacing it, nonworking, purely popping the top vent dashboard plastic piece of and popping this in?
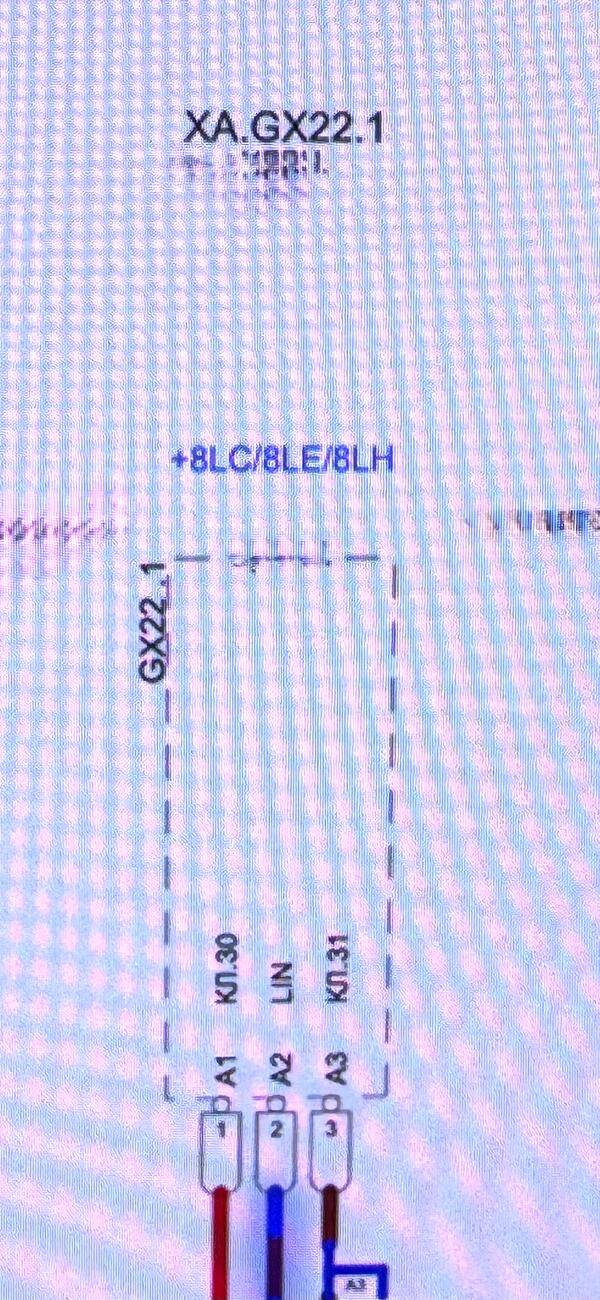
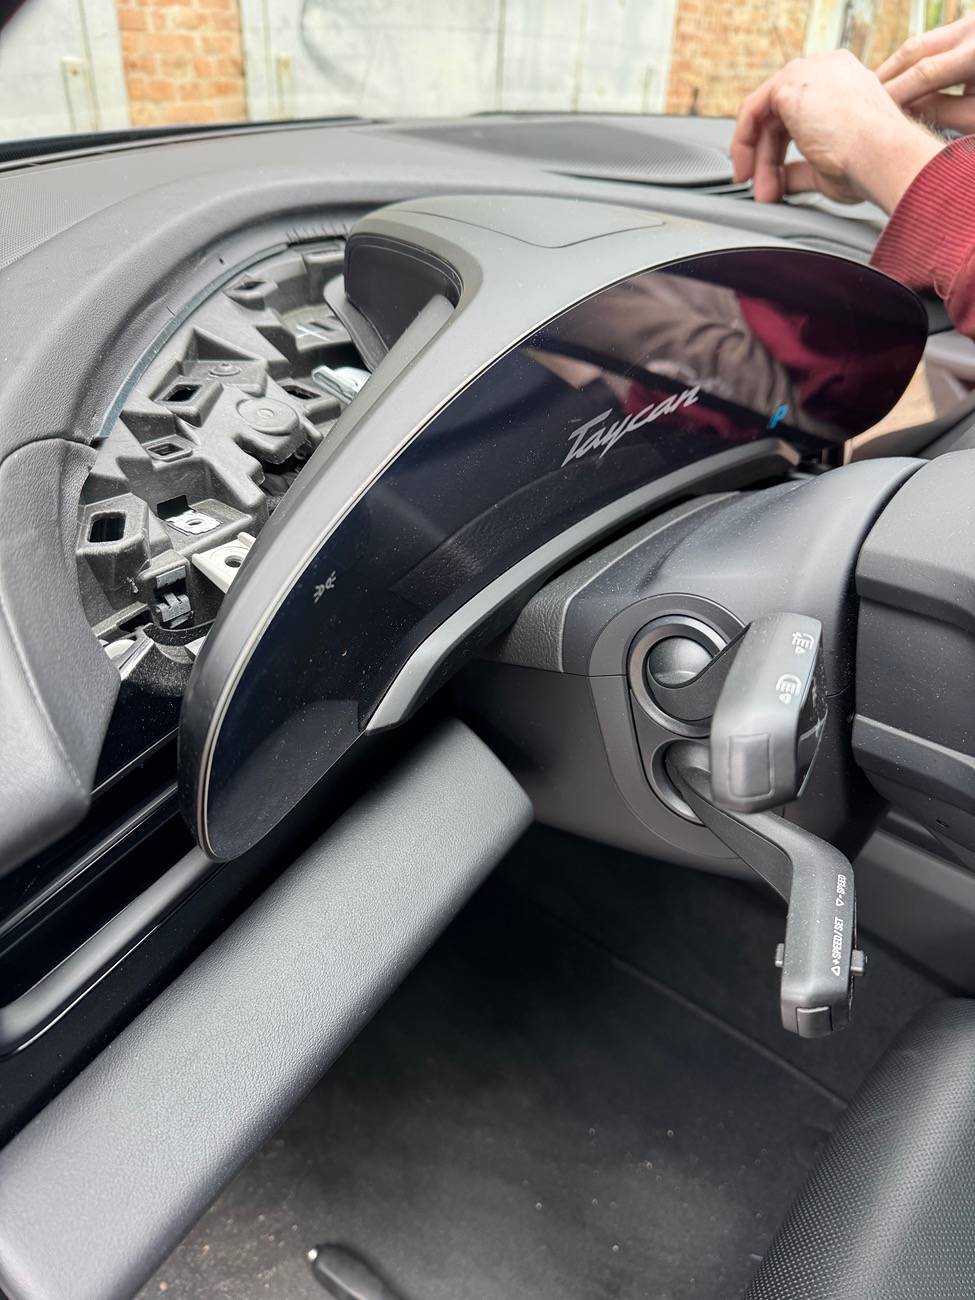
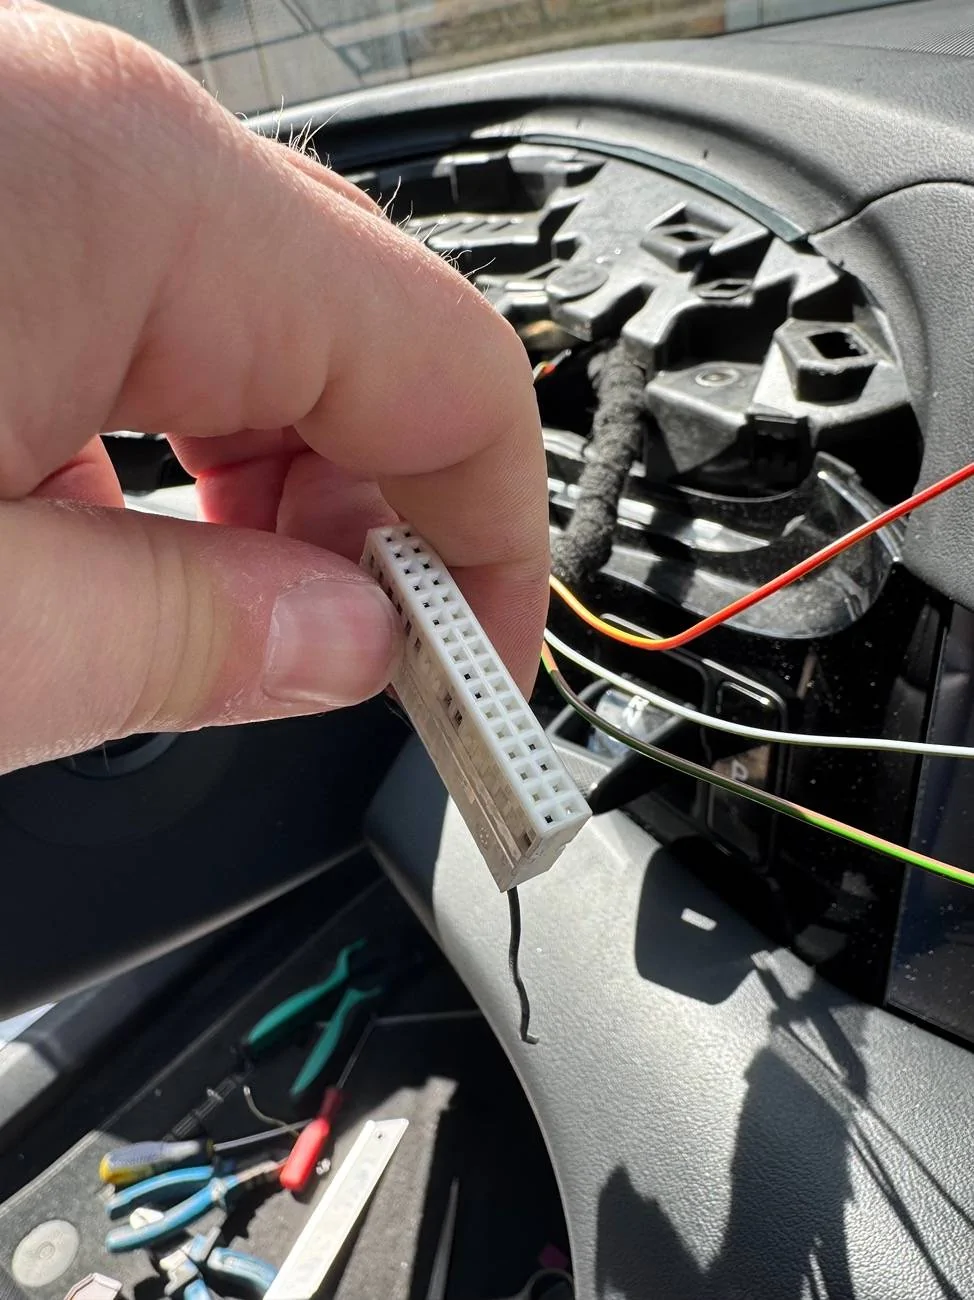
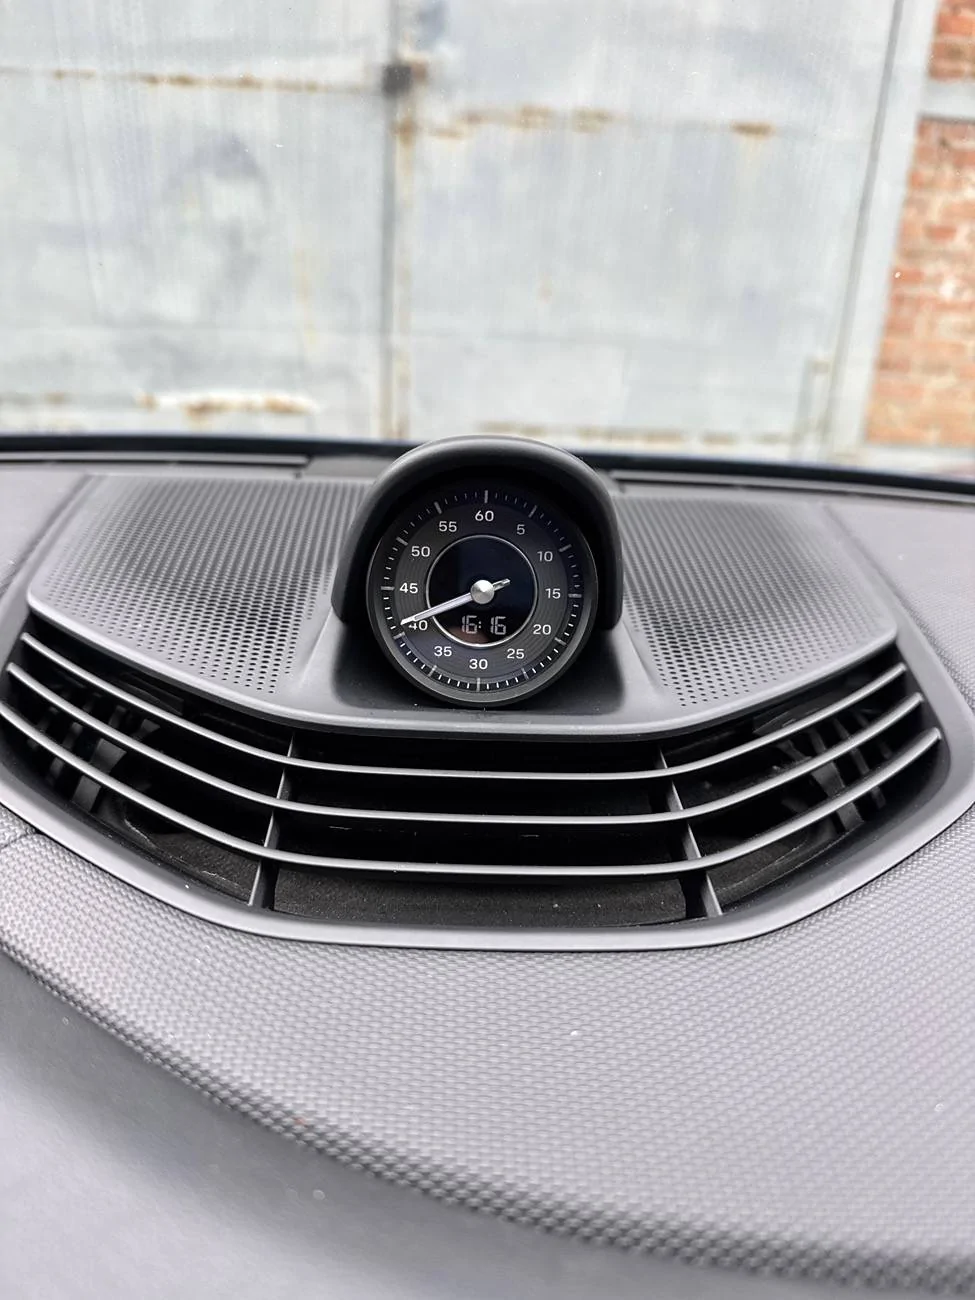
yes, just remove old and install new cover and clock
Sponsored


fika

Well-Known Member
First Name
Jared
Joined
Jul 10, 2023
Threads
0
Messages
56
Reaction score
41
Location
Los Angeles
Vehicles
2020 Taycan Turbo
Country flag
interesting? Why was that?
I think it ruins the looks of the nice clean dash. It doesn't do anything useful for me and it sticks out like a pimple in my vision while driving.
 

Tpup

Well-Known Member
First Name
Roy
Joined
Mar 7, 2025
Threads
5
Messages
72
Reaction score
42
Location
Winter Park, FL
Vehicles
21 Taycan
Country flag
Great right up, thanks. I’m having trouble with the connector on the back of the clock. I cannot get it to off. Any trick to it?
 

stephan

New Member
First Name
Stephan
Joined
Jan 18, 2026
Threads
0
Messages
3
Reaction score
0
Location
Germany; Mechernich
Vehicles
Taycan Cross Turismo + Mini JCW Cabrio
Country flag
Hello Alex!
Thank you very much for this tutorial :)

Just to get it right: Which Pins (clock side; I think in your case the red / white / brown wire) have to be connected to pin17 / +[pin 31?] / -[pin30?] ? I already ordered the mentionted connector.

Thanks in advance!

Stephan
 
OP
OP

alex_bell

Well-Known Member
First Name
Alex
Joined
May 8, 2025
Threads
3
Messages
55
Reaction score
53
Location
Vancouver
Vehicles
Taycan 4s
Country flag
Hello Alex!
Thank you very much for this tutorial :)

Just to get it right: Which Pins (clock side; I think in your case the red / white / brown wire) have to be connected to pin17 / +[pin 31?] / -[pin30?] ? I already ordered the mentionted connector.

Thanks in advance!

Stephan
Yes, this is correct, pin 17 for lin bus, 31 and 30 are for + and -

Use multimeter to check if 31 and 30 receives power, just to be sure


stephan

New Member
First Name
Stephan
Joined
Jan 18, 2026
Threads
0
Messages
3
Reaction score
0
Location
Germany; Mechernich
Vehicles
Taycan Cross Turismo + Mini JCW Cabrio
Country flag
Yes, this is correct, pin 17 for lin bus, 31 and 30 are for + and -

Use multimeter to check if 31 and 30 receives power, just to be sure
Thank you very much - but which PINs are to corresponding ones on the clock side?

In your first picture in this post, equals

red = LIN
white = +
brown -

?

Thanks!!
 
OP
OP

alex_bell

Well-Known Member
First Name
Alex
Joined
May 8, 2025
Threads
3
Messages
55
Reaction score
53
Location
Vancouver
Vehicles
Taycan 4s
Country flag
Thank you very much - but which PINs are to corresponding ones on the clock side?

In your first picture in this post, equals

red = LIN
white = +
brown -

?

Thanks!!
Instead of wiring colors(they might be differenr for you) - find terminal 30 and 31 measure with multimeter if there's 12v(make sure car turned on)

on clock connector - see pic in first post what is what
 

Chiu

Well-Known Member
First Name
Mickey
Joined
May 31, 2023
Threads
15
Messages
138
Reaction score
38
Location
Taipei
Vehicles
Taycan/F56 JCW
Country flag
Hey folks. This weekends decided to retrofit sport chrono clock because my car came without it(and no sport chrono). I have that clock in my Panamera, so felt like something it missing, so here's short breakdown how I did it.

I bought used clock with backplate from local salvage yard for about $500, but I saw them also selling on eBay. I also made small wiring loom for 3 wires - Pos/Neg and LIN bus. You can use this PN 1C0973119B to get correct connector which will connect into clock, on eBay there are already with pins inside, or just add pins yourself.
Here's pinout of connector and how it looks
IMG_5103.jpg


IMG_5090.jpg


TO start I had to remove instrument cluster. To remove it you need to pop off plastic cover thats over IC and then unscrew 4 T20(or T25 dont remember) screws. Then IC simply pops off. Make sure car went to sleep so the screen isnt on anymore to prevent any damage when you disconnect it(it can take 5 mins to fully fall asleep sleep). Remove big connector first and then video signal


IMG_5100.jpg

Remove video cable and big connector. Now we need to wire our clock to this connector. At first - remove housing, that purple small clip that holds connector in housing, just push it up and it will pop off. Next step - we need to add pin #17. This is where one of LIN bus wires lives and this bus made specifically to feed data to clock. The connector has 4 labels marking position of pins. The pin for #17 located in corner, but in my case connector didnt have pin, so I had to add one. You can use crimping tool to make it, but I didnt have this small pins, so I just found old wiring loom from VW and pulled one of pins from that loom and it fit perfectly

IMG_5106.jpg


Next step - remove central speaker cover. Just use pry tool and pry it up. Remove speaker for some time, so it'd be easier to work.

At first I routed wires through hole near air vent channel, but I didnt like that I could see it when I'd put speaker cover back, so I drilled tiny hole behind air vent like 5mm diameter and routed wires there. Took a bit of back and forth, few wires to get it in a route I wanted, but eventually got it done

Last step - add power and ground. You can use any red wire on connector for +12v and any brown wire for ground. In my case I used PIN 31 for +12v and pin 30 for ground. Simply cut isolation off, soldered and put isolation tape back.

Now it's basically done. I insulated with same isolation tape as rest of the loom, so in my case it looks like its been factory made. Connect clock, connect instrument cluster(video signal first, then big connector) and turn car on. You should have your time reset, so go to PCM and set it again. The clock should synchronize with car time right away.

Basic clock feature does not need any coding and works right after connecting. In my case it worked right away. Clock arrow works well, backlight also works well(the one that lights up numbers). If you wan it to be a timer, you will need to code it to car, but I'll do that sometime later when I find reasonable priced steering wheel with mode selector and add full Chrono sport to car.

This is how it looks now

camphoto_684387517 2.JPG


I hope it will help someone to retrofit it too. It took me about 3-4 hours in total with few coffee breaks.

Recently I also replaced CCS1 to CCS2 ports, so if anyone is interested - I can write brief explanation what needs for that


PS: Apologize for any mistakes or typos, I'm not native English speaker, but tried my best
That’s amazing! By the way, if the charging port is changed from CCS1 to CCS2, does it also require re-coding (PIWIS)?


OP
OP

alex_bell

Well-Known Member
First Name
Alex
Joined
May 8, 2025
Threads
3
Messages
55
Reaction score
53
Location
Vancouver
Vehicles
Taycan 4s
Country flag
That’s amazing! By the way, if the charging port is changed from CCS1 to CCS2, does it also require re-coding (PIWIS)?
Yes, you need to code both, HV charger and AC charger(2 modules)
 
OP
OP

alex_bell

Well-Known Member
First Name
Alex
Joined
May 8, 2025
Threads
3
Messages
55
Reaction score
53
Location
Vancouver
Vehicles
Taycan 4s
Country flag
did you also modify the AC Type-1 port (J1772) to Type-2 port?
Yes, I got both ports at once, but I don't think they will work, since other port also has AC/DC charger capability, so either AC/DC will not work with AC, or other AC port will not work. Best to change both
 

Chiu

Well-Known Member
First Name
Mickey
Joined
May 31, 2023
Threads
15
Messages
138
Reaction score
38
Location
Taipei
Vehicles
Taycan/F56 JCW
Country flag
Yes, I got both ports at once, but I don't think they will work, since other port also has AC/DC charger capability, so either AC/DC will not work with AC, or other AC port will not work. Best to change both
Exactly the same as the original design logic — AC and DC cannot be used at the same time. Looking forward to your next post! Because I also want to help make CCS1 and Type-2 the global mainstream standards!! 😄
 
OP
OP

alex_bell

Well-Known Member
First Name
Alex
Joined
May 8, 2025
Threads
3
Messages
55
Reaction score
53
Location
Vancouver
Vehicles
Taycan 4s
Country flag
Exactly the same as the original design logic — AC and DC cannot be used at the same time. Looking forward to your next post! Because I also want to help make CCS1 and Type-2 the global mainstream standards!! 😄
Im afraid that will never happen, both type1 and type2 are widely used nowadays

same story as miles vs kms, except its easier to switch miles to kms than type-1 to type-2
 

stephan

New Member
First Name
Stephan
Joined
Jan 18, 2026
Threads
0
Messages
3
Reaction score
0
Location
Germany; Mechernich
Vehicles
Taycan Cross Turismo + Mini JCW Cabrio
Country flag
Hey :)

Does anyone know which VW pins I need to add them to the big connector? My connector hasn't got the needed Pins :(

Thank You very much!
 

MrJones02

Well-Known Member
Joined
Feb 13, 2024
Threads
0
Messages
192
Reaction score
189
Location
Germany
Vehicles
Taycan Turbo
Country flag
Hey :)

Does anyone know which VW pins I need to add them to the big connector? My connector hasn't got the needed Pins :(

Thank You very much!
I got a 32 pin connector with 32 pins of the correct type included from aliexpress for 2 euro
I screwed up 3-4 pins before I got it right so was happy to have extras, but that might just be me and/or the crappy crimp-tool I used :)
Sponsored


Top