Fantasmos
Well-Known Member
- First Name
- Hristo
- Joined
- Nov 19, 2023
- Threads
- 6
- Messages
- 171
- Reaction score
- 163
- Location
- Sofia, Bulgaria
- Vehicles
- Taycan 4S Cross Turismo
- Thread starter
- #1
I've decided to combine a guide to install illuminated sills yourself. It is not completed since I've just finished the rear ones but I will update this post once I am done with the front too. The official info about the installation PDF is attached here. However, it relies on the fact that you have the ready made harnesses for the sills. However, having in mind it's price I guess you will be buying just the sill pieces from ebay like I did or other source so you need to do the harness yourself.
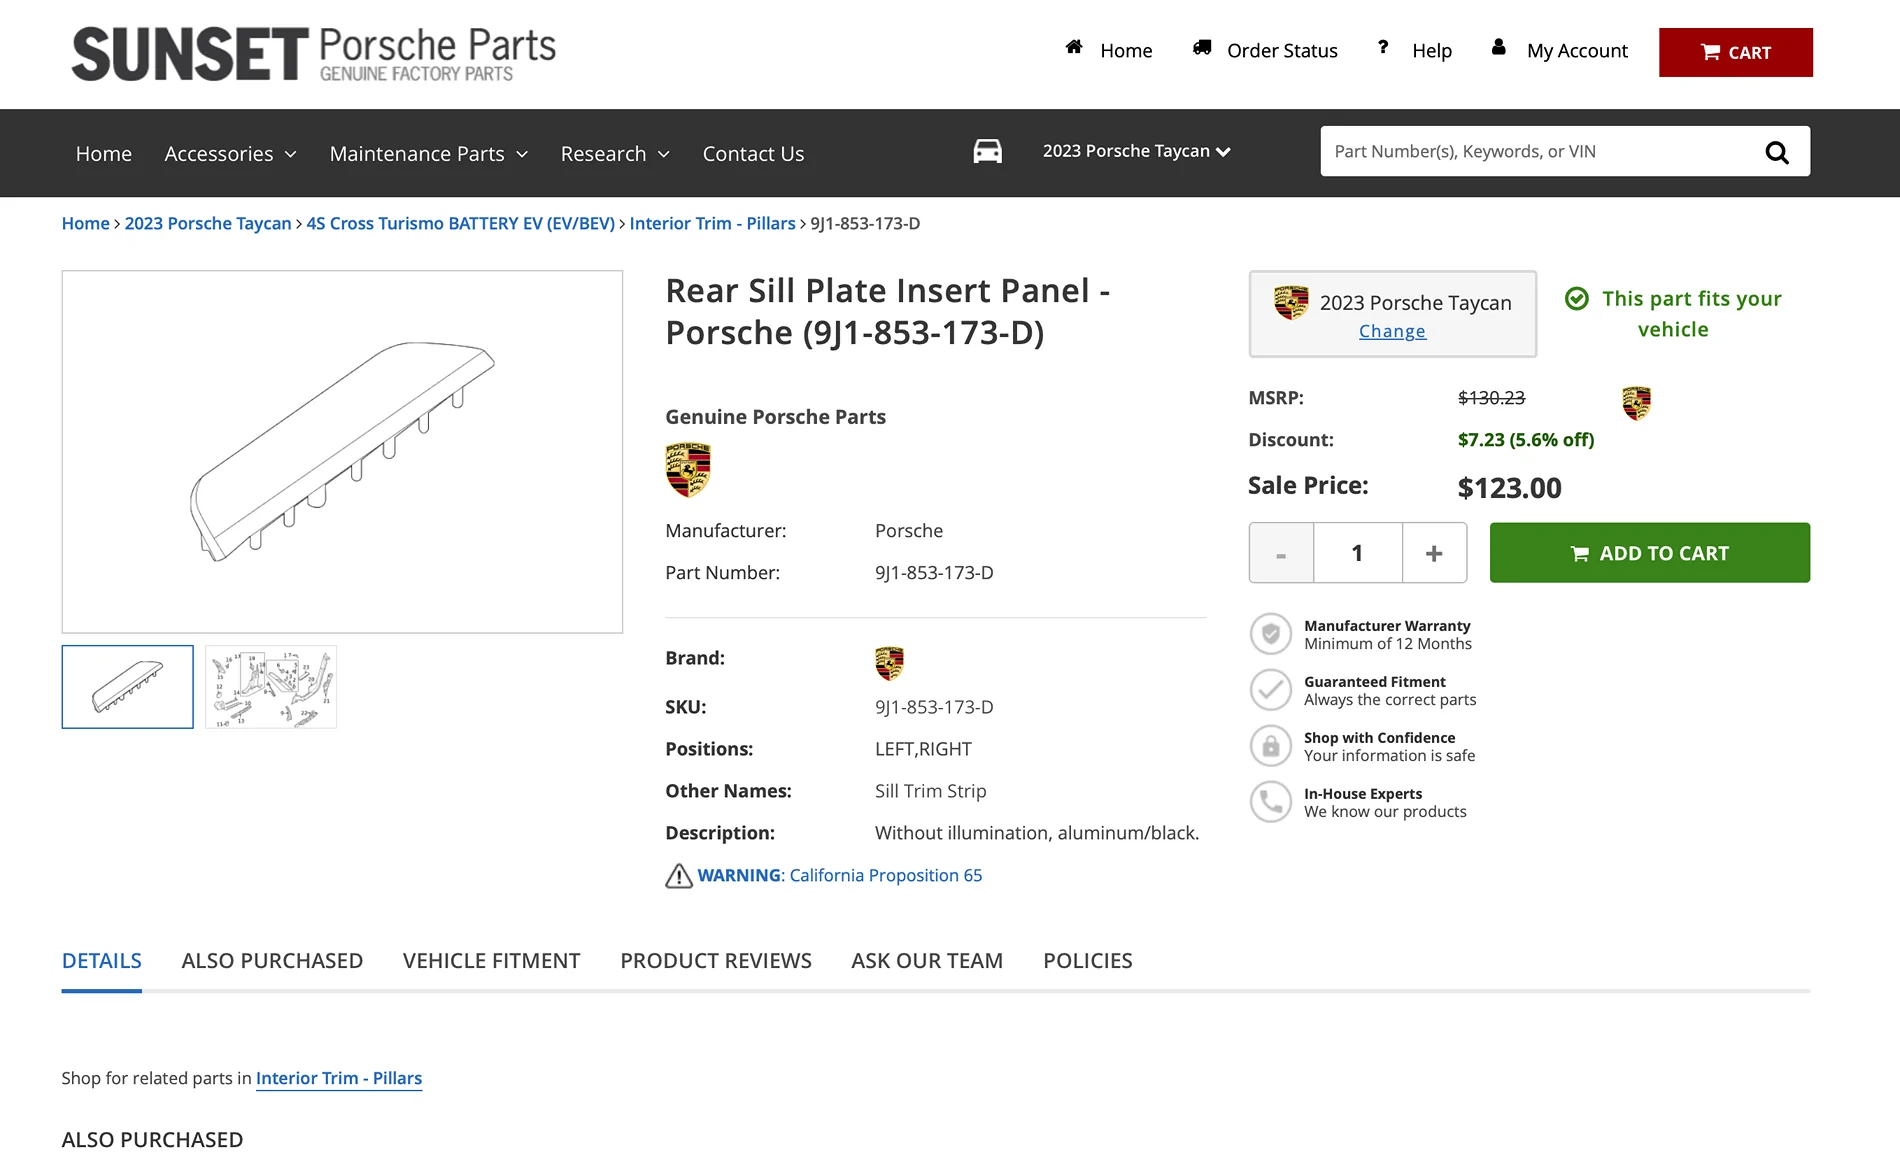
Note: If you have the very basic plastic sills - they are embedded in the main piece and cannot be replaced. If you have the brushed aluminum ones, they can be replaced with the illuminated ones easily.
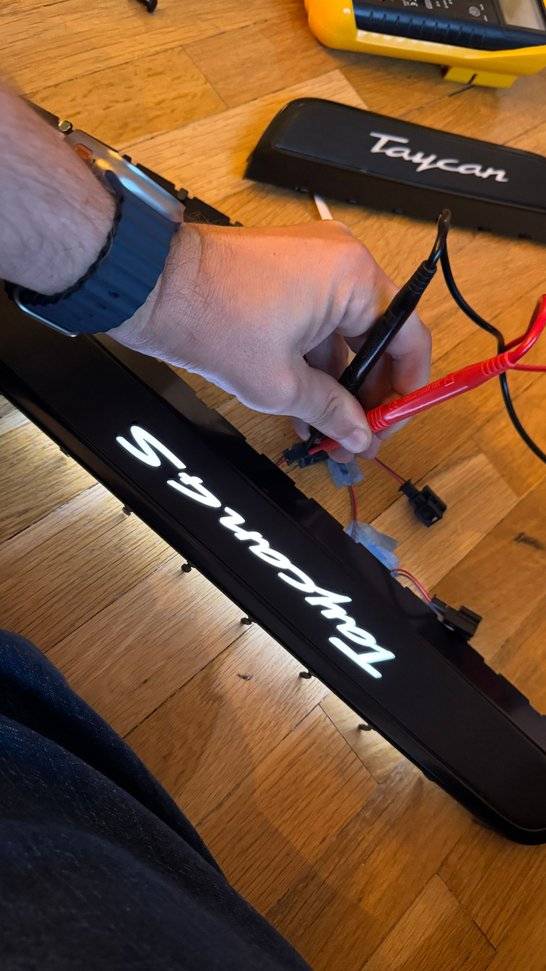
First, once I got them, I checked if they are working just fine and yey, they are")

Second, you need to prepare the harness. Each side has common ground and then you get the positive wire from each door's connector. There is a simple and a “like stock” way to do it. On the side of the sill, you can just cut the sill’s end and use whatever two wire connector for cars you want. You can even solder it or tape it - it’s a led light - plus, ground -> lights on. However, I’ve decided to find the actual connector and make it stock. Of course, that took some time, research and multiple wrong pins ordered…
Link to the connector: 20pcs/lot 1-929080-5
https://a.aliexpress.com/_EJ7tsKy
Link to the pins: 5-928999-1
https://a.aliexpress.com/_EyFS1FS
You need good quality 22AWG silicon wire too. Get a proper silicon wire, don't buy cheap stuff.
On the other end, each cable has ground (standard pin) and one of these that must go into the door connector (male):
https://a.aliexpress.com/_EGG84cY
Of course, you need a good set of crimpers. If yku haven’t done this - get more pins, you will mess few but watch an YT video or two and you will become master in no time.
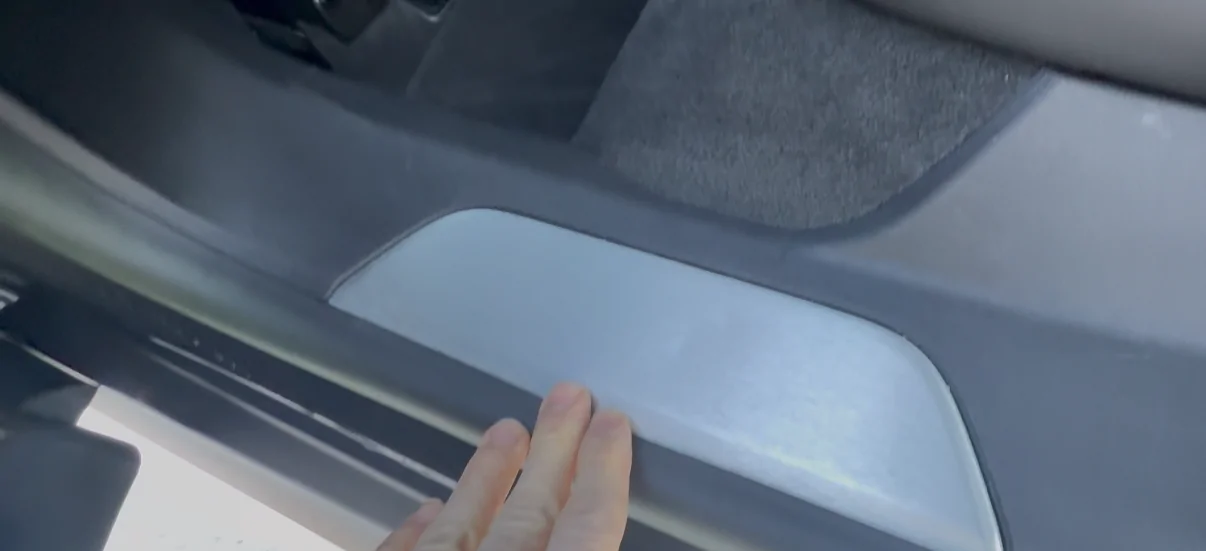
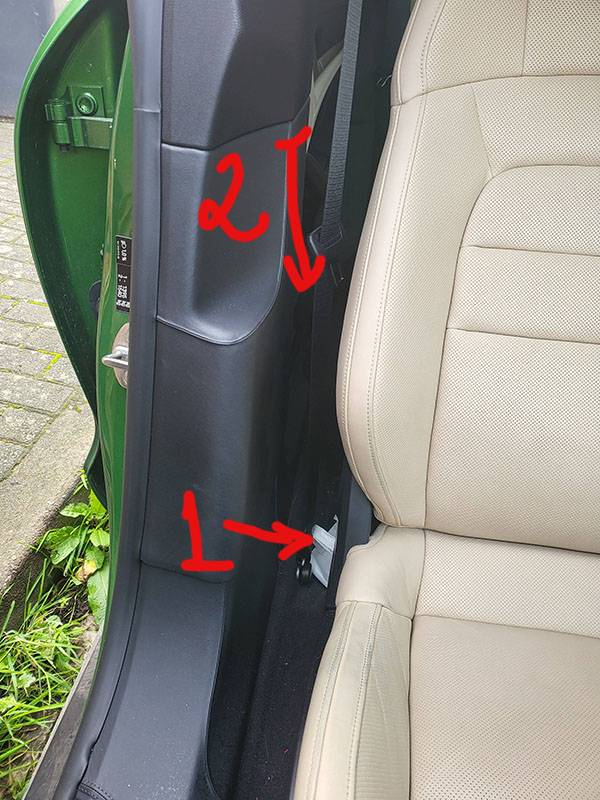
Now, the fun begins with removing the lower piece of the B trim. You pull the lower end inwards toward the seat and then the whole thing down. Here's an an amazing illustration made by me

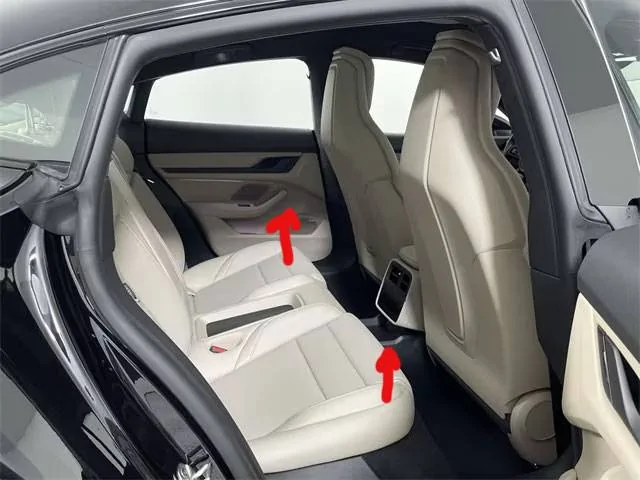
Next, you need to remove the back seat. You pull the front up. Don't worry you can't break anything. Pull the front, lift it, needle through the third seat belt and do not unplug any connectors. Just move it away a bit from the side you're working.

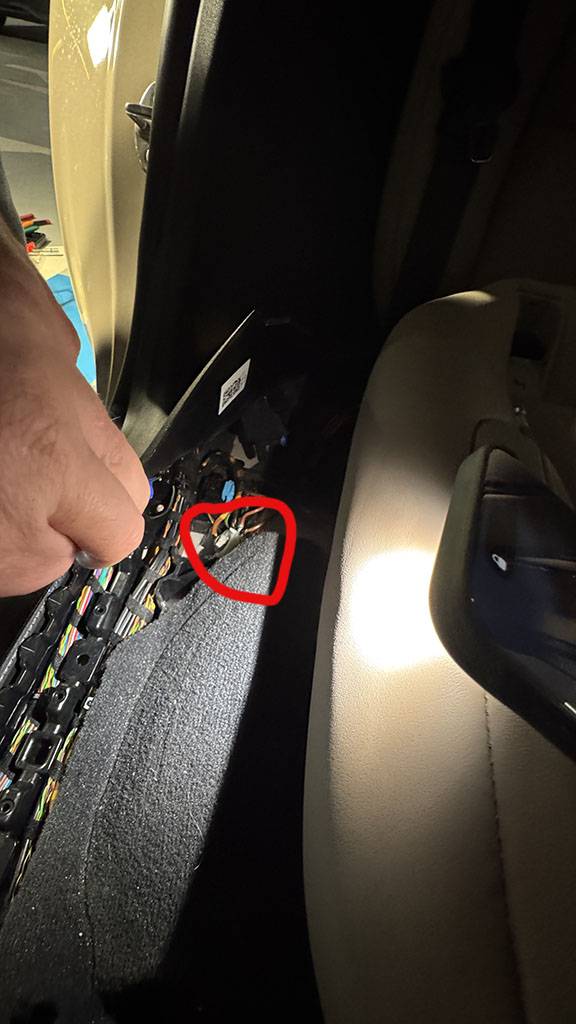
Now that you have access to the rear sill, first pull it a bit from the B pillar and then lift UP. Do this carefully wince there are clips there but don't over stress - it's a very hard and flexible plastic. Once you lift it, the metal piece of the sill that you need to replace will be accessible. You can easily do that with your fingers or screwdriver. Note, that you will need to move away the rubber door insulation but don't remove it completely, just untuck the sill from it. Don't remove the rearmost part of the sill, just lift it up and you will get access to the ground. It's a standard 10mm socket, unscrew it and link your ground wire there.

Now, when you do the harness, link the both ground wires there since the front door doesn't have a separate ground wire. Just link the two on the same pin and tie them there. leave a longer ground wire for the front - you will crimp it once you start working on the front sills later on.
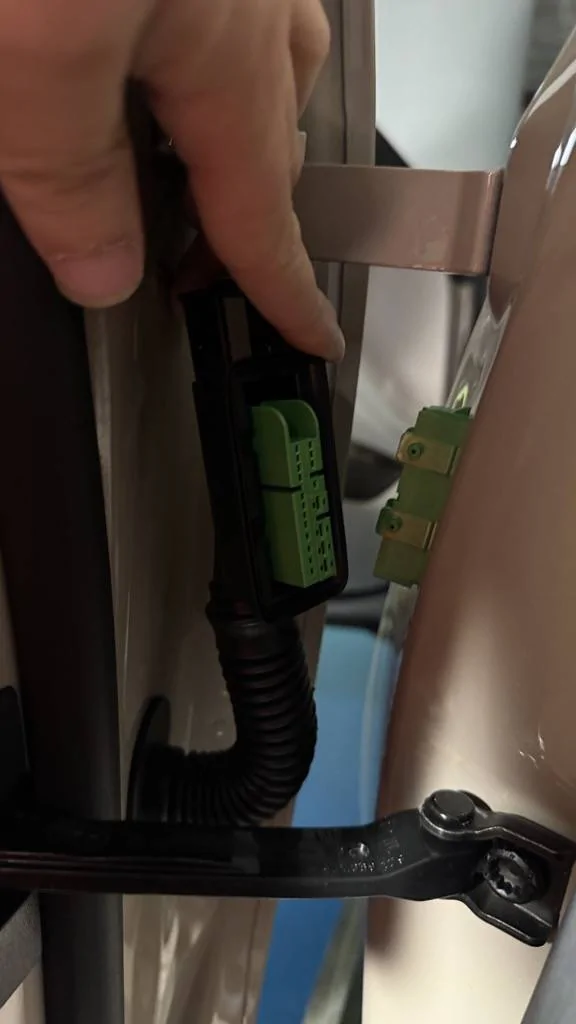
Tuck the two wires, click your cable to the the sill and put everything but the piece you removed first together. Needle the red (positive) wire through the door and let it stay there. Now you need to unplug the door connector.
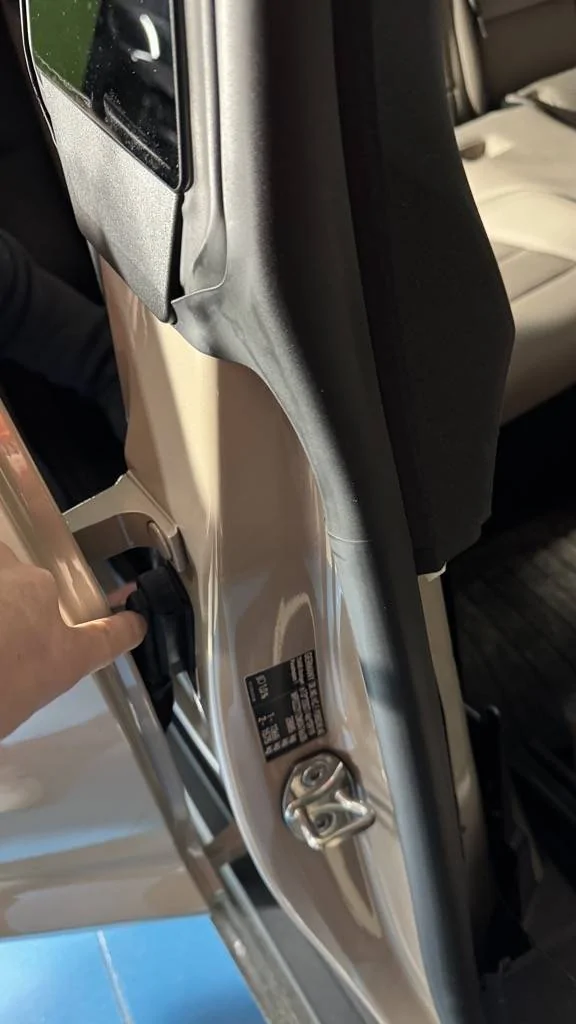
Open the door and remove it from the outside. You need to pull the lock up and then outwards.
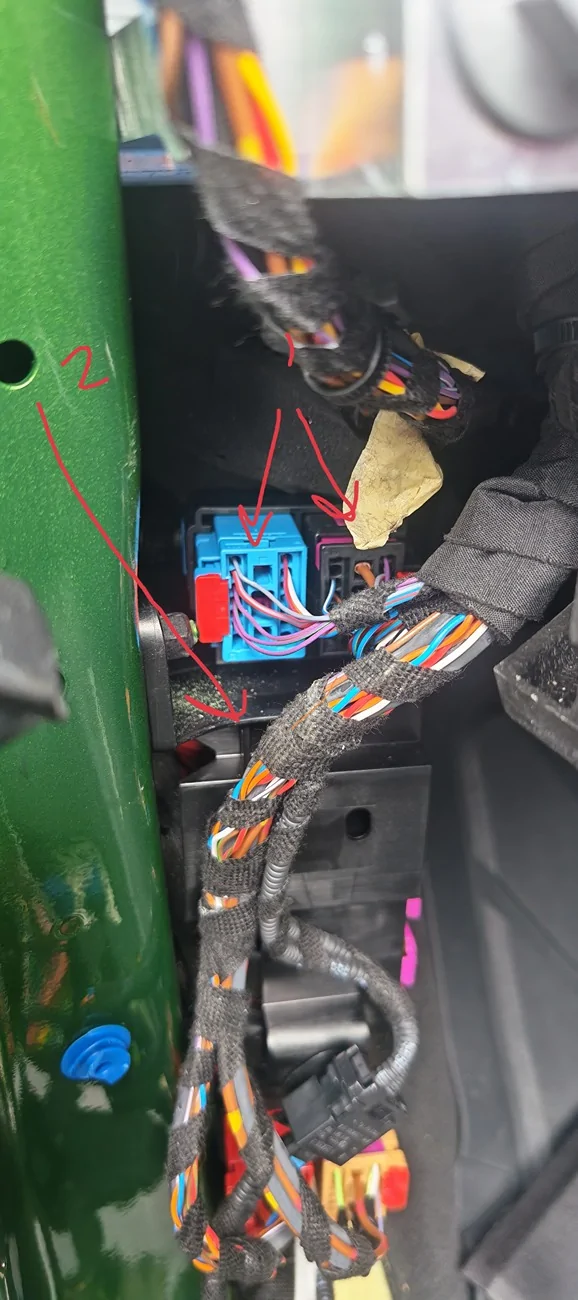
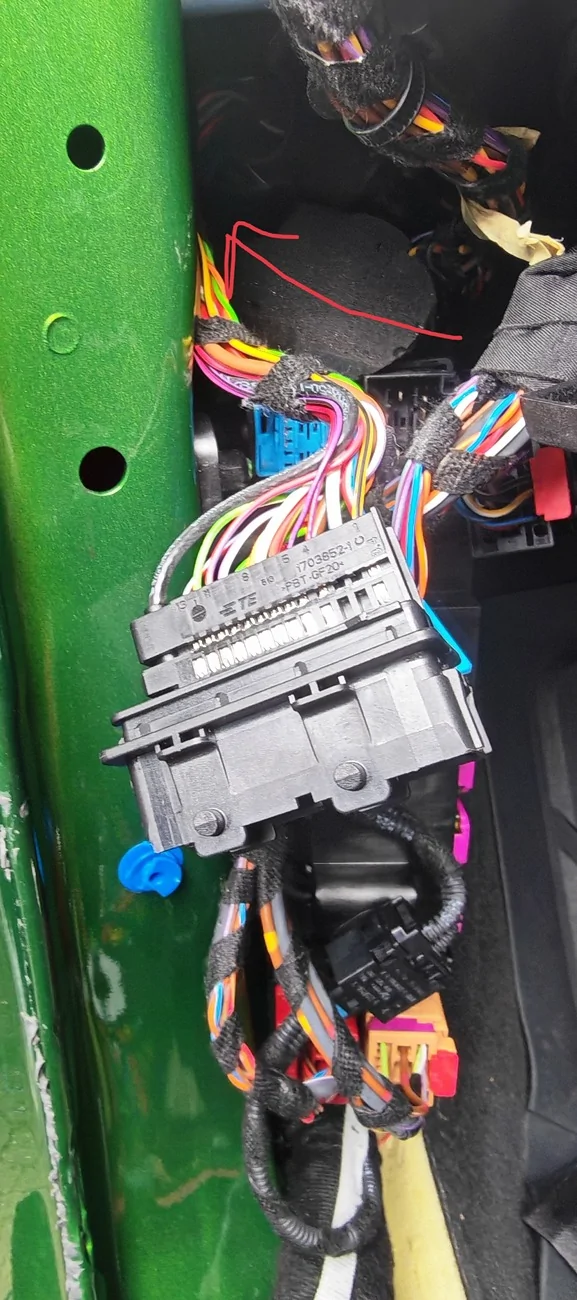
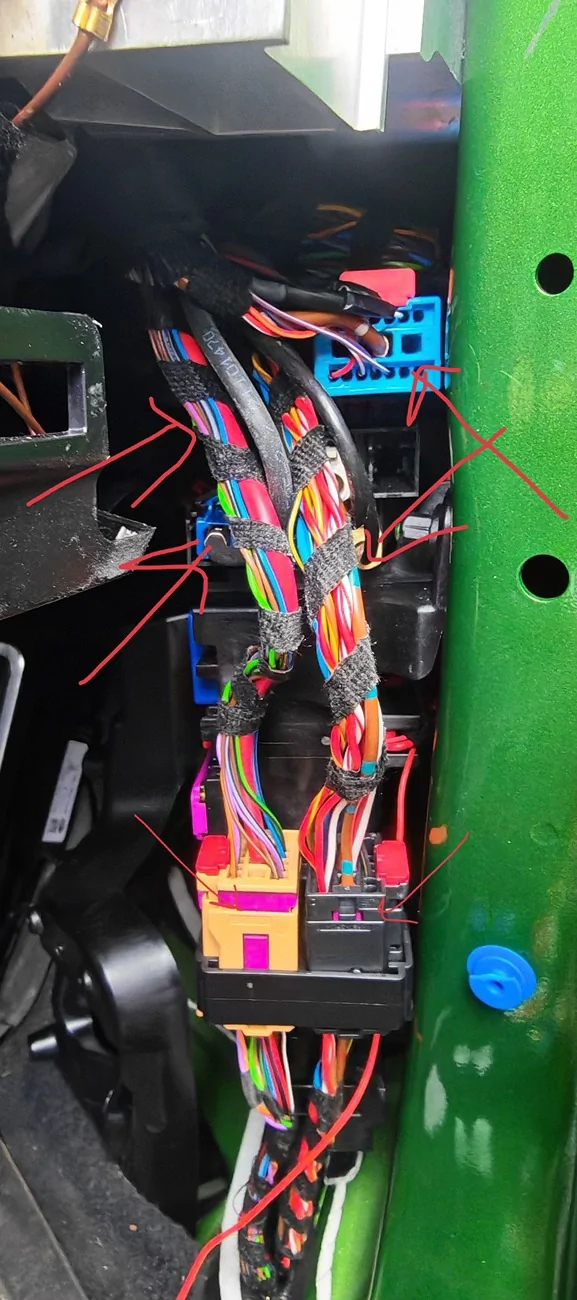
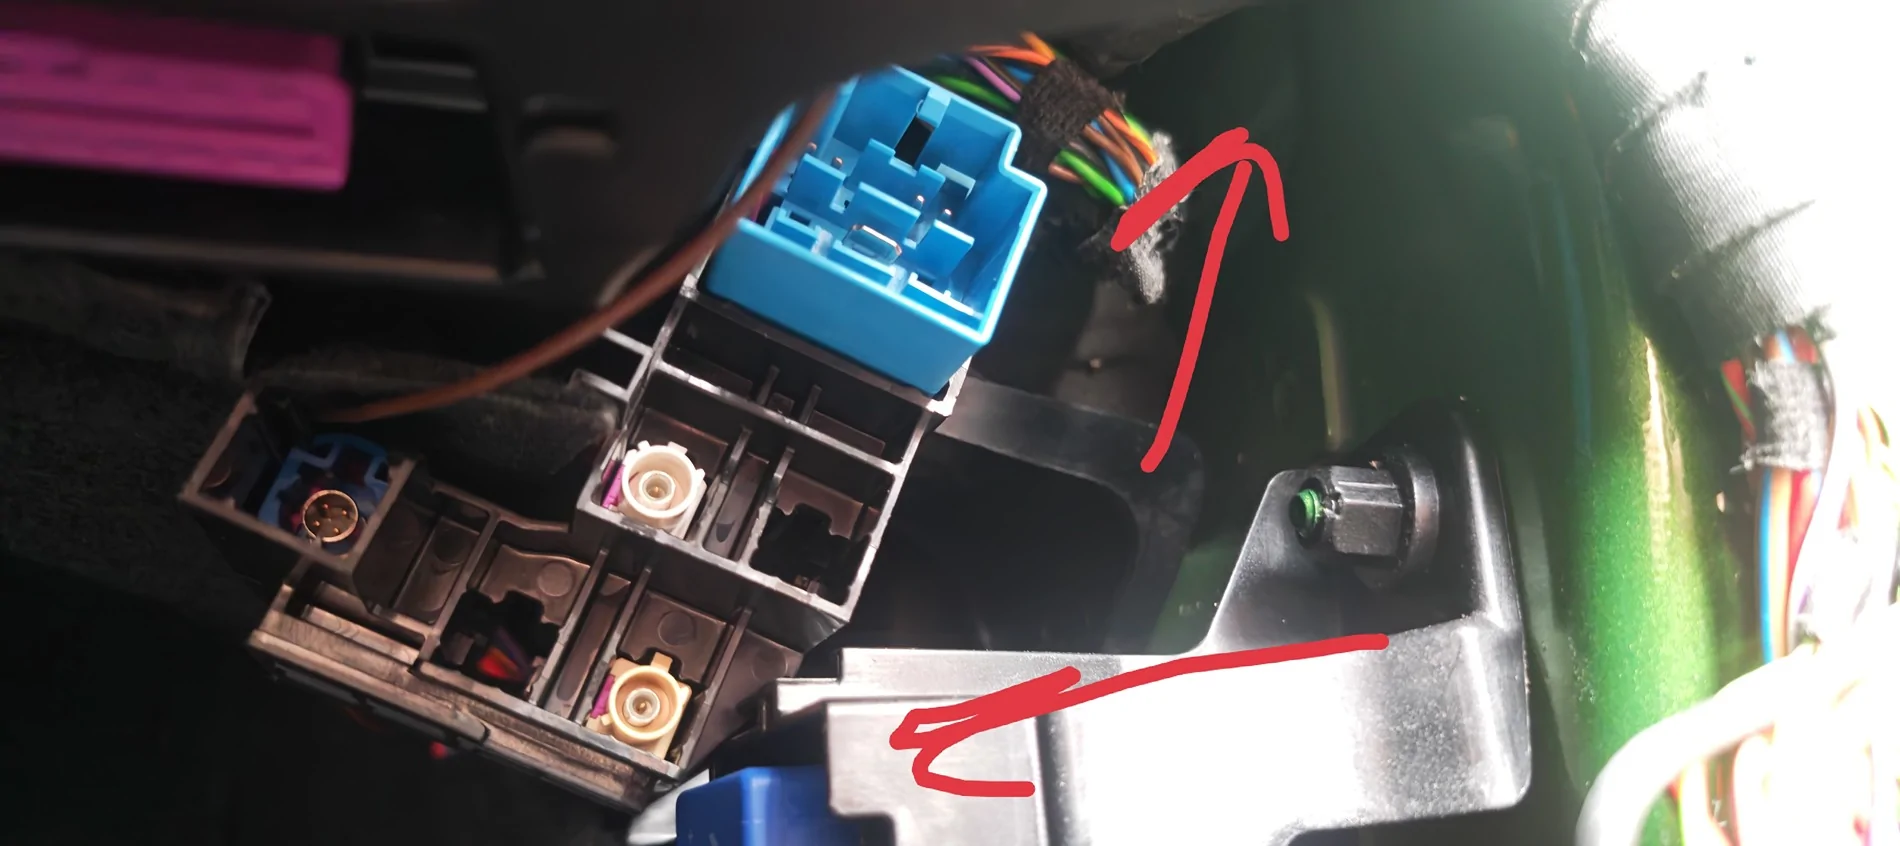
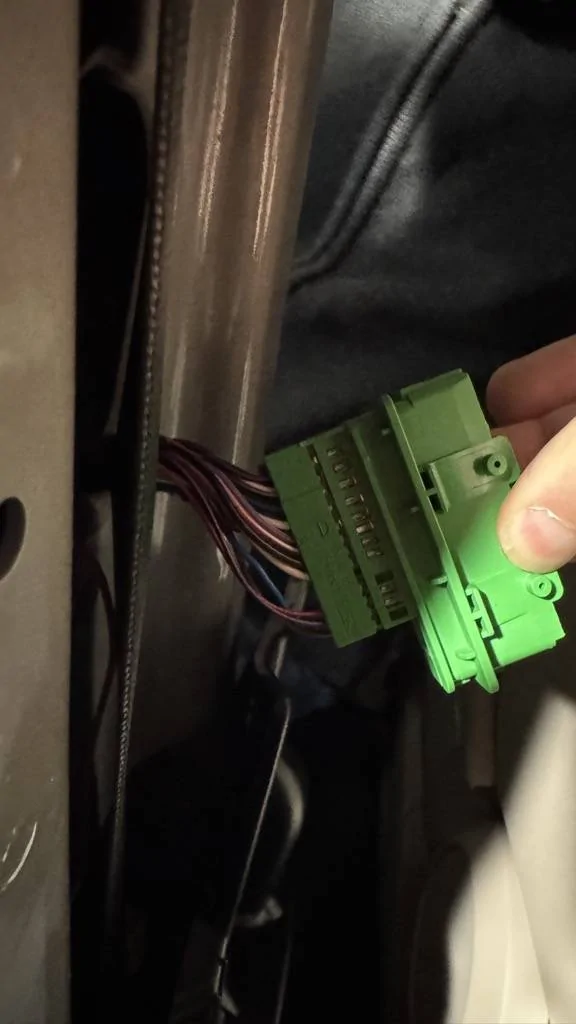
Once you unplug the connector, push the other end inside the pillar. Use your fingers to press both ends to unlock and then inwards.
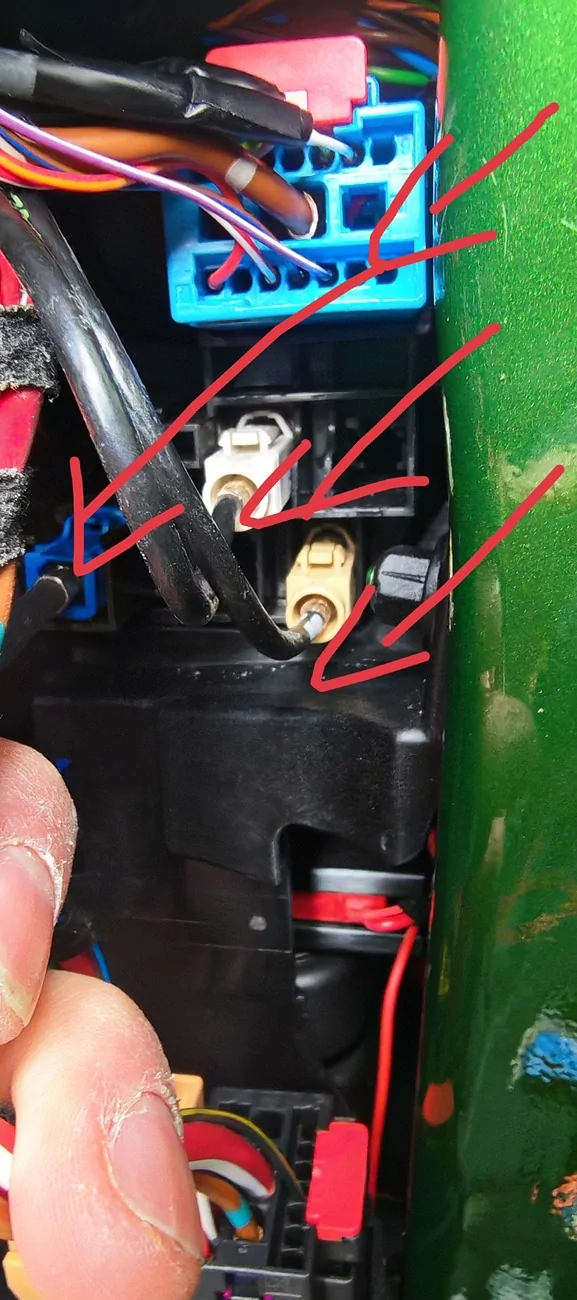
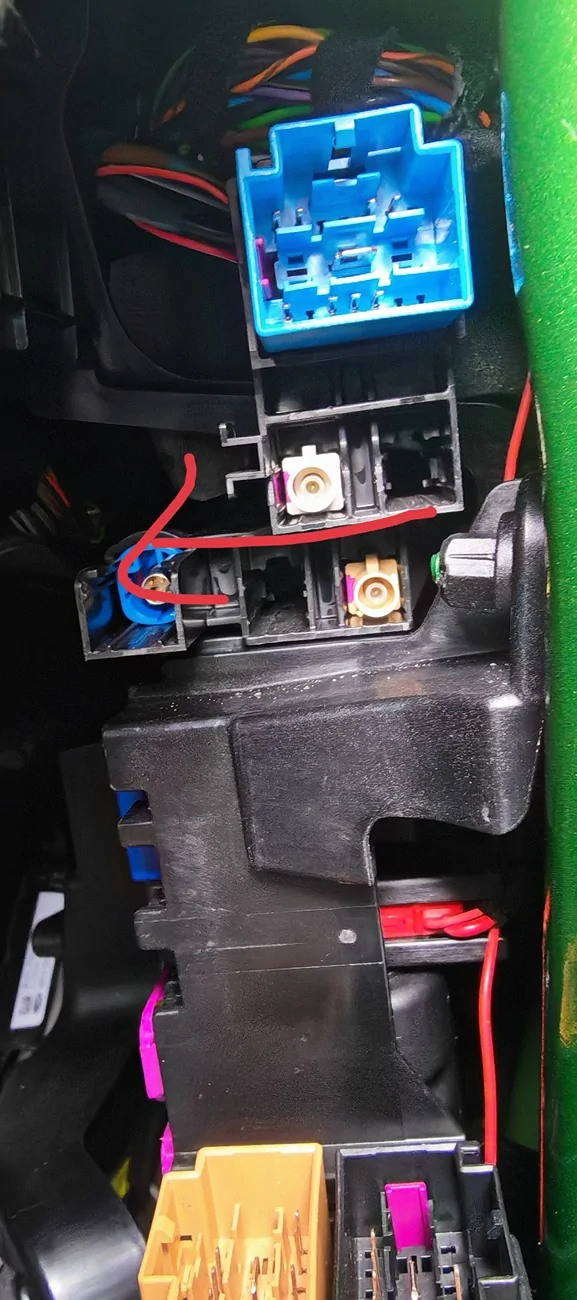
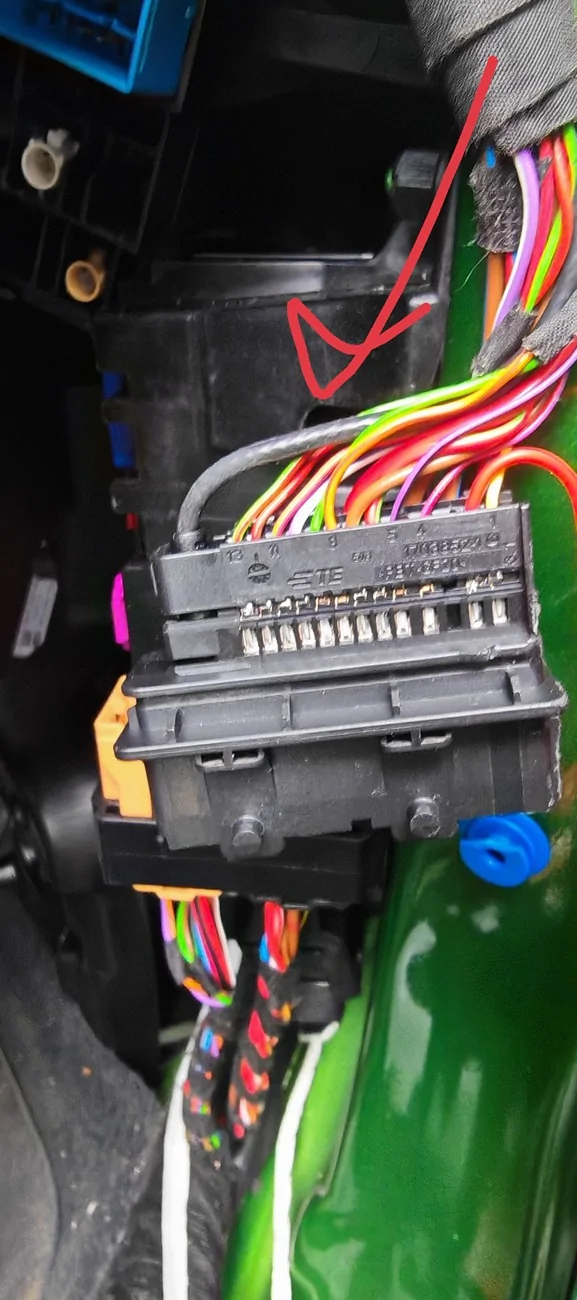
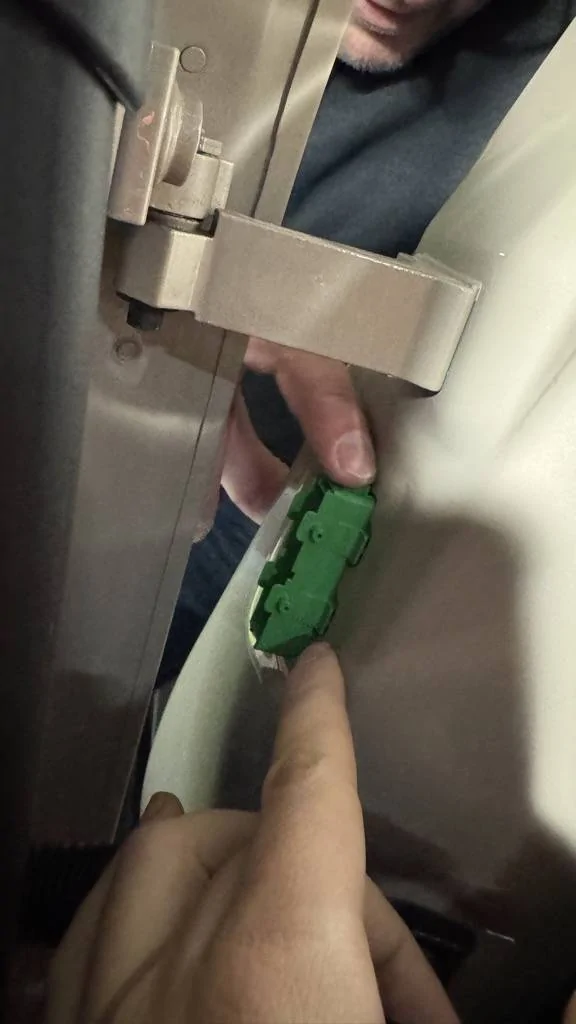
Now from inside the vehicle, slide the piece of the connector that protects the pin. It's difficult to explain. Unclip it and slide it. Just take a look at it for few minutes and don't break it.
Once you gain access to it, plug in on Pin 9. and clip it back together. Make sure you hear the clicking noise from the pin when you add it to the connector. Put everything back together and go get your remote. Close the door, lock the car, unlock the car and then open it. Sills should work just fine The sills should illuminate when you open the door and fade out when you close it.
At the end of this part you should have working rear end sills and a black ground wire tucked away for the front sills. Next, we will have to get power from the front end (Pin 2) but there will be more disassembling because the connector is much harder to get access to. I hope to do it next weekend
Note: If you have the very basic plastic sills - they are embedded in the main piece and cannot be replaced. If you have the brushed aluminum ones, they can be replaced with the illuminated ones easily.
First, once I got them, I checked if they are working just fine and yey, they are
Second, you need to prepare the harness. Each side has common ground and then you get the positive wire from each door's connector. There is a simple and a “like stock” way to do it. On the side of the sill, you can just cut the sill’s end and use whatever two wire connector for cars you want. You can even solder it or tape it - it’s a led light - plus, ground -> lights on. However, I’ve decided to find the actual connector and make it stock. Of course, that took some time, research and multiple wrong pins ordered…
Link to the connector: 20pcs/lot 1-929080-5
https://a.aliexpress.com/_EJ7tsKy
Link to the pins: 5-928999-1
https://a.aliexpress.com/_EyFS1FS
You need good quality 22AWG silicon wire too. Get a proper silicon wire, don't buy cheap stuff.
On the other end, each cable has ground (standard pin) and one of these that must go into the door connector (male):
https://a.aliexpress.com/_EGG84cY
Of course, you need a good set of crimpers. If yku haven’t done this - get more pins, you will mess few but watch an YT video or two and you will become master in no time.
Now, the fun begins with removing the lower piece of the B trim. You pull the lower end inwards toward the seat and then the whole thing down. Here's an an amazing illustration made by me
Next, you need to remove the back seat. You pull the front up. Don't worry you can't break anything. Pull the front, lift it, needle through the third seat belt and do not unplug any connectors. Just move it away a bit from the side you're working.
Now that you have access to the rear sill, first pull it a bit from the B pillar and then lift UP. Do this carefully wince there are clips there but don't over stress - it's a very hard and flexible plastic. Once you lift it, the metal piece of the sill that you need to replace will be accessible. You can easily do that with your fingers or screwdriver. Note, that you will need to move away the rubber door insulation but don't remove it completely, just untuck the sill from it. Don't remove the rearmost part of the sill, just lift it up and you will get access to the ground. It's a standard 10mm socket, unscrew it and link your ground wire there.
Now, when you do the harness, link the both ground wires there since the front door doesn't have a separate ground wire. Just link the two on the same pin and tie them there. leave a longer ground wire for the front - you will crimp it once you start working on the front sills later on.
Tuck the two wires, click your cable to the the sill and put everything but the piece you removed first together. Needle the red (positive) wire through the door and let it stay there. Now you need to unplug the door connector.
Open the door and remove it from the outside. You need to pull the lock up and then outwards.
Once you unplug the connector, push the other end inside the pillar. Use your fingers to press both ends to unlock and then inwards.
Now from inside the vehicle, slide the piece of the connector that protects the pin. It's difficult to explain. Unclip it and slide it. Just take a look at it for few minutes and don't break it.
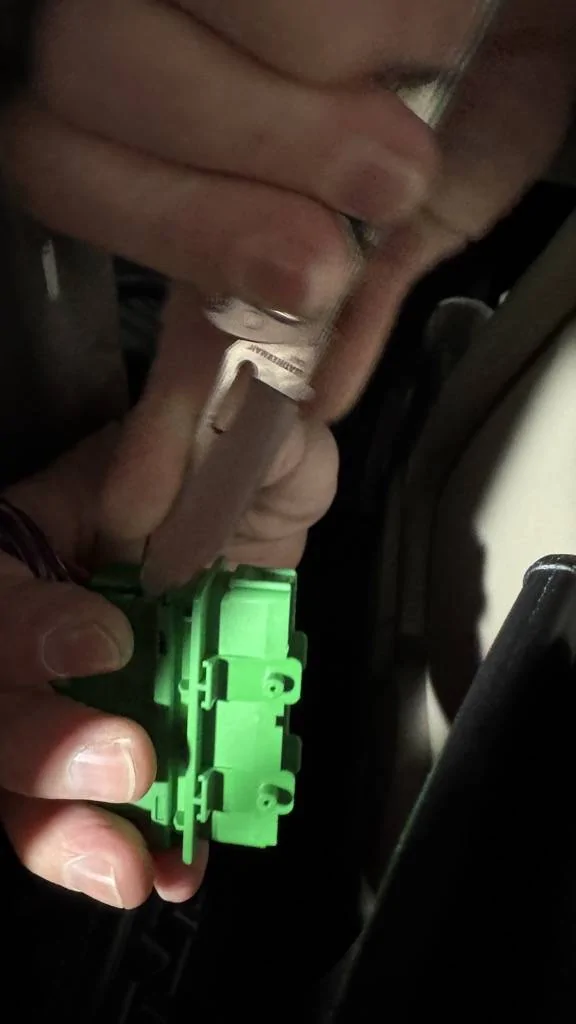
Once you gain access to it, plug in on Pin 9. and clip it back together. Make sure you hear the clicking noise from the pin when you add it to the connector. Put everything back together and go get your remote. Close the door, lock the car, unlock the car and then open it. Sills should work just fine
The sills should illuminate when you open the door and fade out when you close it.At the end of this part you should have working rear end sills and a black ground wire tucked away for the front sills. Next, we will have to get power from the front end (Pin 2) but there will be more disassembling because the connector is much harder to get access to. I hope to do it next weekend

Sponsored
Attachments
-
184.6 KB Views: 751
Last edited: