PDACPA
Well-Known Member
- First Name
- PDA
- Joined
- Feb 21, 2020
- Threads
- 23
- Messages
- 992
- Reaction score
- 411
- Location
- Tampa, FL
- Vehicles
- 2021 Taycan RWD, 1989 911 Carrera
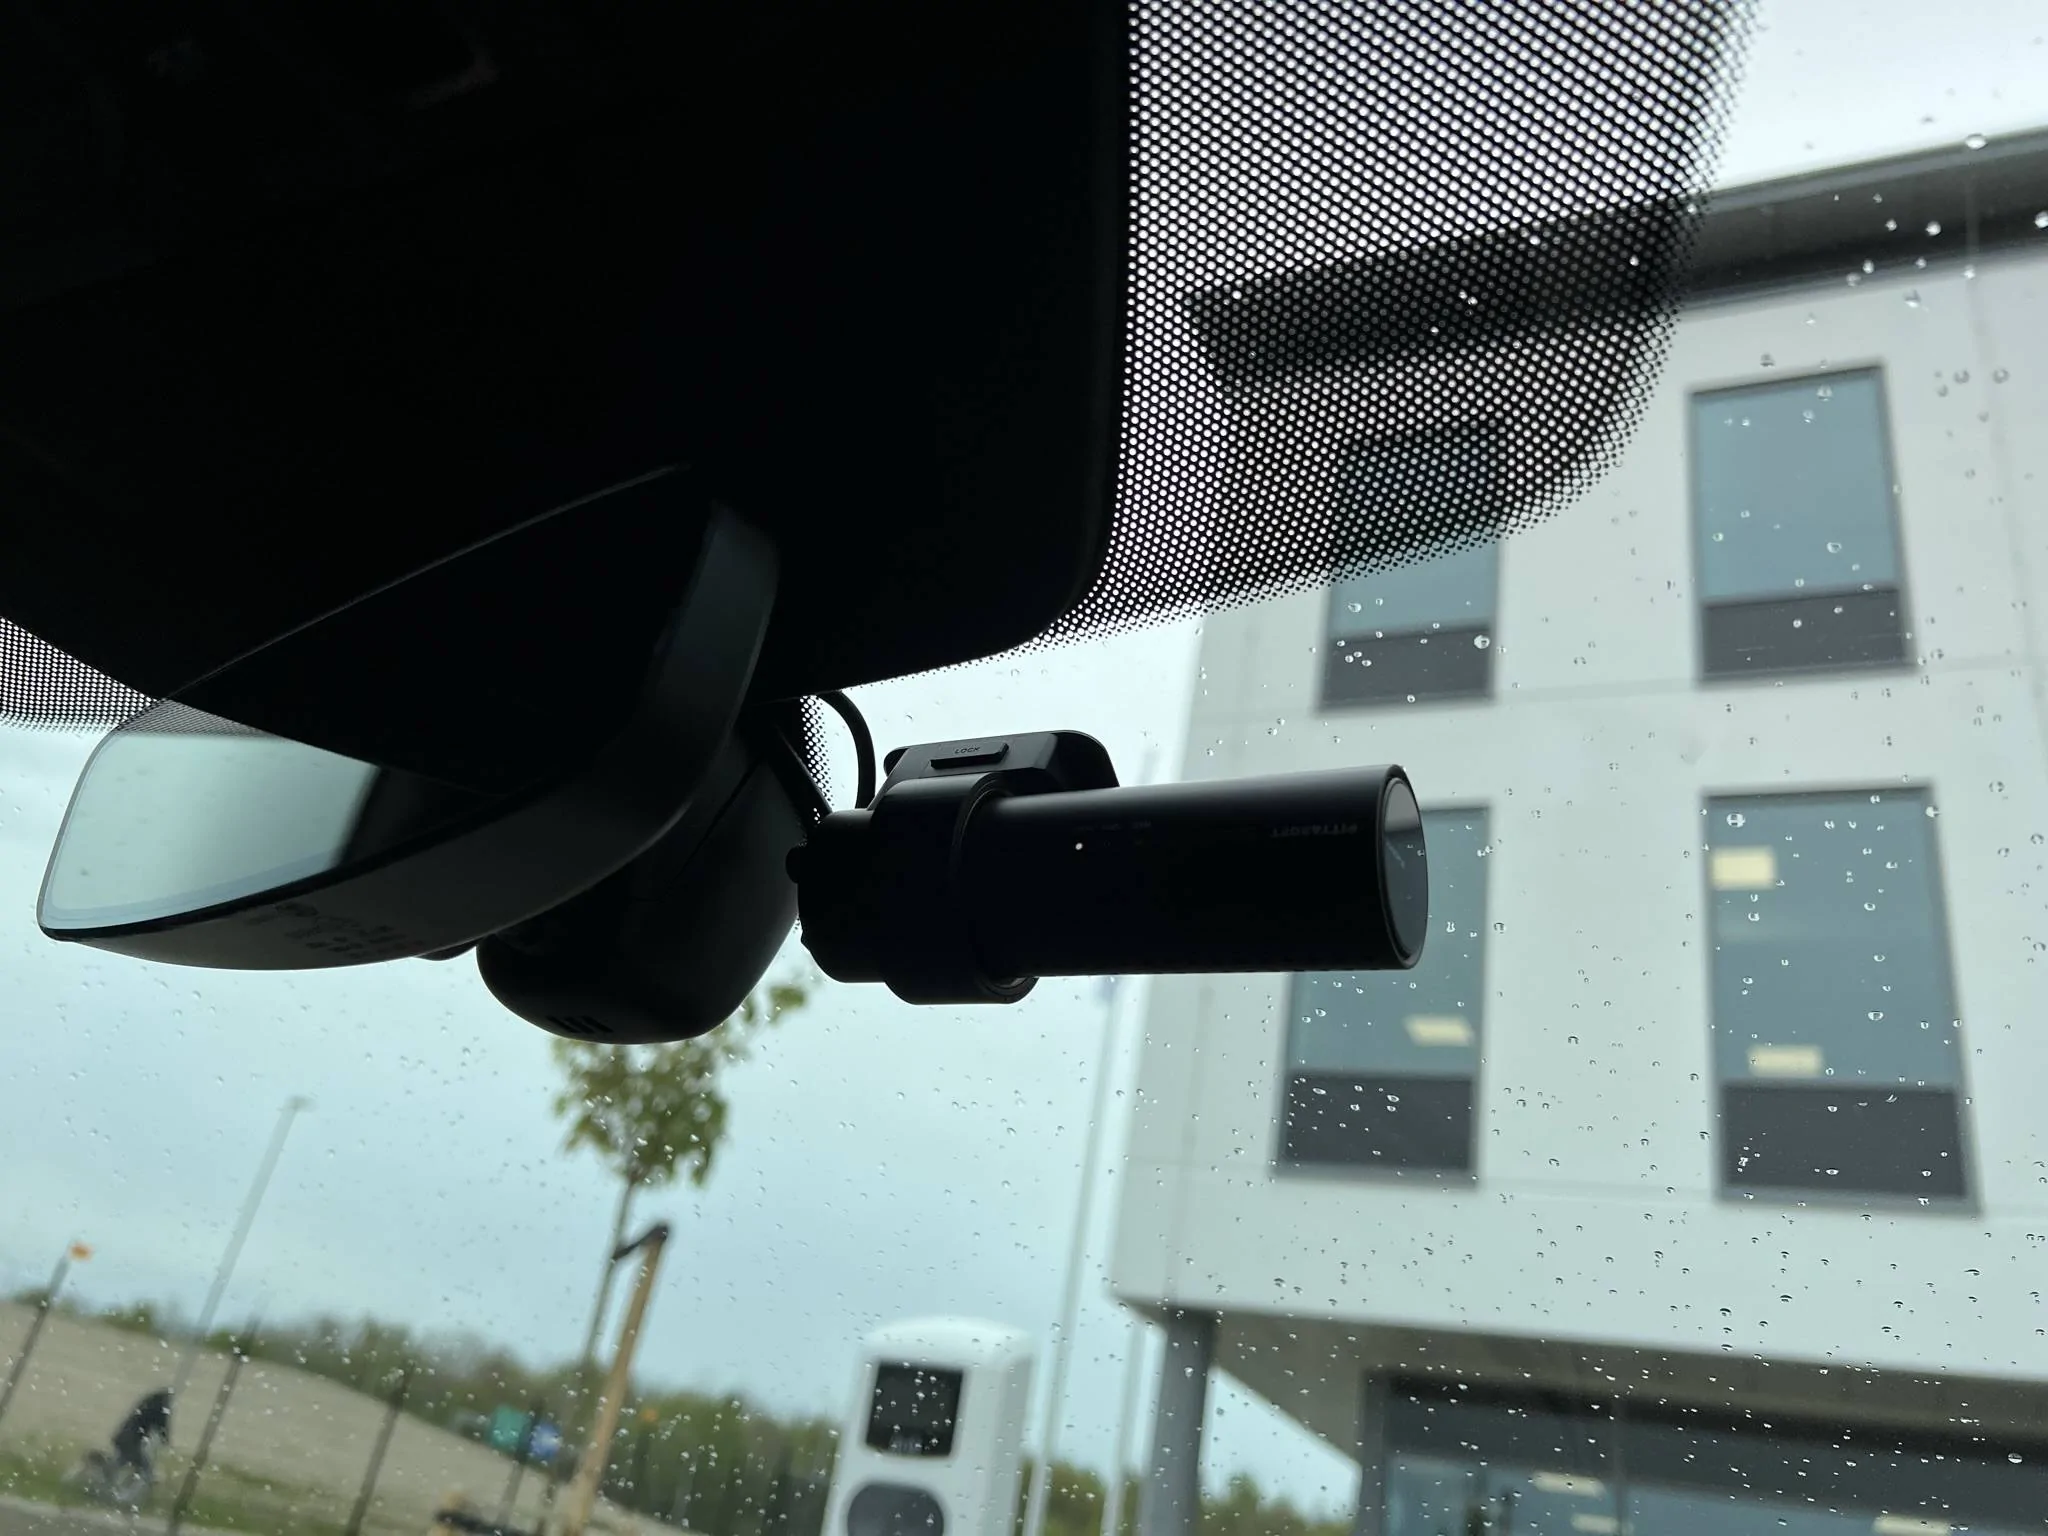
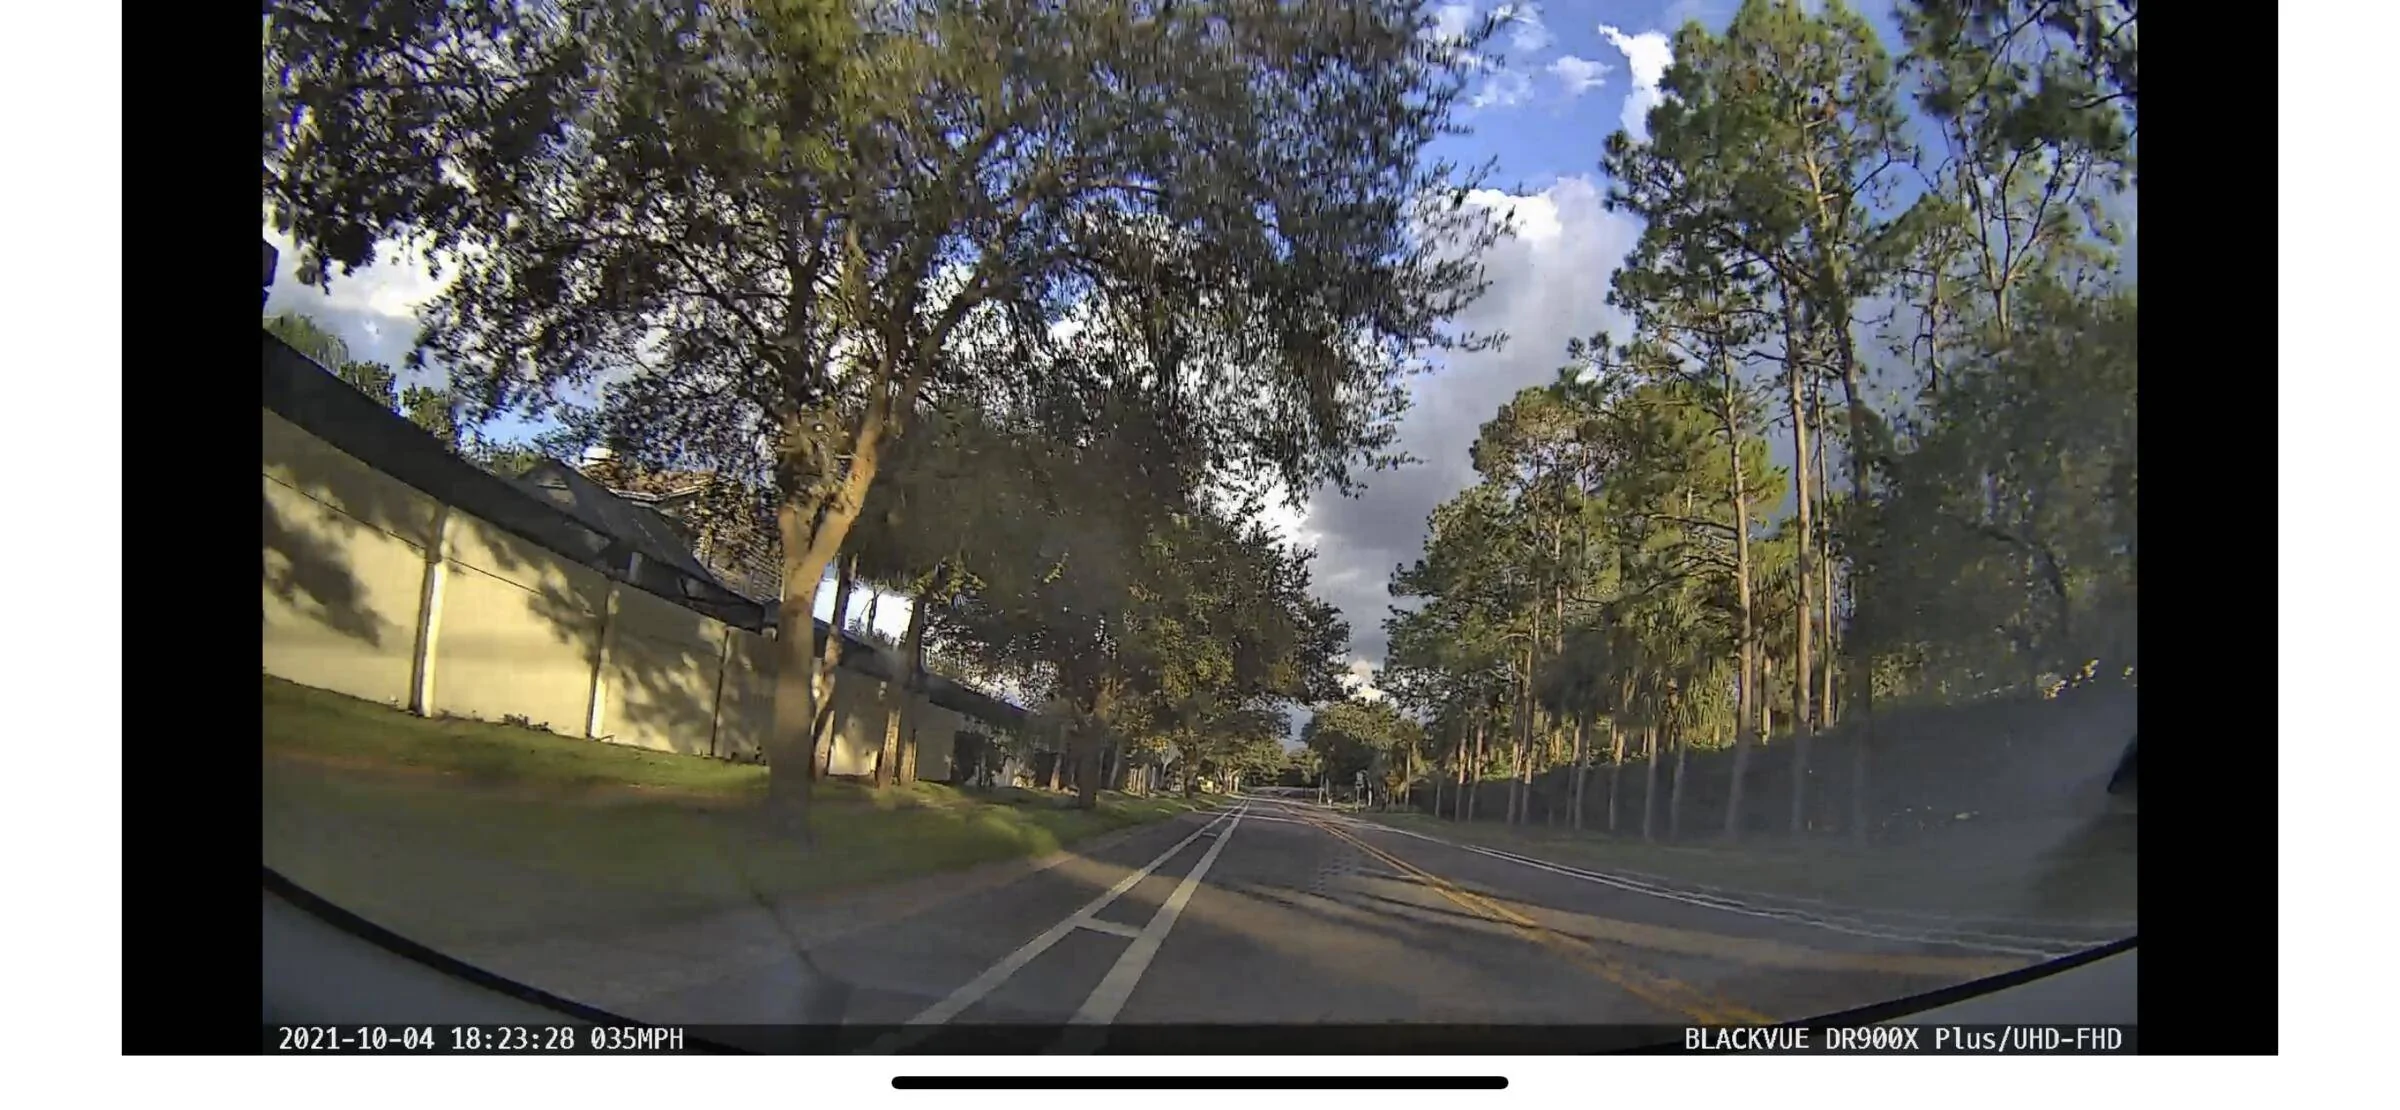
Thanks for this thread. Helped me easily wire my Blackvue DR900X-2CH Plus. I thought I would add a couple of additional notes and pics to aid in other installs that I researched during my installation. Do at your own risk. I am just a DIY'er.
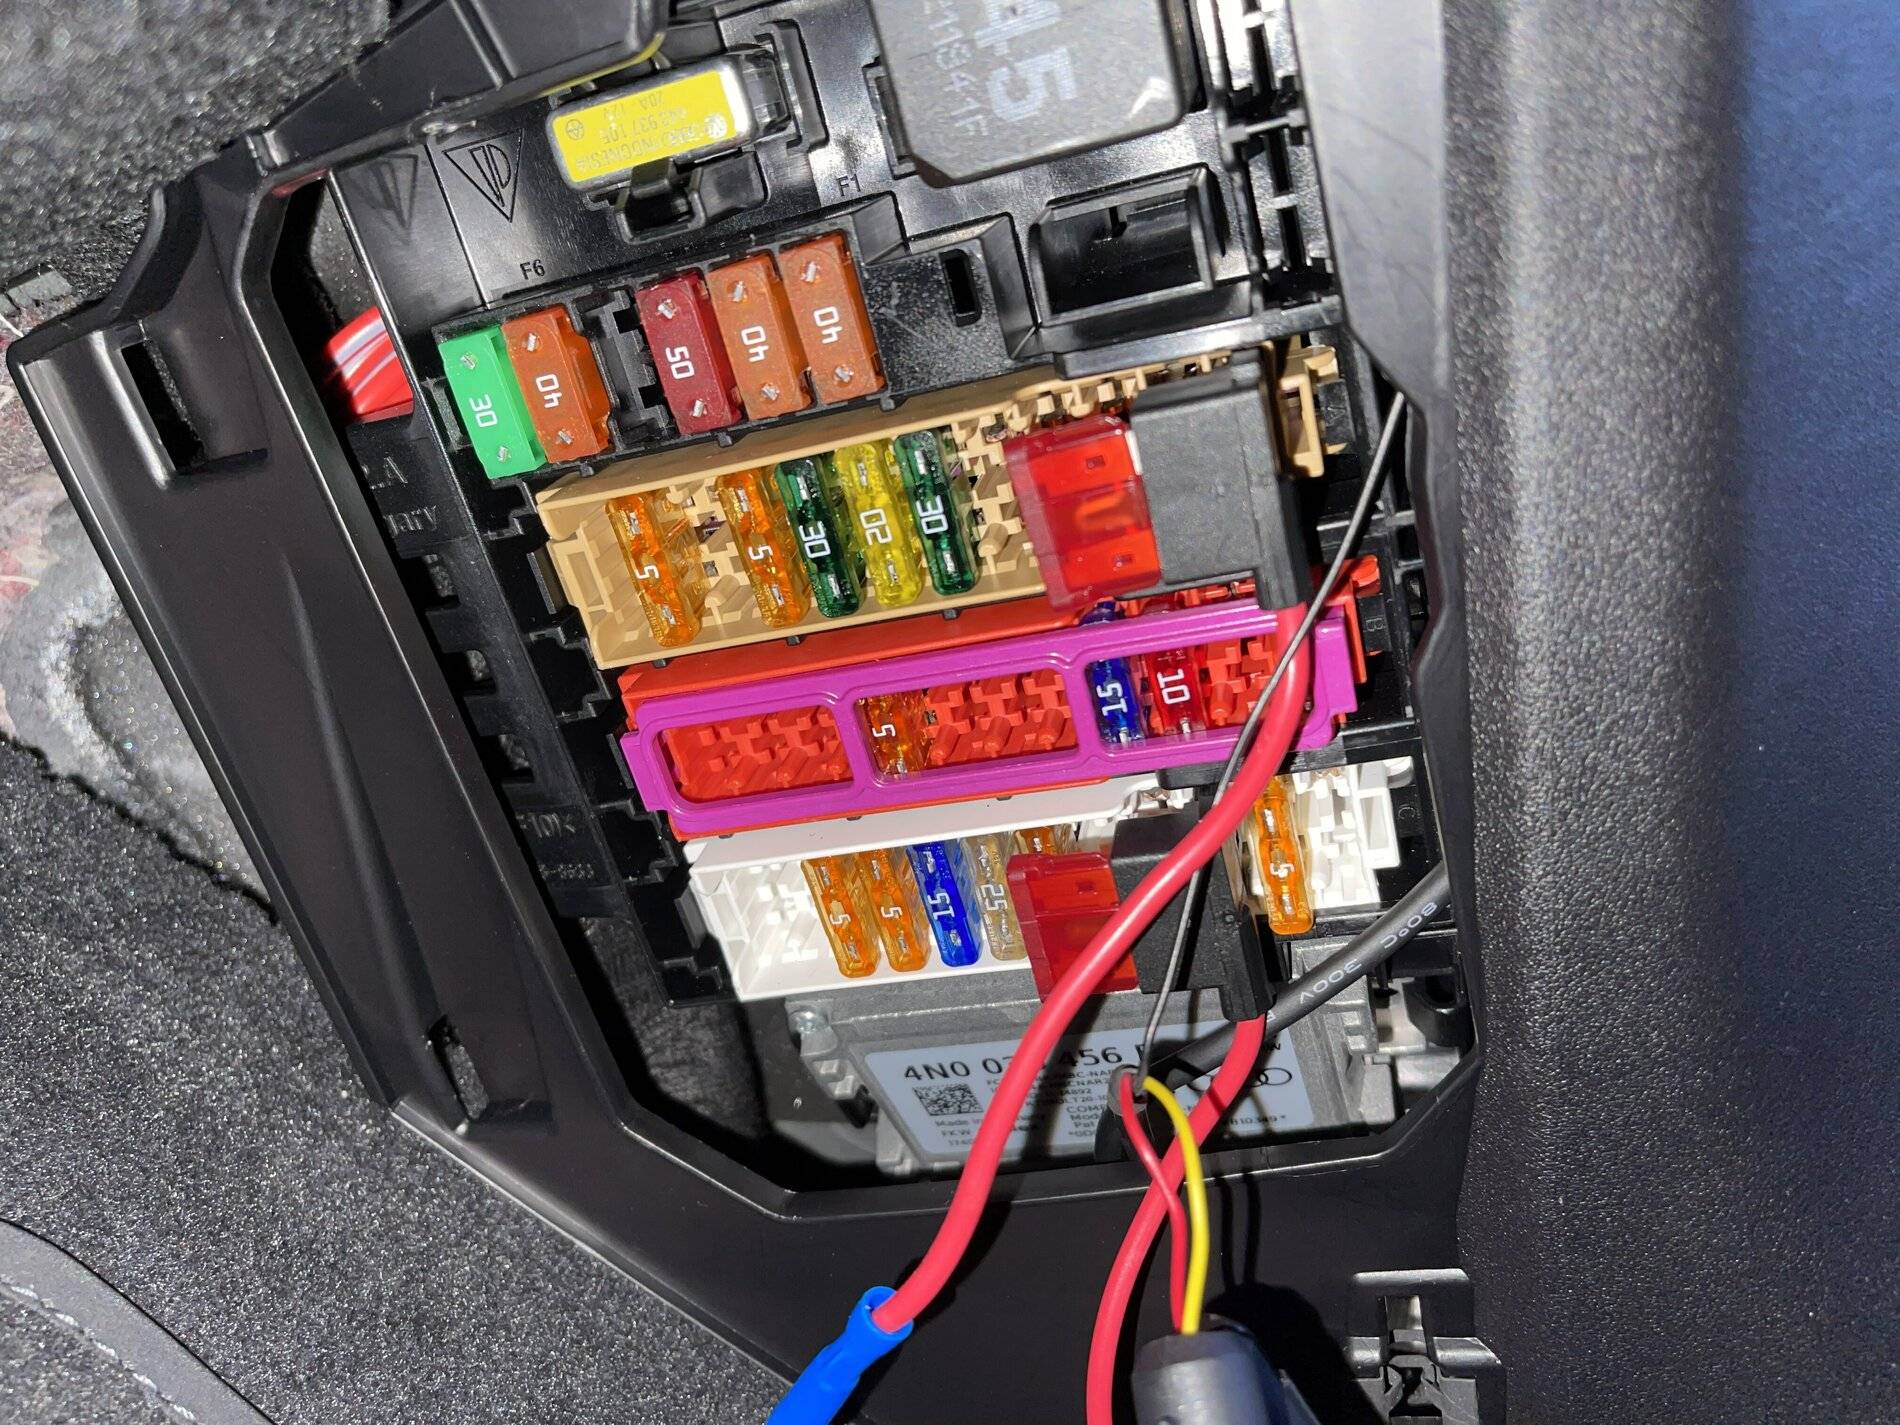
1. Blackvue says you can use 10a-30a fuses. I used the 10a as others had done the same.
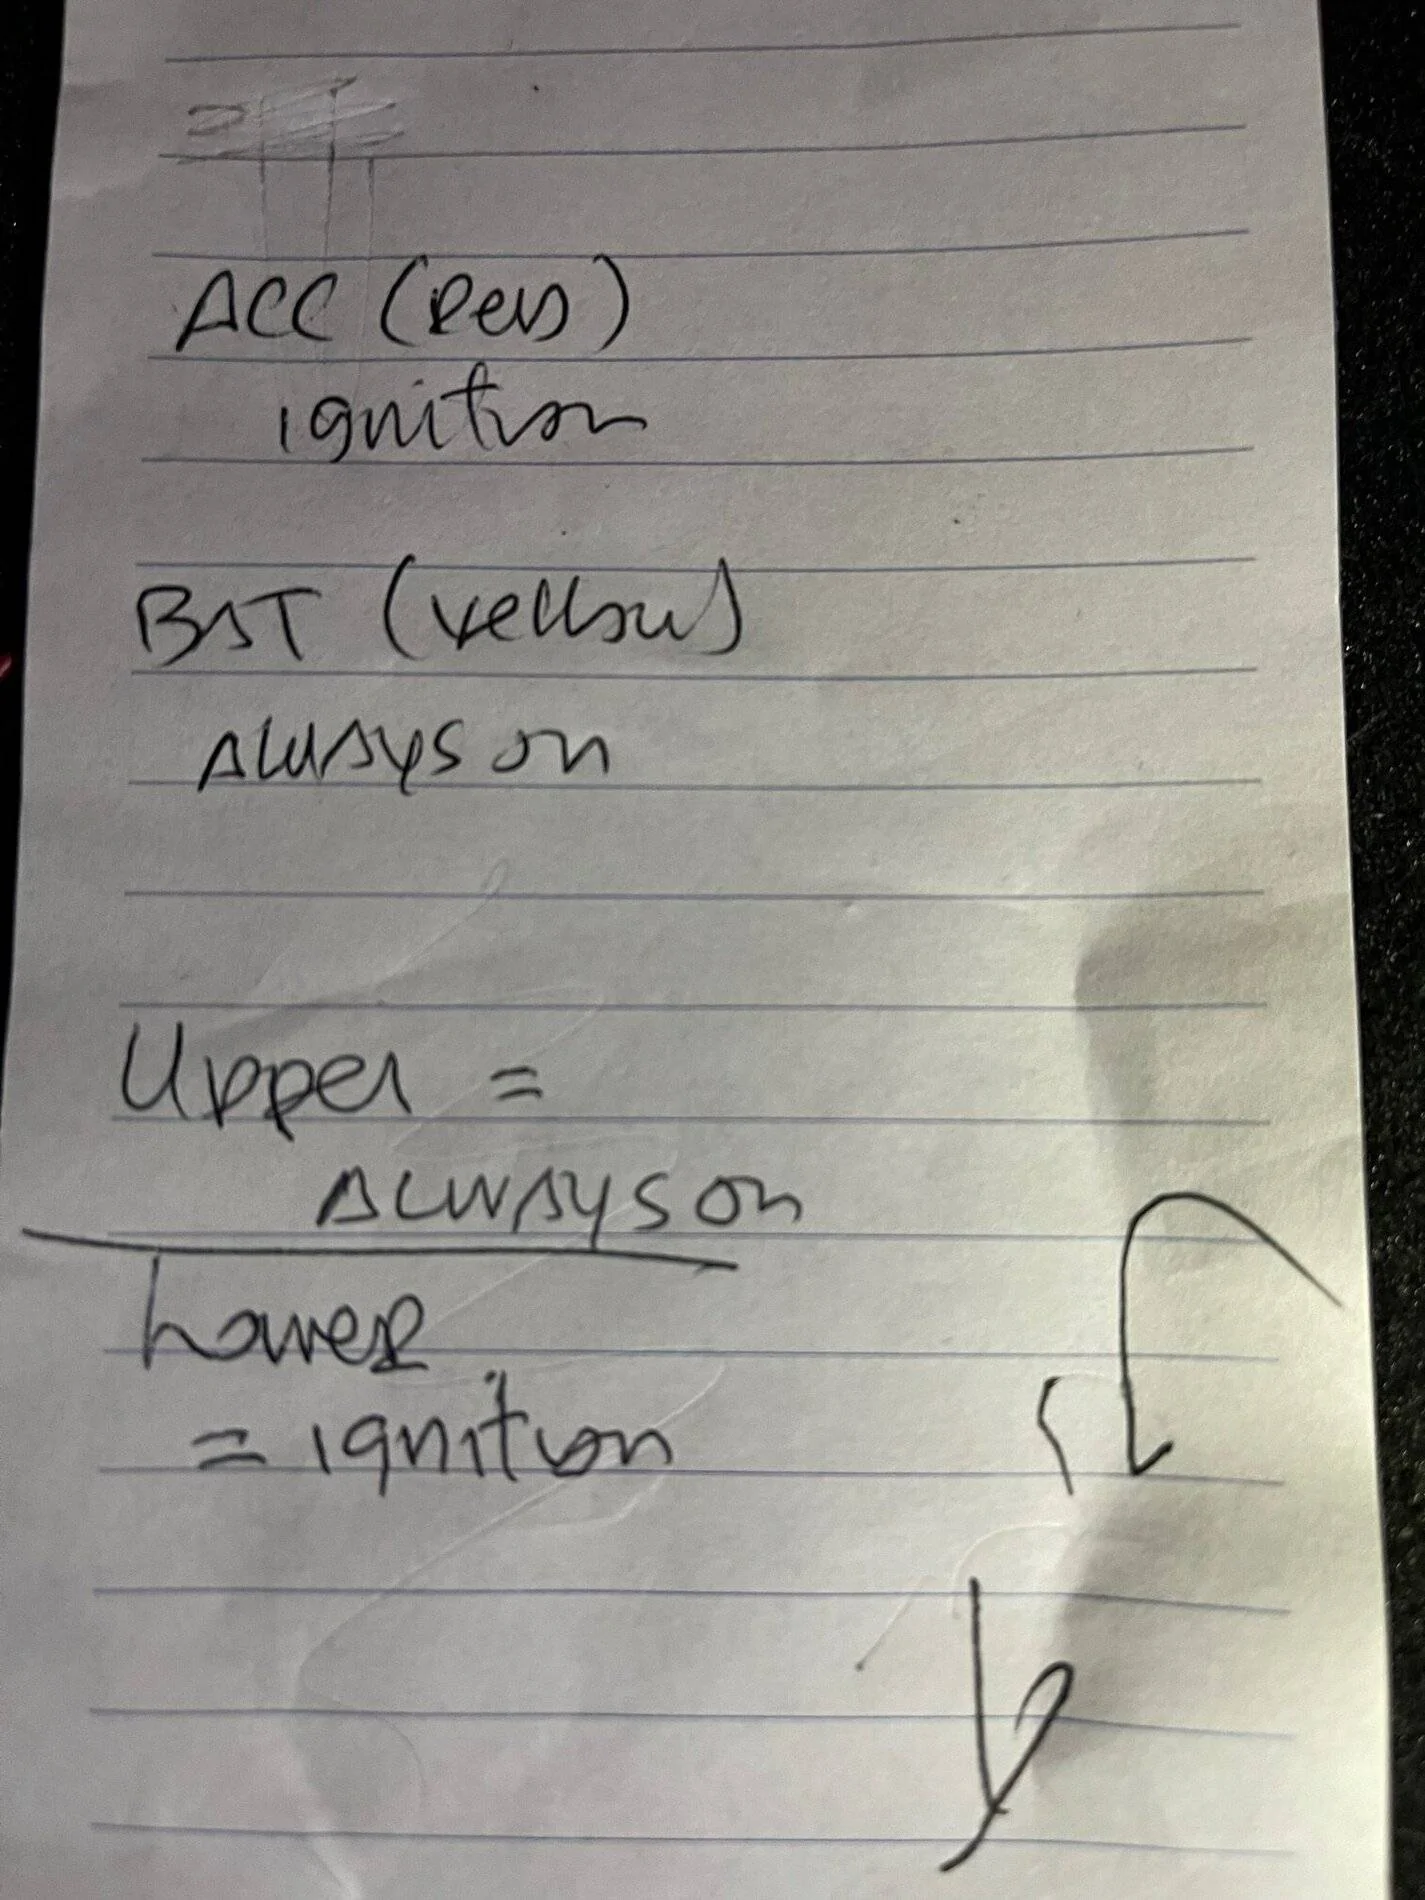
2. On the Blackvue hardwire, the RED wire (ACC) is connected to the ignition/switched power and the YELLOW (BAT) wire is connect to the power source when the car is off.
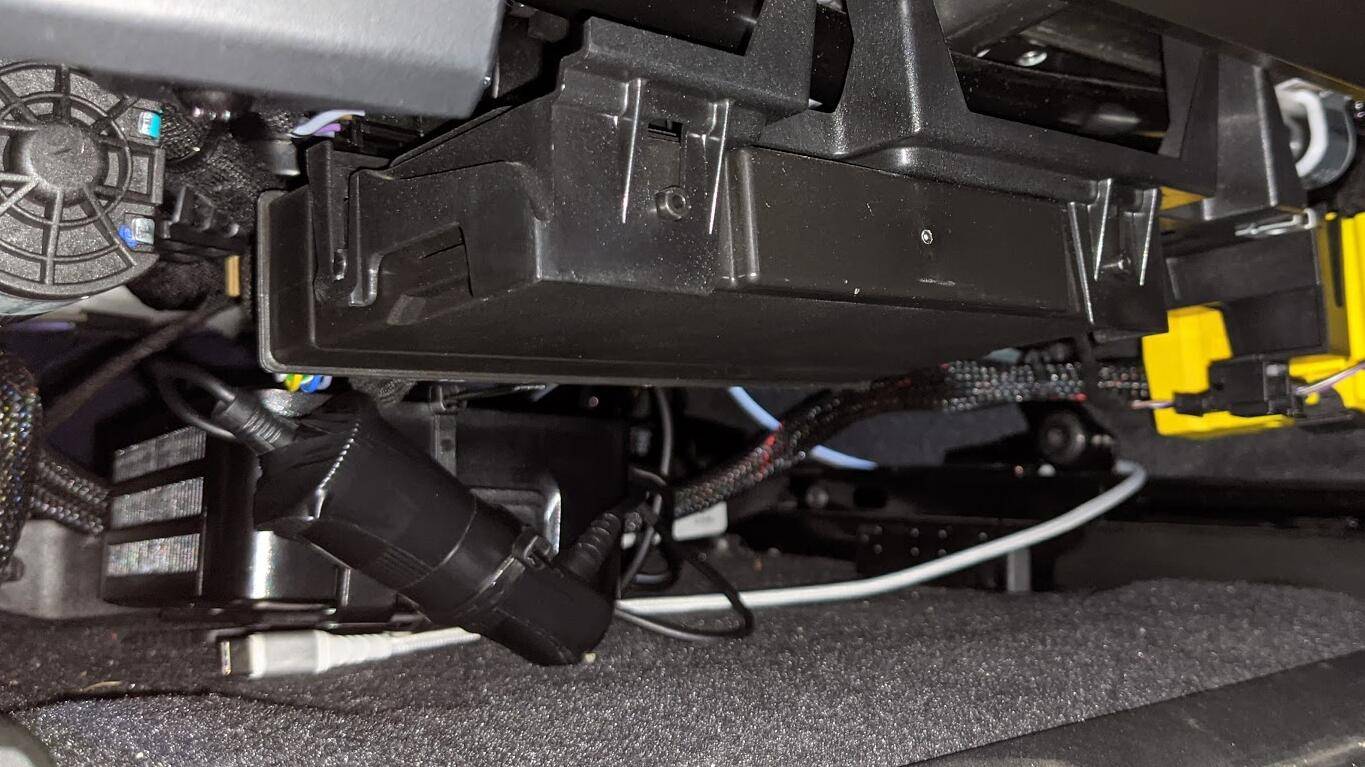
3. My note below shows which fuse in the PASSENGER footwell was the ACC and BAT.
4. The purple covers are easily removed. Use needle-nose pliers on the very end and squeeze lightly and tug. They pop right off. A hardwire thread for radar detectors had an issue with them. They cannot be put back on with the wire tap so I zip tied mine to the excess dashcam wire that I tucked up in the footwell to the left of the fuse box.
5. The fuse slot in the top row (Bat-use yellow wire) is empty and is the last slot on the right.
6. The fuse slot in the third row is the (ACC-use red wire) is on the third slot from the right on the third row and the empty slot the left of the 5am fuse.
7. O'Reilly Autoparts sells the fuse tap. You need the ATO (big fuse) not the mini.
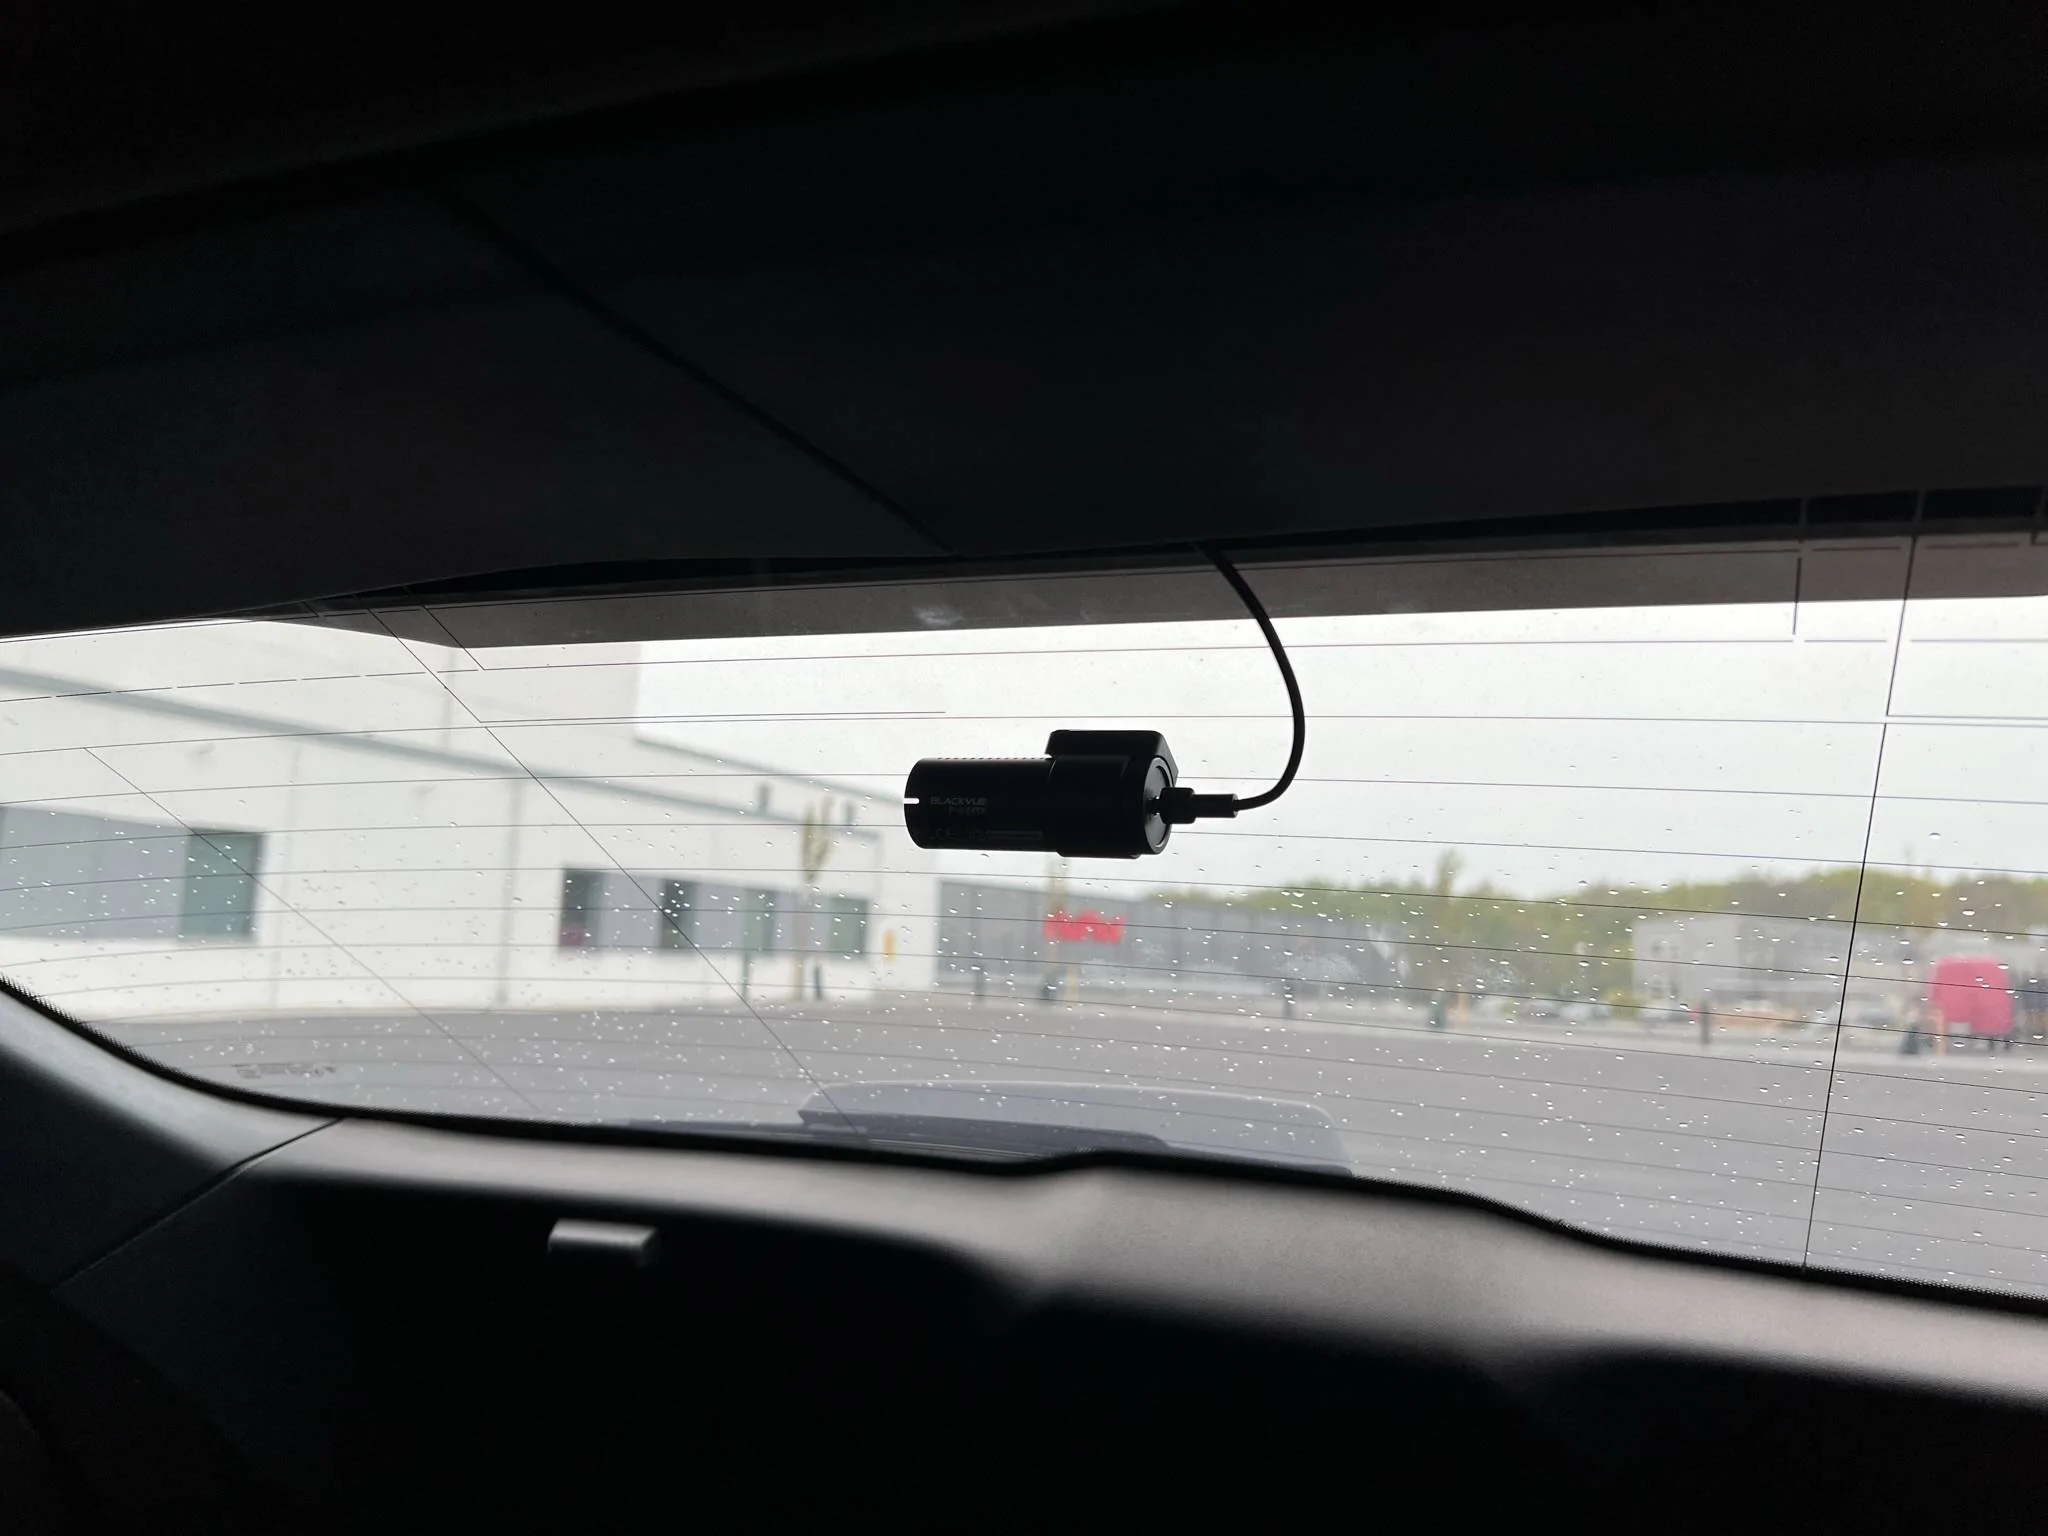
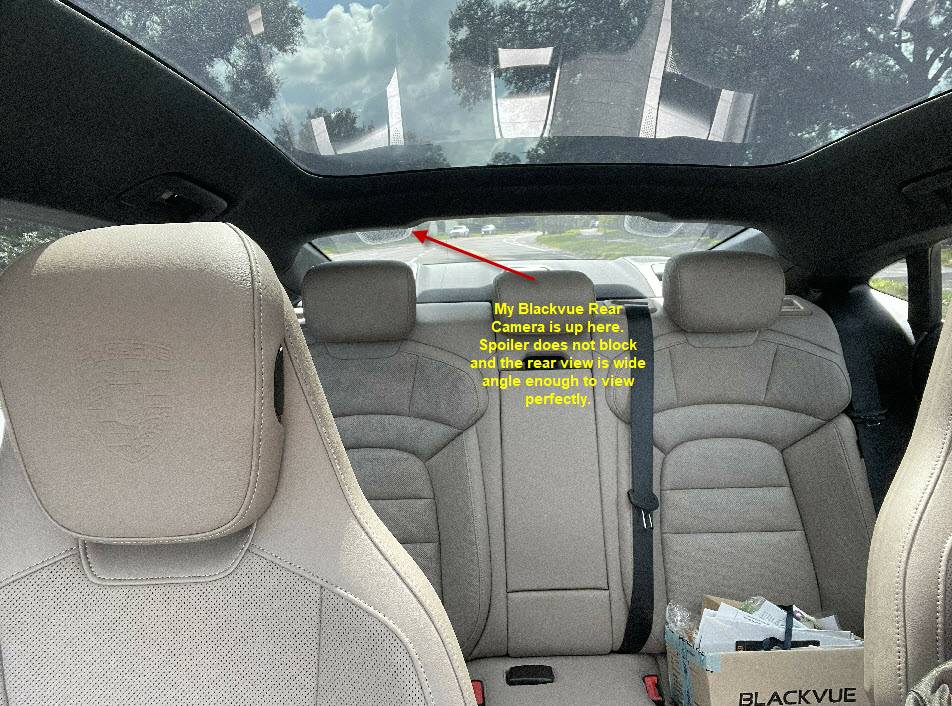
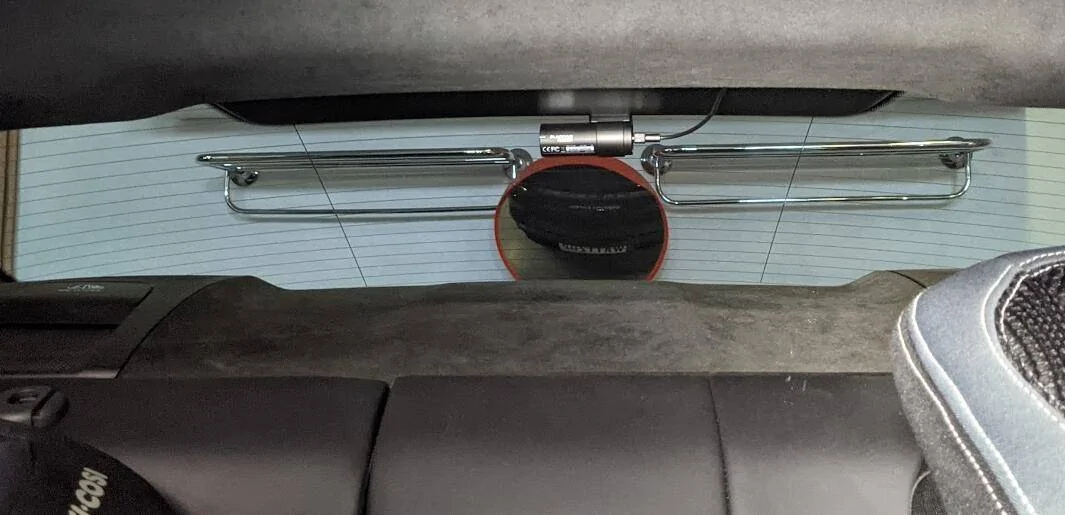
8. Personally, I did not want to see the camera in the middle of the rear window as it would have to be below the third brake light and not only would the camera be visible, so would a wire. I tucked it up on the passenger side and I absolutely cannot see it from the drivers seat in my mirror. The camera view is wide enough to cover the whole rear with no issue.
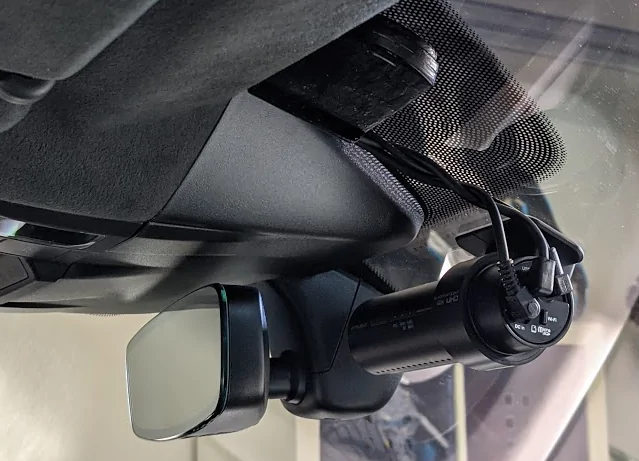
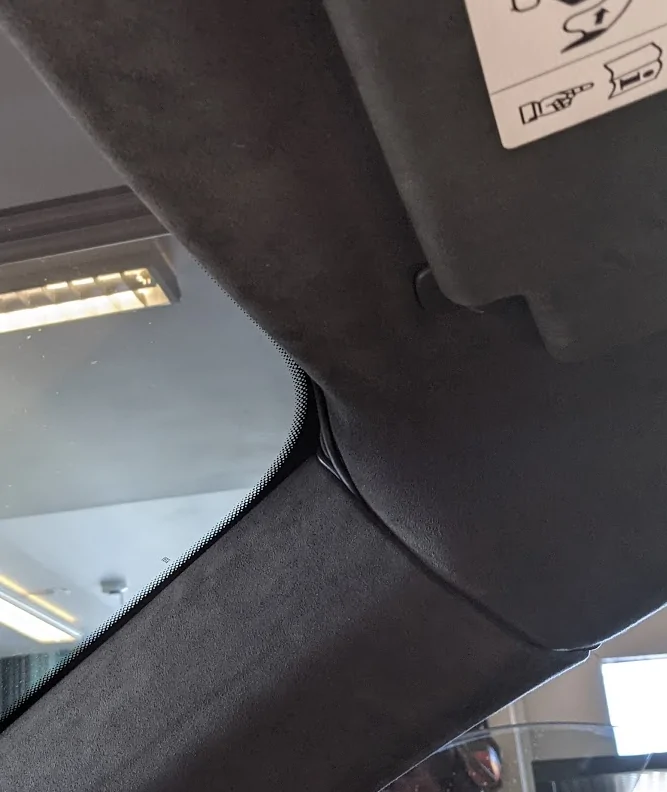
9. It was pretty easy to run the rear camera under the door sill all the way along the passenger side and then putting the rear seat down, up behind the side bolster and up the rear pillar and into the headliner.
10. On the passenger side, I removed the fuse cover (Blackvue tool was perfect for all panel removals), the side of the dash panel, and a trim panel that was to the right of the dash panel. Made it easier to fish wires from the fuse panel and up the A pillar.
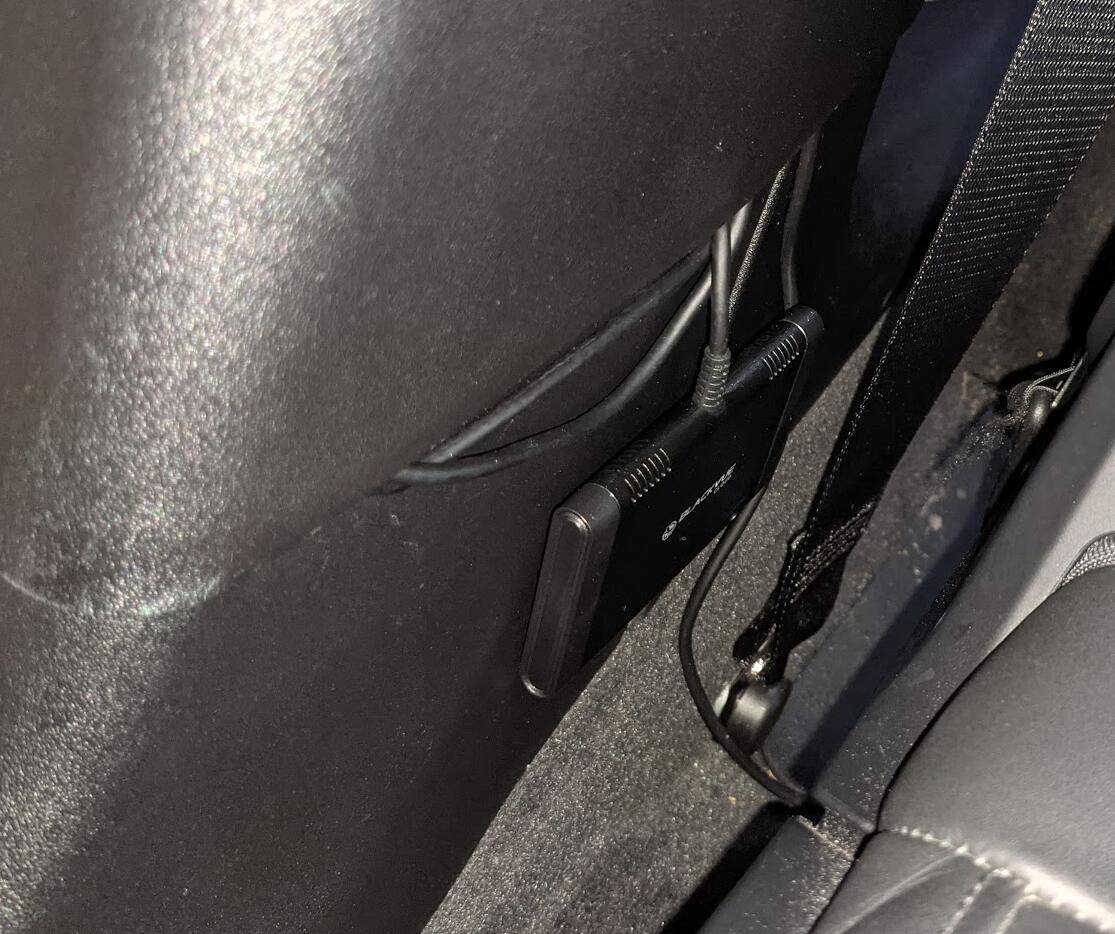
11. I started with the wires at the mirror and worked my way down so the excess wire ended at the fuse box.


1. Blackvue says you can use 10a-30a fuses. I used the 10a as others had done the same.
2. On the Blackvue hardwire, the RED wire (ACC) is connected to the ignition/switched power and the YELLOW (BAT) wire is connect to the power source when the car is off.
3. My note below shows which fuse in the PASSENGER footwell was the ACC and BAT.
4. The purple covers are easily removed. Use needle-nose pliers on the very end and squeeze lightly and tug. They pop right off. A hardwire thread for radar detectors had an issue with them. They cannot be put back on with the wire tap so I zip tied mine to the excess dashcam wire that I tucked up in the footwell to the left of the fuse box.
5. The fuse slot in the top row (Bat-use yellow wire) is empty and is the last slot on the right.
6. The fuse slot in the third row is the (ACC-use red wire) is on the third slot from the right on the third row and the empty slot the left of the 5am fuse.
7. O'Reilly Autoparts sells the fuse tap. You need the ATO (big fuse) not the mini.
8. Personally, I did not want to see the camera in the middle of the rear window as it would have to be below the third brake light and not only would the camera be visible, so would a wire. I tucked it up on the passenger side and I absolutely cannot see it from the drivers seat in my mirror. The camera view is wide enough to cover the whole rear with no issue.
9. It was pretty easy to run the rear camera under the door sill all the way along the passenger side and then putting the rear seat down, up behind the side bolster and up the rear pillar and into the headliner.
10. On the passenger side, I removed the fuse cover (Blackvue tool was perfect for all panel removals), the side of the dash panel, and a trim panel that was to the right of the dash panel. Made it easier to fish wires from the fuse panel and up the A pillar.
11. I started with the wires at the mirror and worked my way down so the excess wire ended at the fuse box.
Sponsored